Any x86_64 machine
This guide is for any desktop from the Intel Core 2 Era or beyond, AMD processors from the FX series and beyond will also work.
What you need
- A desktop PC
- A monitor, keyboard, and mouse. To connect to the desktop
- A different computer running Windows, Mac, or Linux
- A screwdriver (sometimes)
- Two flash drives at least 2gb in size OR one flash drive and a wired internet connection for the desktop
- About $30 to buy appropriate Ethernet expander cards
How to
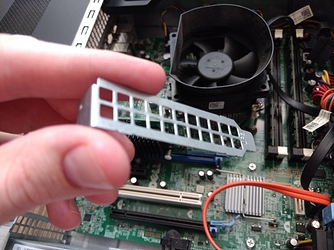
- First inspect the desktop to determine what sort of expander cards you should use. Unplug the desktop from any power sources and open the case.
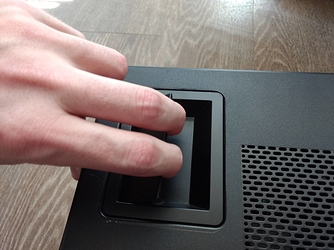
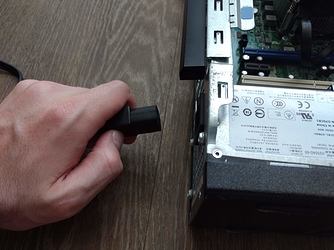
Some cases have quick releases as shown here, others have screws on the back. In general look for some sort of lever or screws on the back left side of the computer with the front facing you.
- Now that the machine is open, inspect the interior ports. In this case we have a PCIe x16 slot in blue, a PCIe x4 slot below in black, a PCI slot in white and finally another PCIe x16 in black on the bottom.
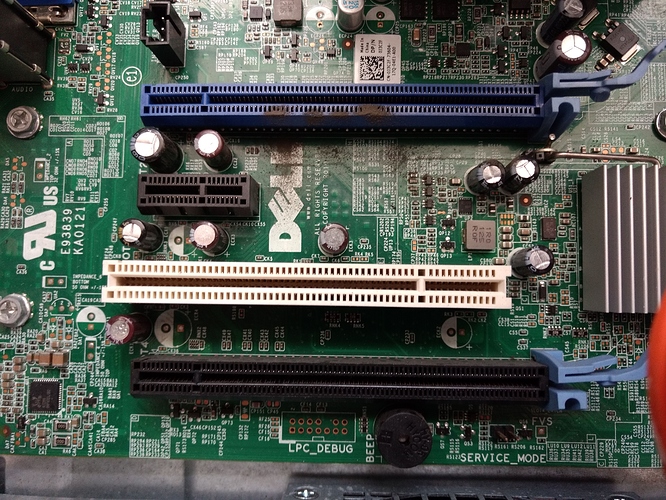
- Now that you’ve identified what ports you have you need to decide on cards. PCI has less throughput than the PCIe so avoid it if possible. Otherwise select cards based on your budget, port needs, and the number of slots in your desktop. PCIe cards can be inserted in either the x16 slots or the x4 slots so do not concern yourself with that.
Four port PCIe $60 Two ports PCIe $35 Two ports PCI $20
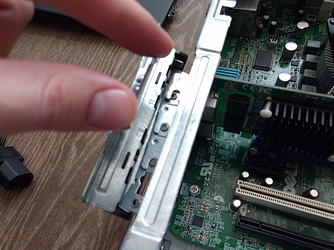
- Once you have the cards it’s time to install them, line the card up with the appropriate slot, you may have to remove a card slot blank from the back of the case using a screwdriver or a screwless latch system. Note the orientation of the card is upside down, this is the normal mounting direction for expansion cards.
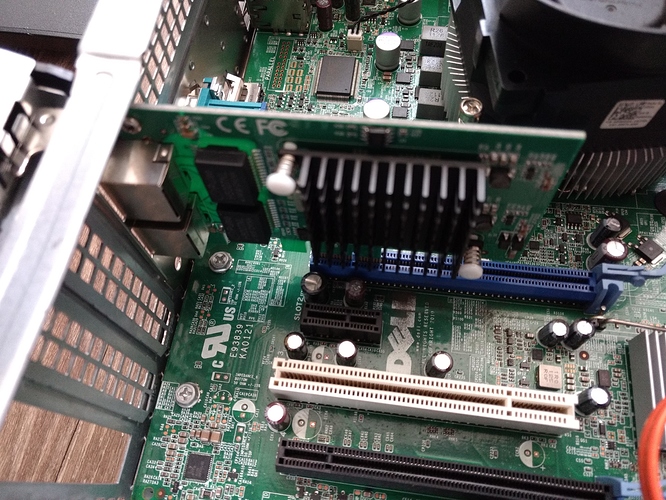
- Push gently but firmly until the card slots fully into place, then screw or latch it in. You may have to remove one of these blanks to make room.
- Finally it’s time to startup the machine and install Althea. First we have to prepare the Ubuntu flash drive.
Once you have unetbootin running select Ubuntu from the dropdown on the top, select your drive and hit start.
-
Next we boot the live USB on the desktop. Plug in the monitor, keyboard, and flash drive. Ensure the monitor is on and then power on the machine.
-
In the first few seconds after powering on you will see a manufacturer screen, in one of the corners it will note a button that needs to be pressed to “enter setup” or “configure boot order.”
-
If you do not manage to press this button fast enough, there is no need to worry. Simply cut power to the machine and try again. Do not concern yourself with anything you may know about power failures being bad for computers. That’s an operating system issue and we are installing a new operating system, therefore any potential damage done to the old one is not a concern.
-
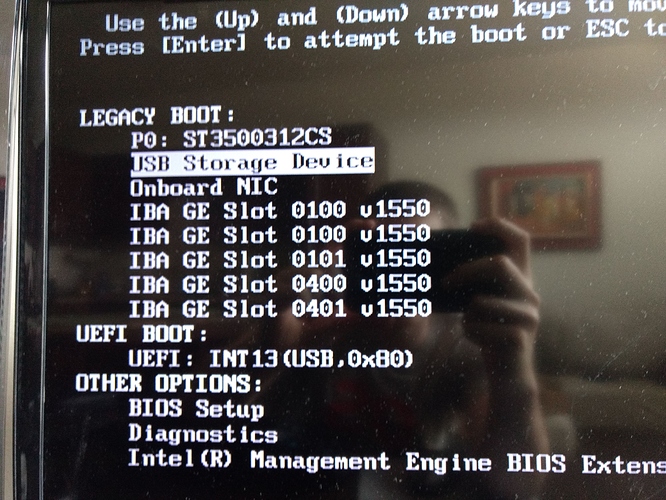
Now you have made your way into the bios. This section of the guide is of limited assistance since configuration differs drastically between different types of machines, generally you want to find a boot from USB option and select it or find a boot order list and promote USB devices to the top. This is what it looks like on my machine.
-
You may have to try to press the BIOS button several times, don’t be afraid to just rapidly press it while the machine comes on.
-
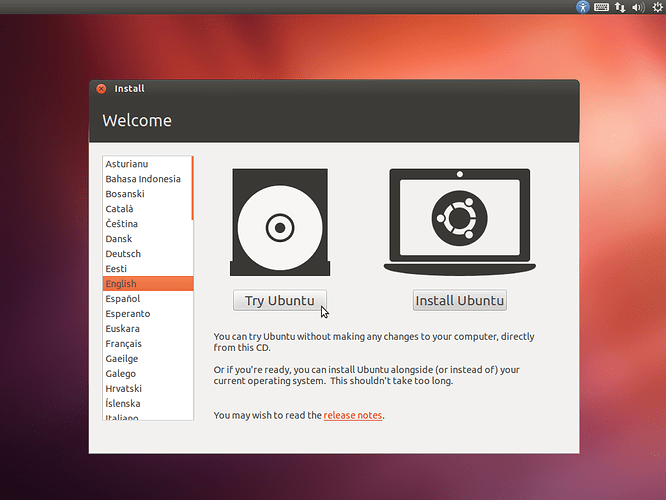
Once you have selected “boot from flash drive,” wait until you see this screen. Then select “try Ubuntu.”
-
You now have Ubuntu booted on your machine. There are two options from this point. You can plug an Ethernet cable into the desktop, open Firefox and download the image from this page 20 using the desktop itself. Alternatively, you can do the same thing on a different machine and copy it onto a separate flash drive.
-
Now that you have the Althea x86_64 image you need to extract it. Right clicking on the x86_64 image file and selecting “extract” will extract the image into the current folder.
-
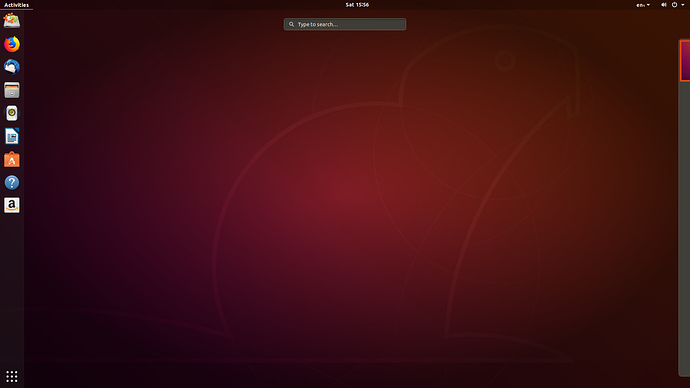
Now you have a .img file instead of a .img.gz file. We’re going to use the Disks tool to write this image to the internal hard disk so that the machine boots into it every time. Click the “activities” button in the top left corner of the screen, search for “disks” then press enter.
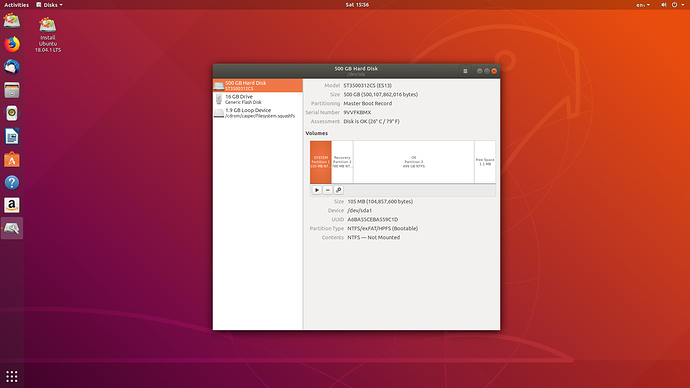
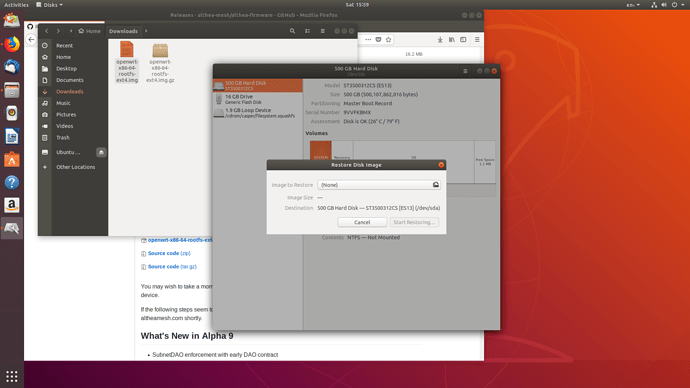
- Select the entry labeled “hard disk” whatever size the internal disk may be. Then click the button with three horizontal lines in the top right and select “restore disk image.” Click the “image to restore” button and select the file openwrt-x86-64-rootfs-ext4.img
-
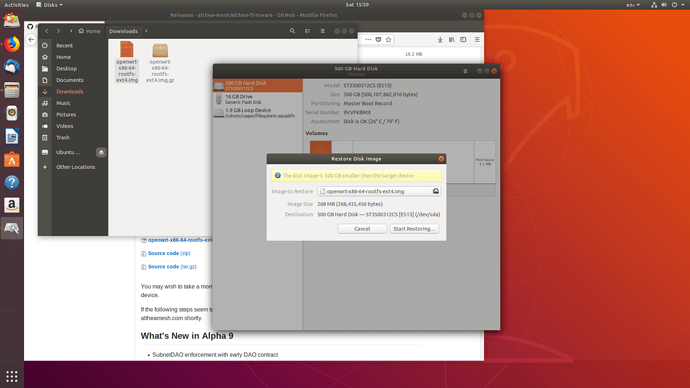
Finally select “start restoring.” Select yes when it asks if you are sure.
-
Congratulations, you’re done! Reboot the machine and you should see the Althea router terminal come up. You don’t need to use this terminal though.
-
The first two ports of the first expansion card will be “WAN” and “LAN” respectively, all other ports will be mesh device ports you can connect this computer to. If you plug your device into the “LAN” port you can navigate to 192.168.10.1/althea which is the Althea router dashboard. From there you can setup your Althea router and make links into the network