Getting Started with your Gateway Router
This guide provides an overview for getting your gateway router online, starting after the firmware has been installed. If you have purchased a router from Althea directly, the firmware comes preinstalled. If you have purchased your own gateway router, please consult the flashing guide to first install the required firmware.
Accessing the Althea Router Dashboard
To set up your new router to function as a gateway in your network, you will first need to connect to the device and pull up the Althea Router Dashboard. You may use a wired or a wireless connection.
Wireless Connection
To wirelessly connect to the device’s WiFi, find the default WiFi name, AltheaHome-2.4 or AltheaHome-5, in your list of available WiFi networks. The default password to connect to this WiFi is “ChangeMe”.
Wired Connection
For a wired connection, you will need to plug one end of an ethernet cable into the LAN port of your router and the other into your computer. By default Althea locates the LAN port as the port physically furthest from the marked WAN port on the device. ThisWAN port is usually a different color or uses a globe symbol. If there is no marked WAN port, then the LAN port is the highest numbered port and the WAN port is the lowest.
Access Althea Router Dashboard
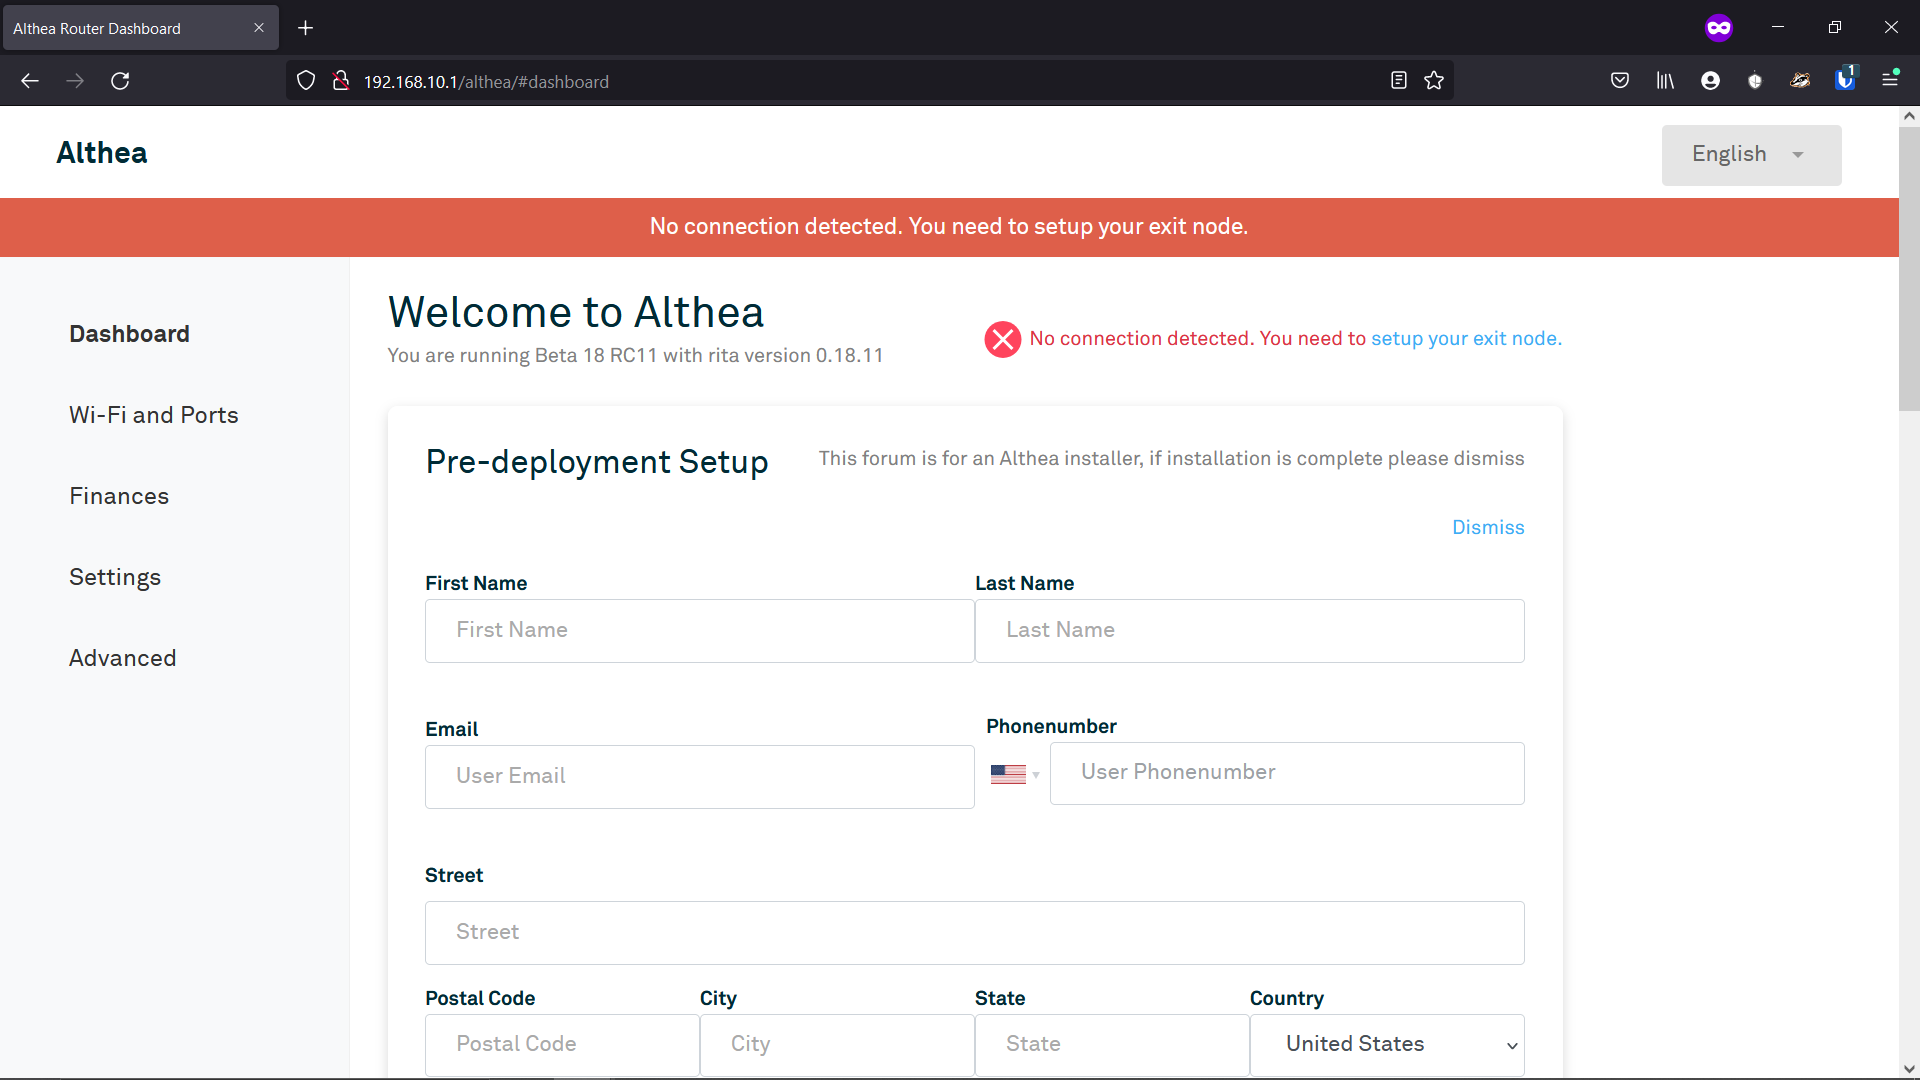
Once your device is connected to the router, navigate to http://192.168.10.1 from a web browser (the http:// part is optional, you can also just enter the IP address). We strongly recommend using a private browser or incognito window to prevent any browser caching issues while setting up your router. Below is what you will see when you first pull up this page.
Update Default Settings
Since your gateway router will not likely be the only one on your network, it is important to properly name the device so you may easily distinguish it from other routers.
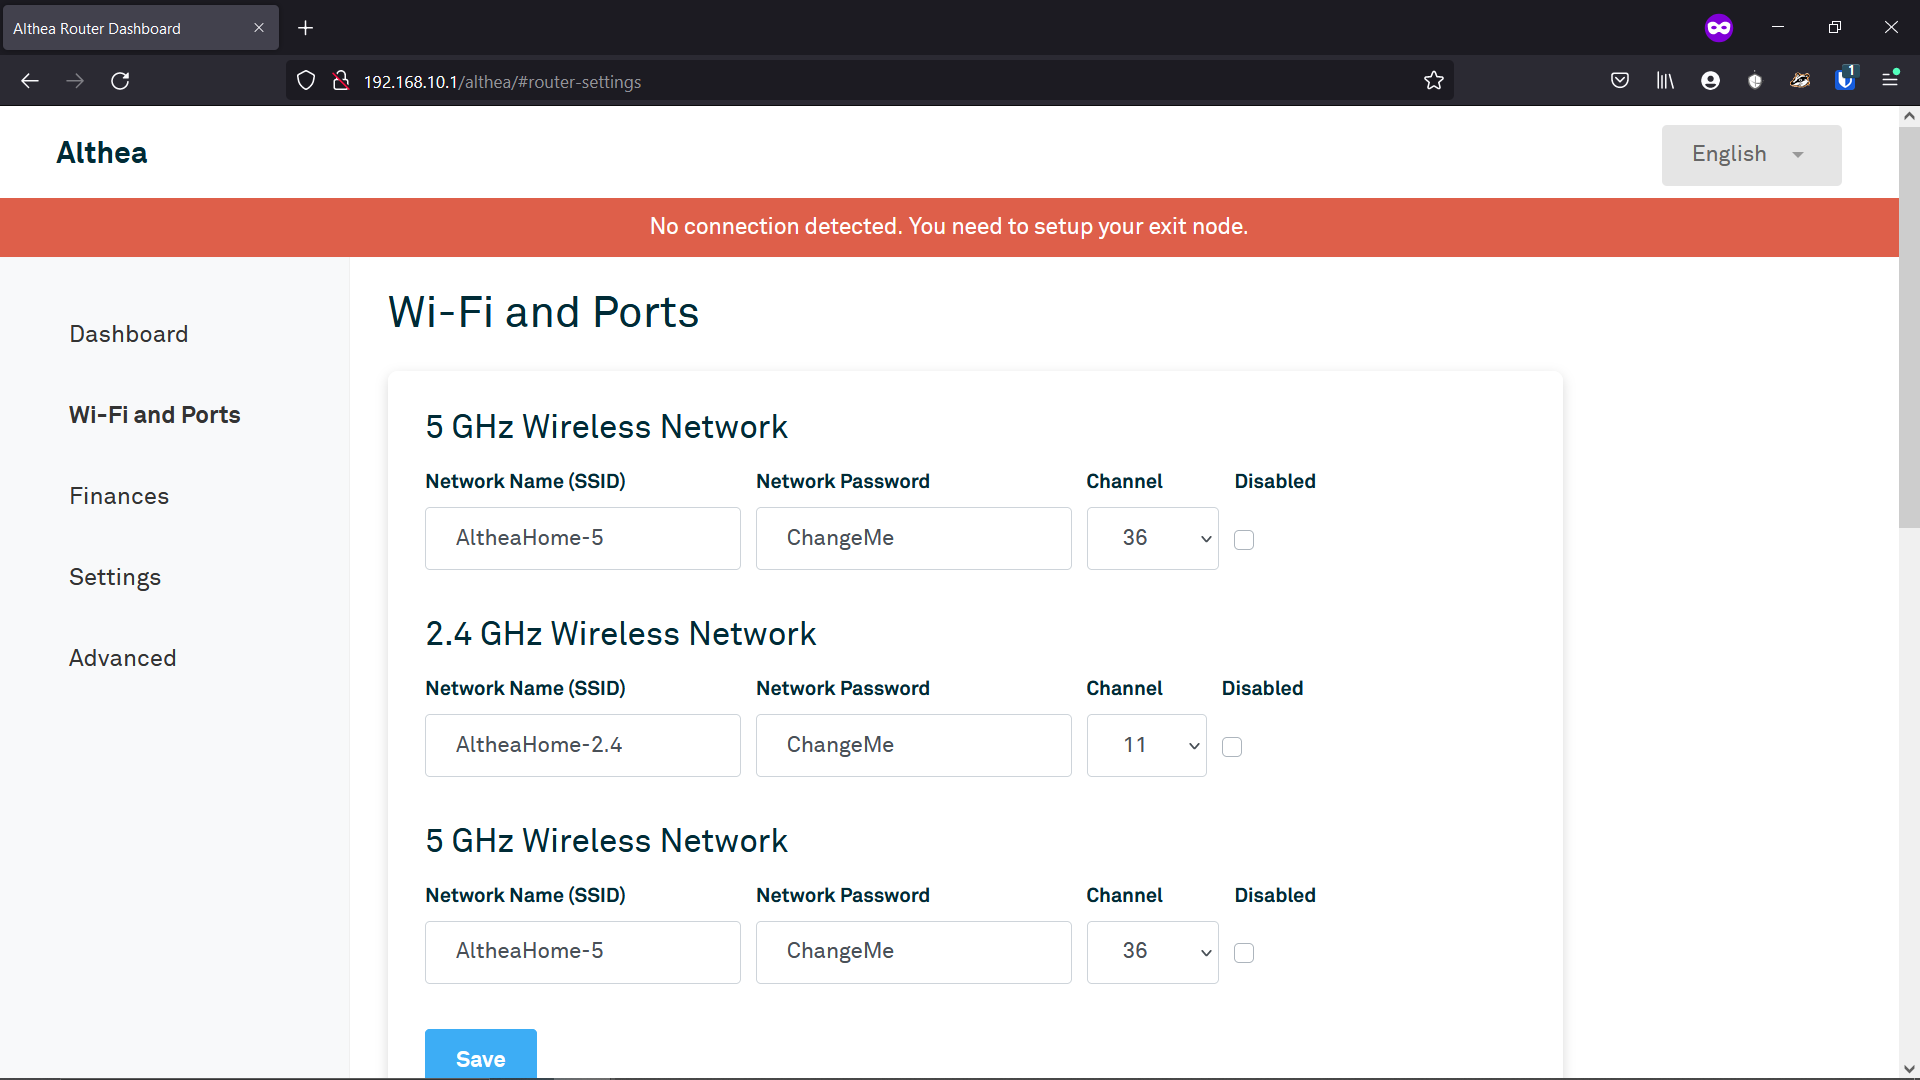
Update Wi-Fi Name and Password
- Navigate to the Wi-Fi and Ports page of the Althea Router Dashboard.
- Under Wi-Fi, change the Wi-Fi Network Name / SSID. We suggest using AltheaGateway or AltheaGateway1 in lieu of AltheaHome for the SSID, so you may easily identify it as a gateway router.
- Next, update your password (8 characters minimum). Any password may be used, but be sure to make a note of it as the router may need to be reset if this information is lost. It is recommended that you use the same password for each of the Wi-Fi networks for a single router, unless you have a particular reason to do otherwise (creating a guest network, for example).
Note: changing these details will cause the router to reboot. You will need the new SSID and password to log back onto the Wi-Fi if you are using a wireless connection.
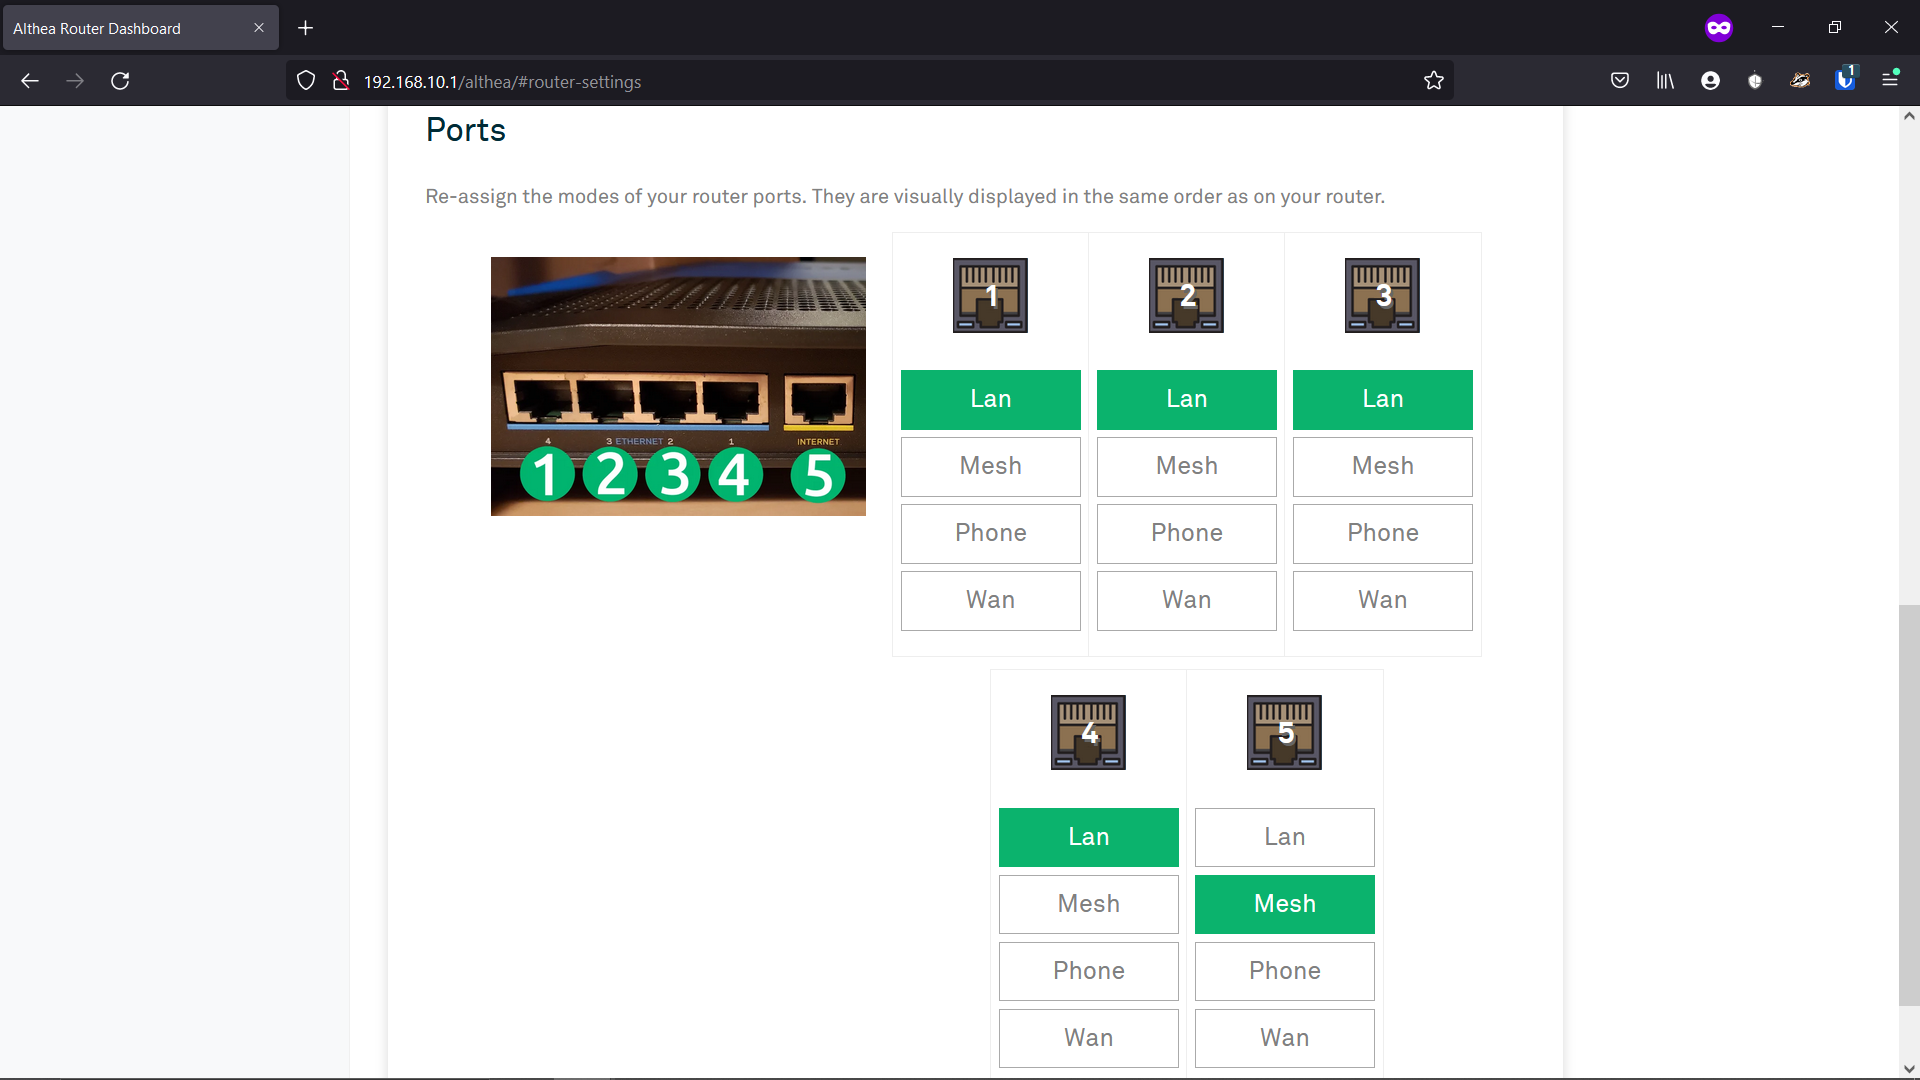
Update Port Modes
- Next you will need to update your router ports so that it functions as a gateway router. By default, ports are set for an endpoint router. You will need to change port 5 from Mesh to Wan. As a brief description, Mesh ports are what Althea routers use to talk to each other. Wan (wide area network) ports are what Althea routers use to talk to a non-Althea network. Any Althea router that has an active Wan port is considered to be a Gateway router, even if it plays a minor role in your network. Wan connections are optimized for a backhaul with stable latency, such as fiber. A backhaul with unstable latency, such as a DSL, radio, or satellite connection will introduce instability into the downstream Althea network as well. Using either fiber, ethernet, or coax copper for backhaul is recommended whenever possible.
 Choose either DHCP or Static. If you aren’t sure which to pick, choose DHCP.
 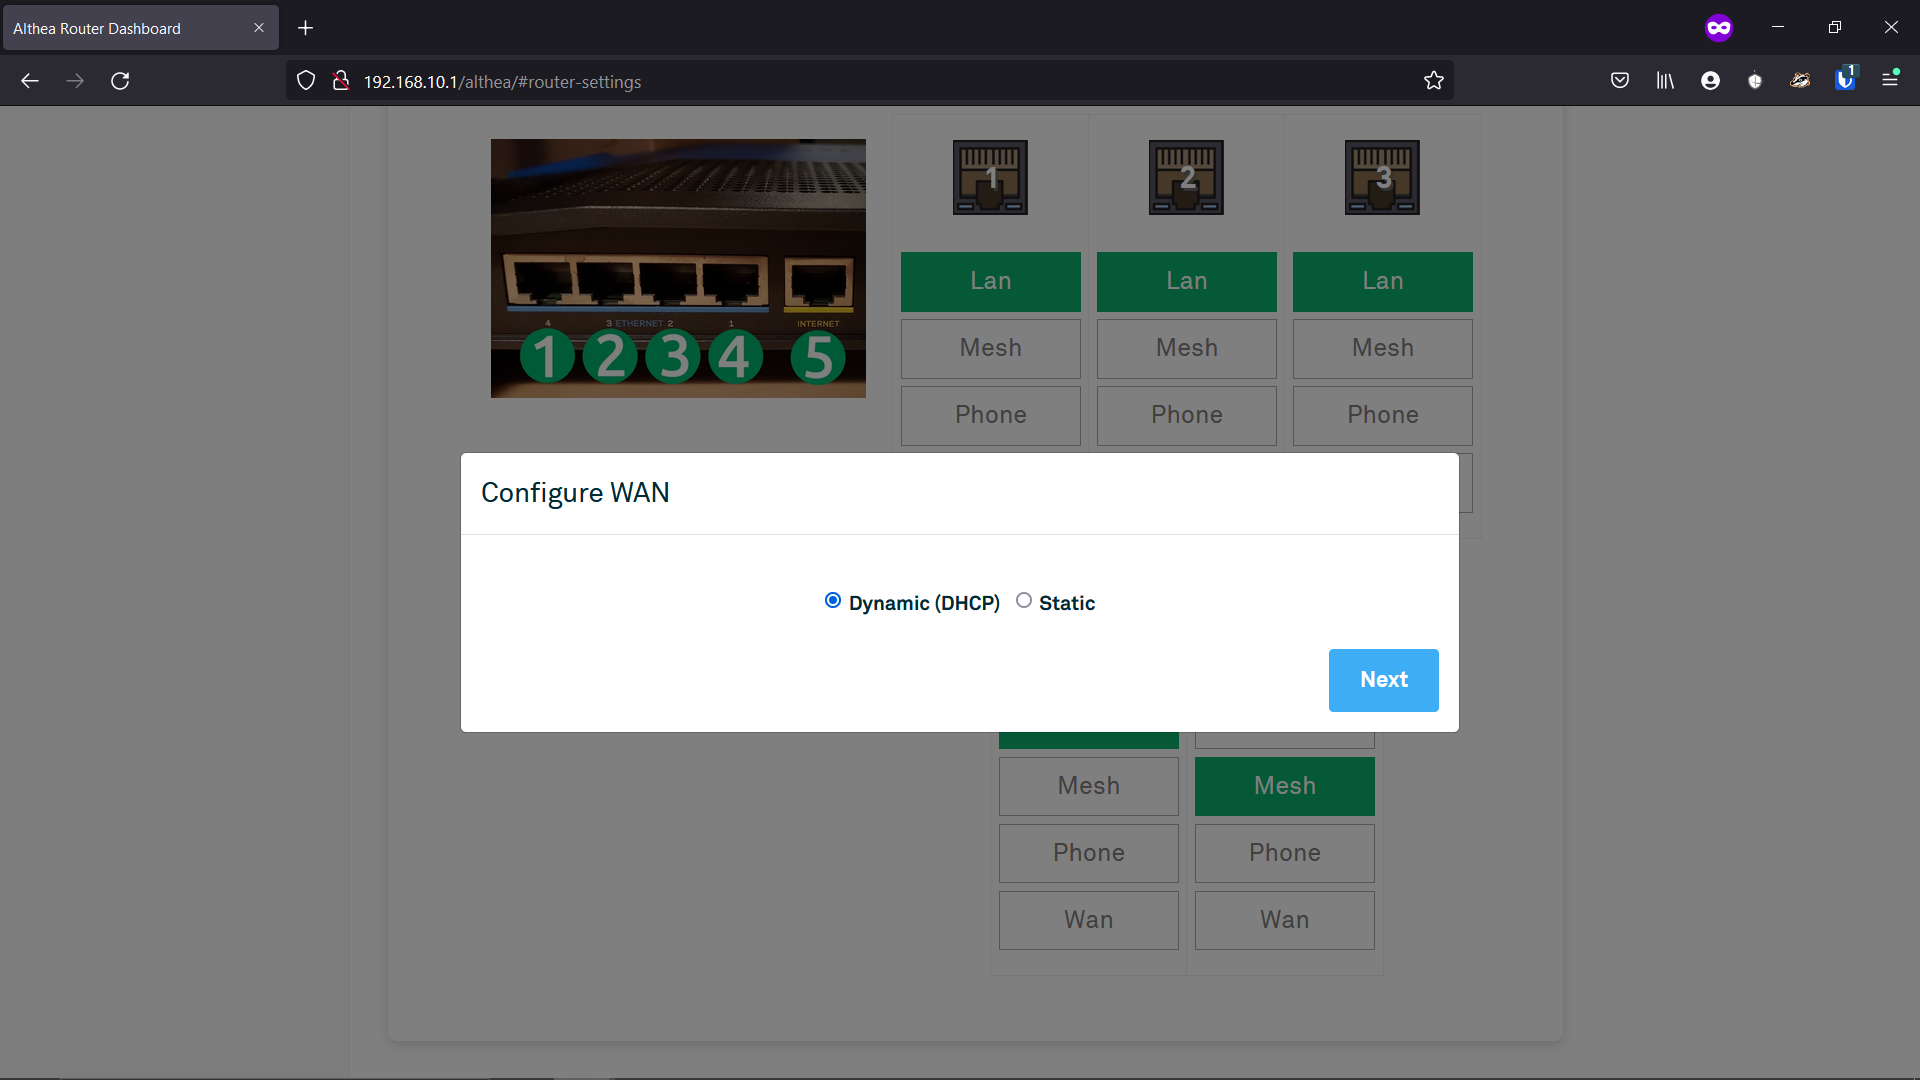 If you need to specify a static IP, you can do so here. If you aren’t sure what to enter here, choose DHCP instead. Static IP settings are variable depending on the upstream non-Althea router, but some standard values for many common routers would be: static IP 192.168.0.XXX (xxx being any number between 2 and 254), netmask 255.255.255.0, gateway 192.168.0.1
 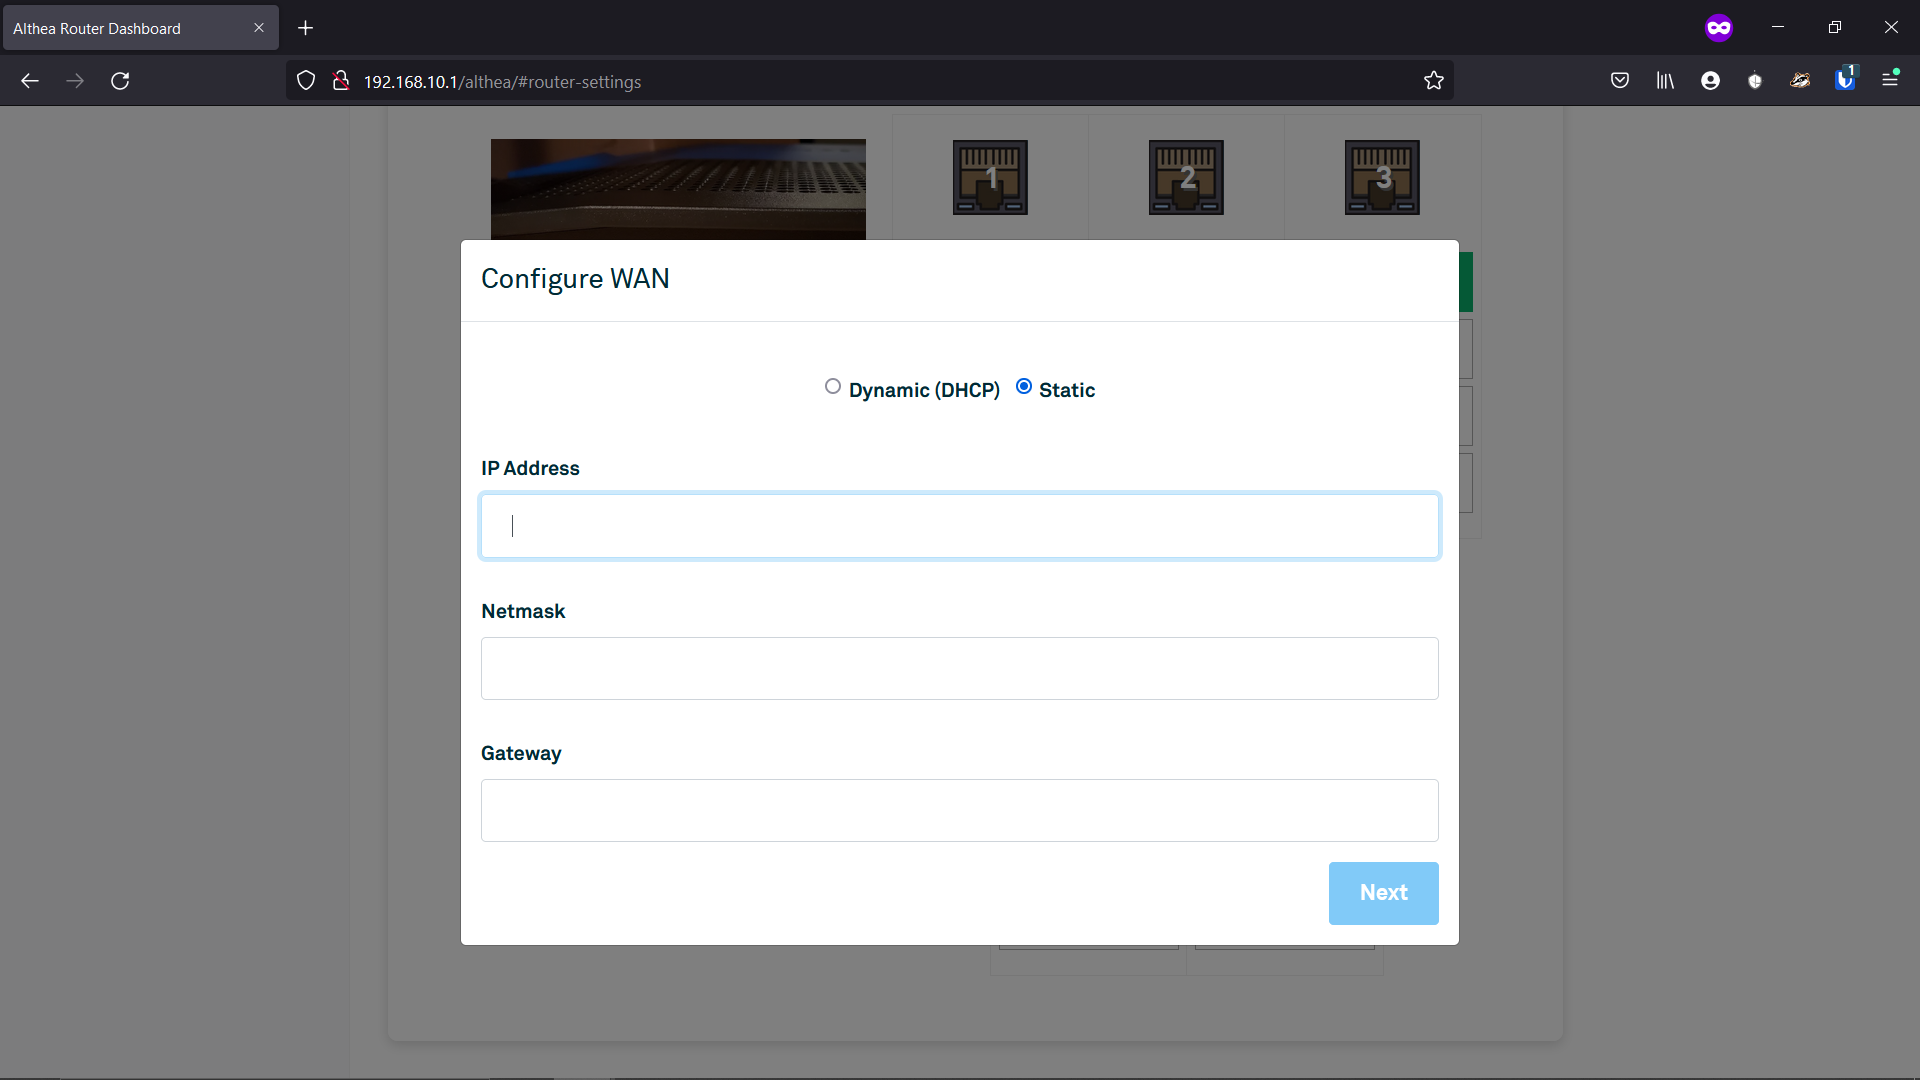 After saving the Wan settings, the router will reboot.
 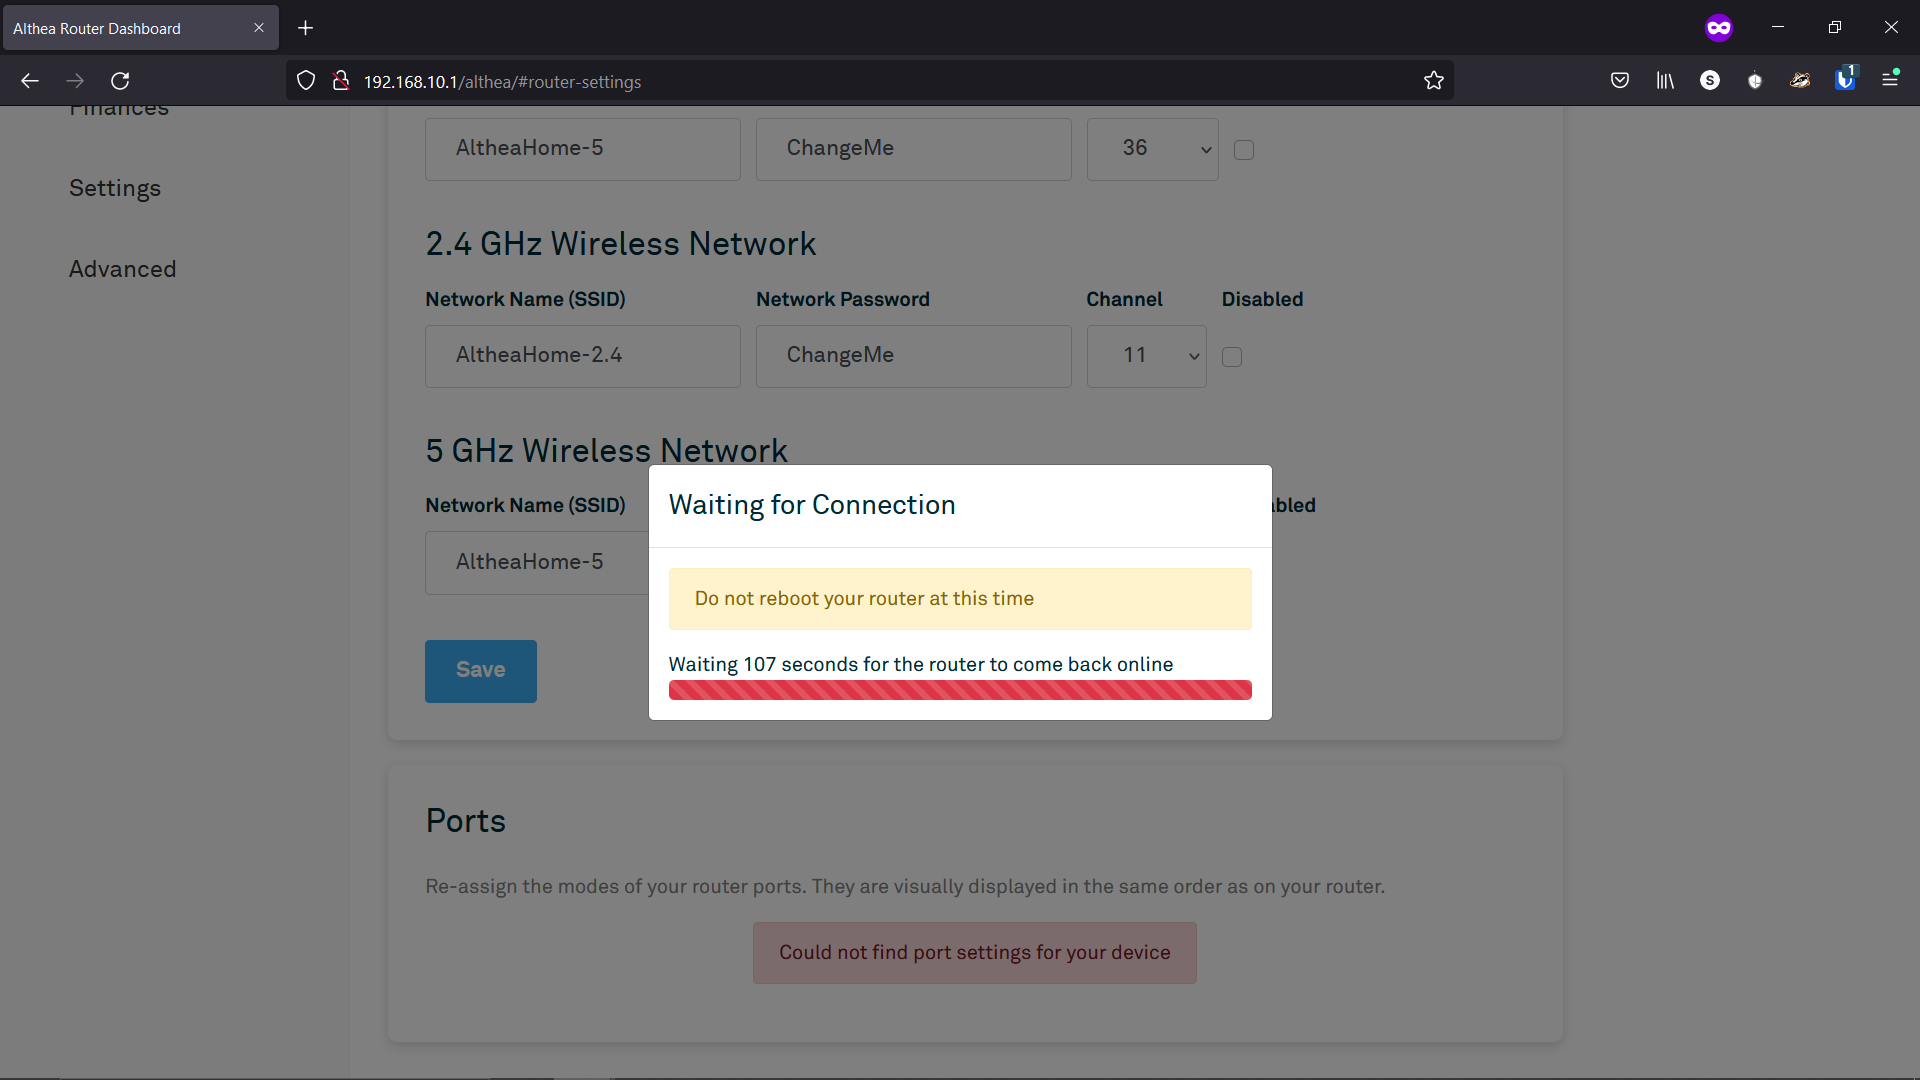 Note that if you are using a wireless connection to the router, your device may connect to a different wireless network during this reboot cycle, in which case you will need to manually reconnect to the Althea WiFi connection once the reboot cycle is complete. This reboot cycle typically takes 2 - 3 minutes.
 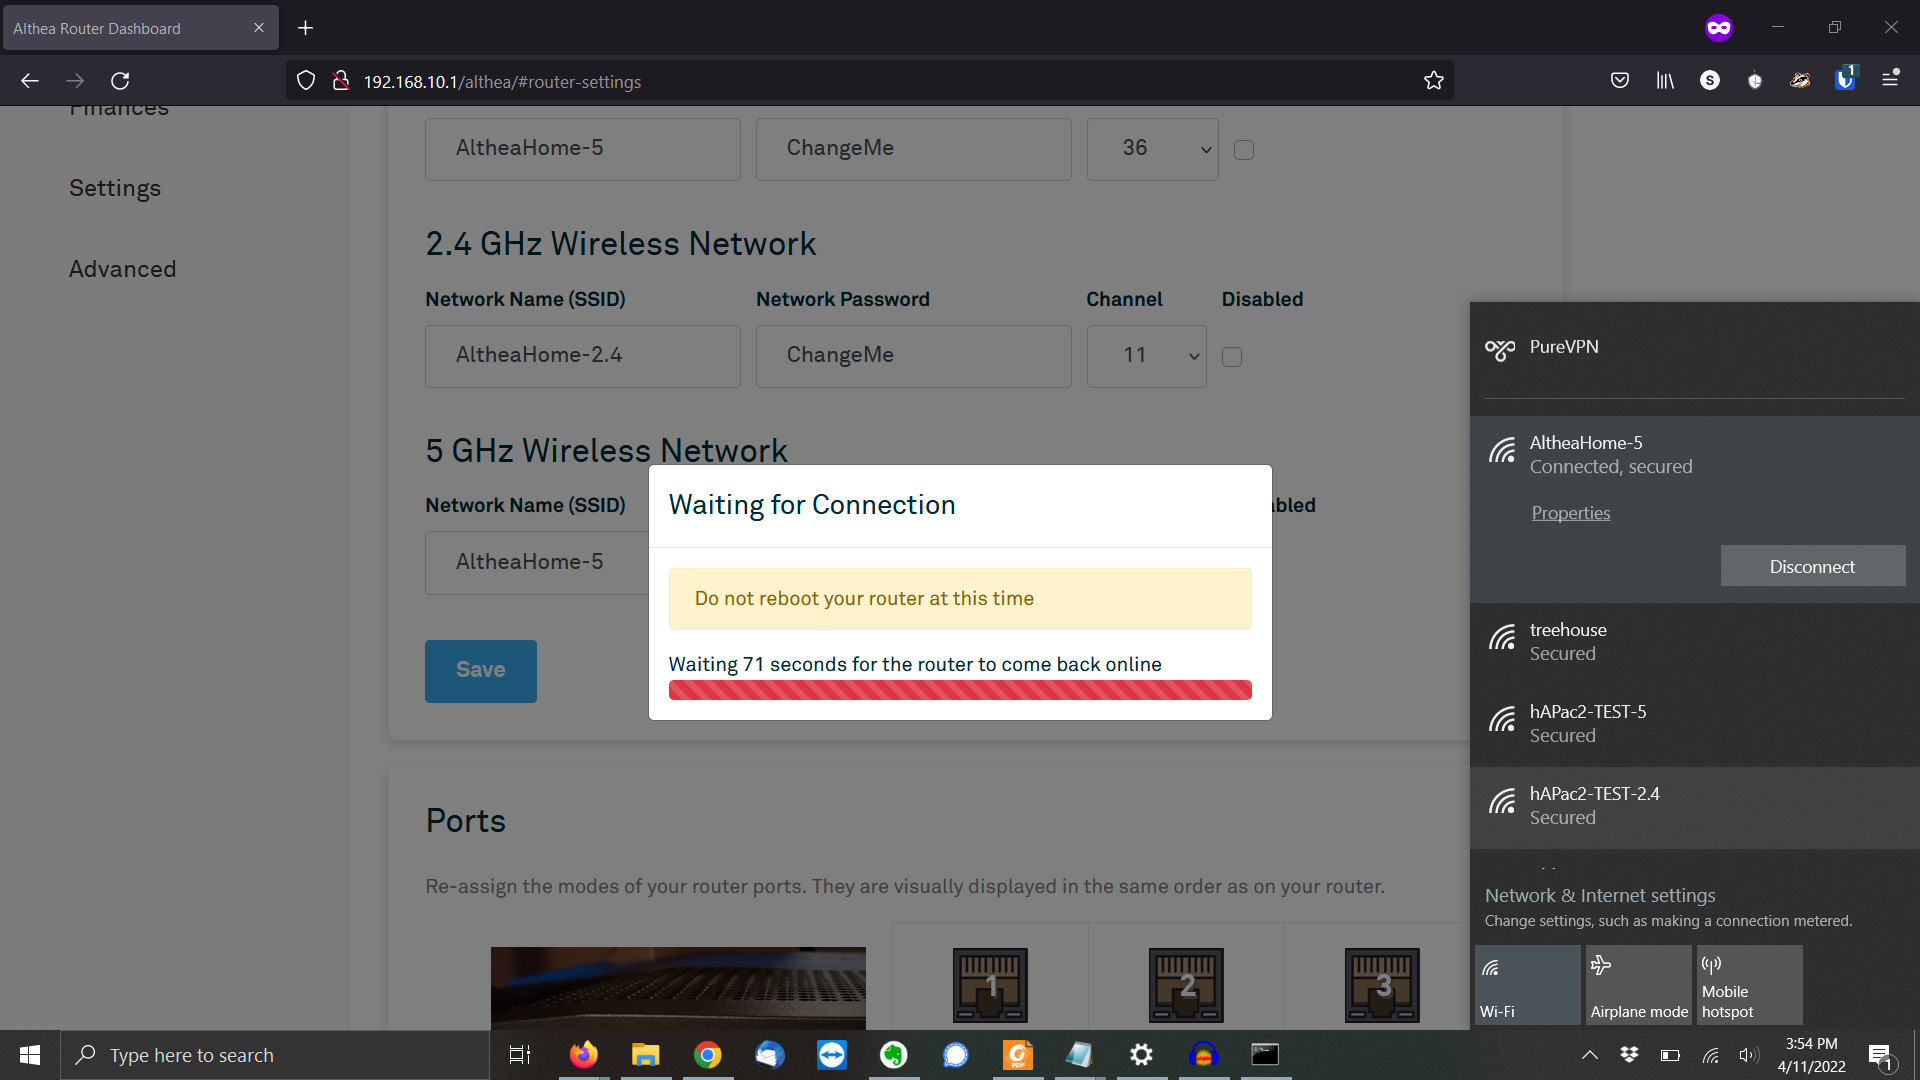 When the reboot is complete, Port 5 should show a Wan connection, as shown here:
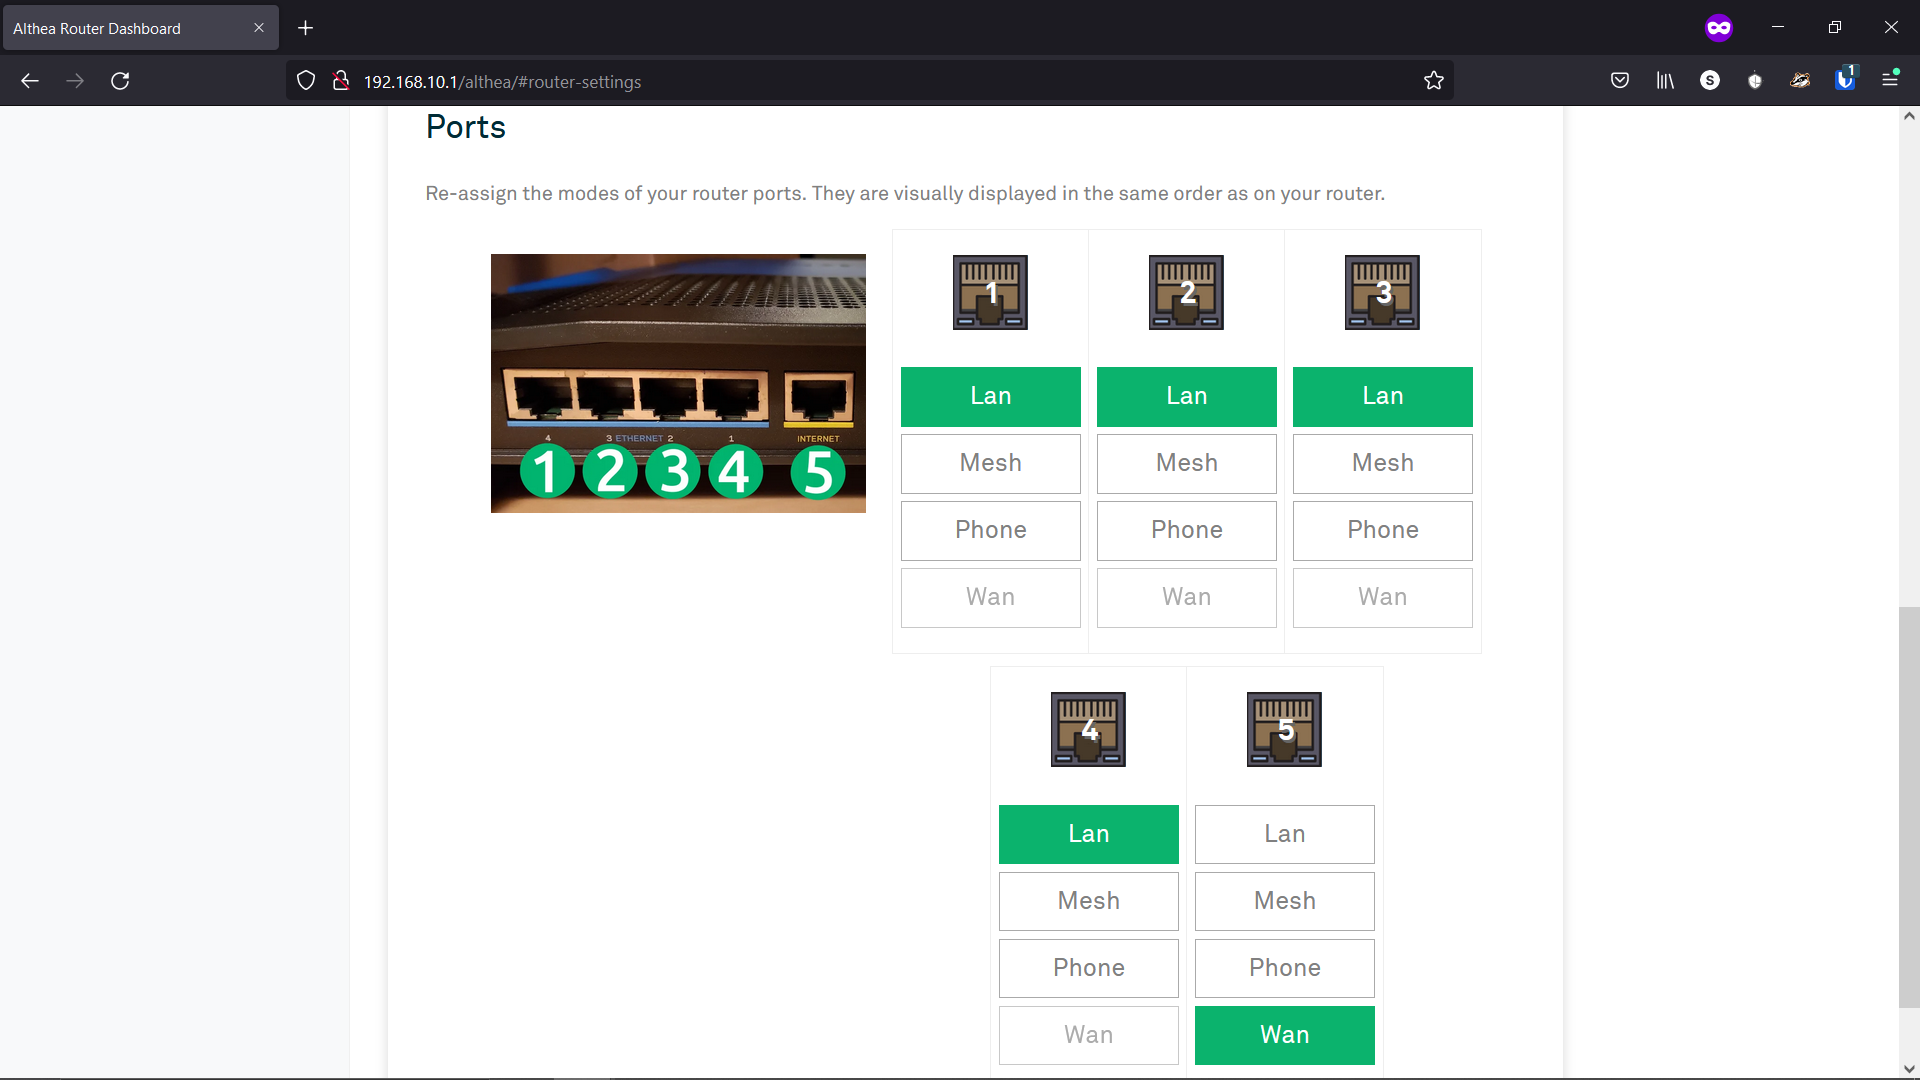
Update Router Nickname
- Next navigate to the Settings Page and update the router nickname. Again, we recommend using “Gateway” in the nickname so it may be easily distinguished from other routers in your network.

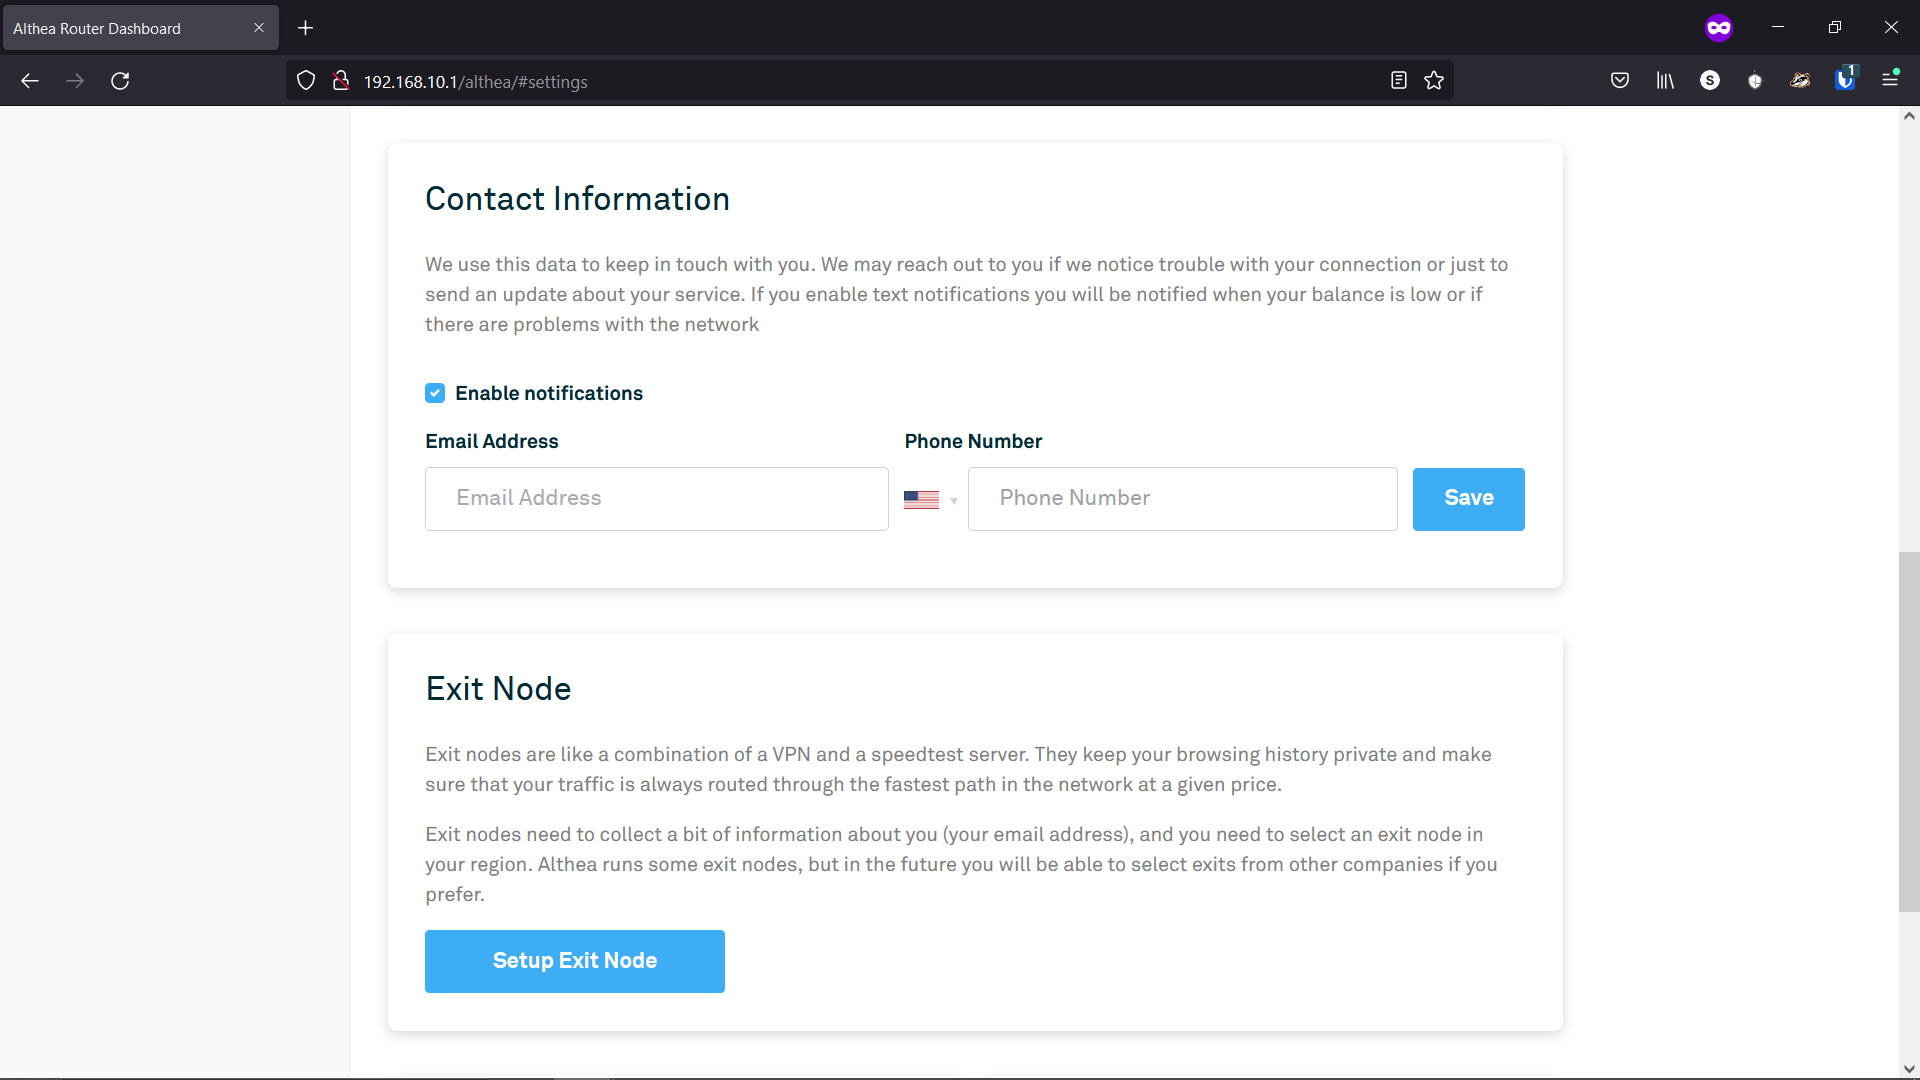
Connect to an Exit Node
- By now you have probably noticed a warning banner on your Althea Router Dashboard stating, “No connection detected. You need to set up your exit node.” To do this, navigate to the Settings page. Scroll down until you find the “Exit Node” section of this page.
- Click “Setup Exit Node”. The below pop-up will appear.
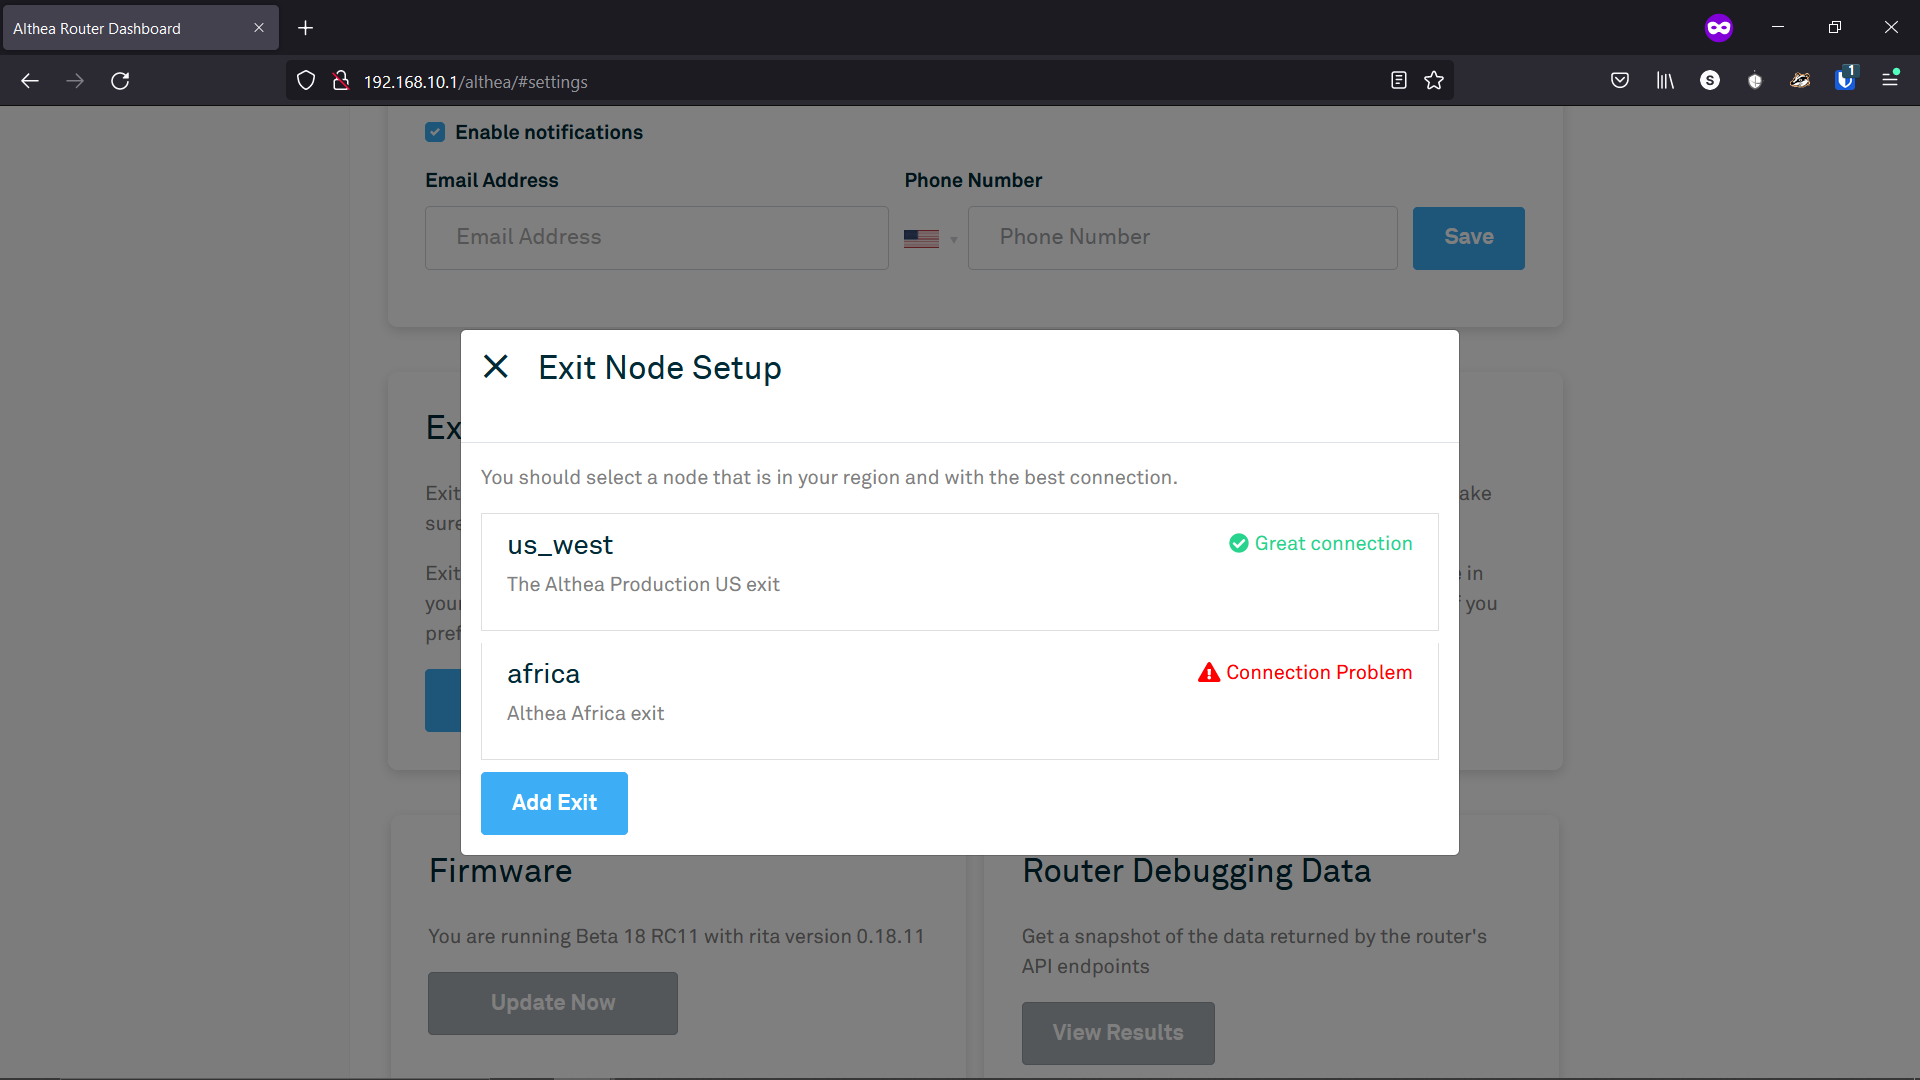
- In an Althea network, the exit node is a service that helps protect your privacy and safely deliver traffic to the outside world. In traditional networking terms, the exit node would be frequently called the “headend router.” The exit node is where the Althea network connects to the greater internet, and it is the physical server where traffic originating from an Althea router is decrypted and peered. An exit can be located locally (often co-located with a gateway router), or at a remote location such as a datacenter or internet exchange. Multiple distributed exits can also be deployed as “exit clusters,” providing more resiliency, load balancing, and low latency routing options. It’s important that you choose an exit that you trust. For users in the United States we suggest “US West” an exit operated by the Althea development team. Click on the exit you wish to connect to.
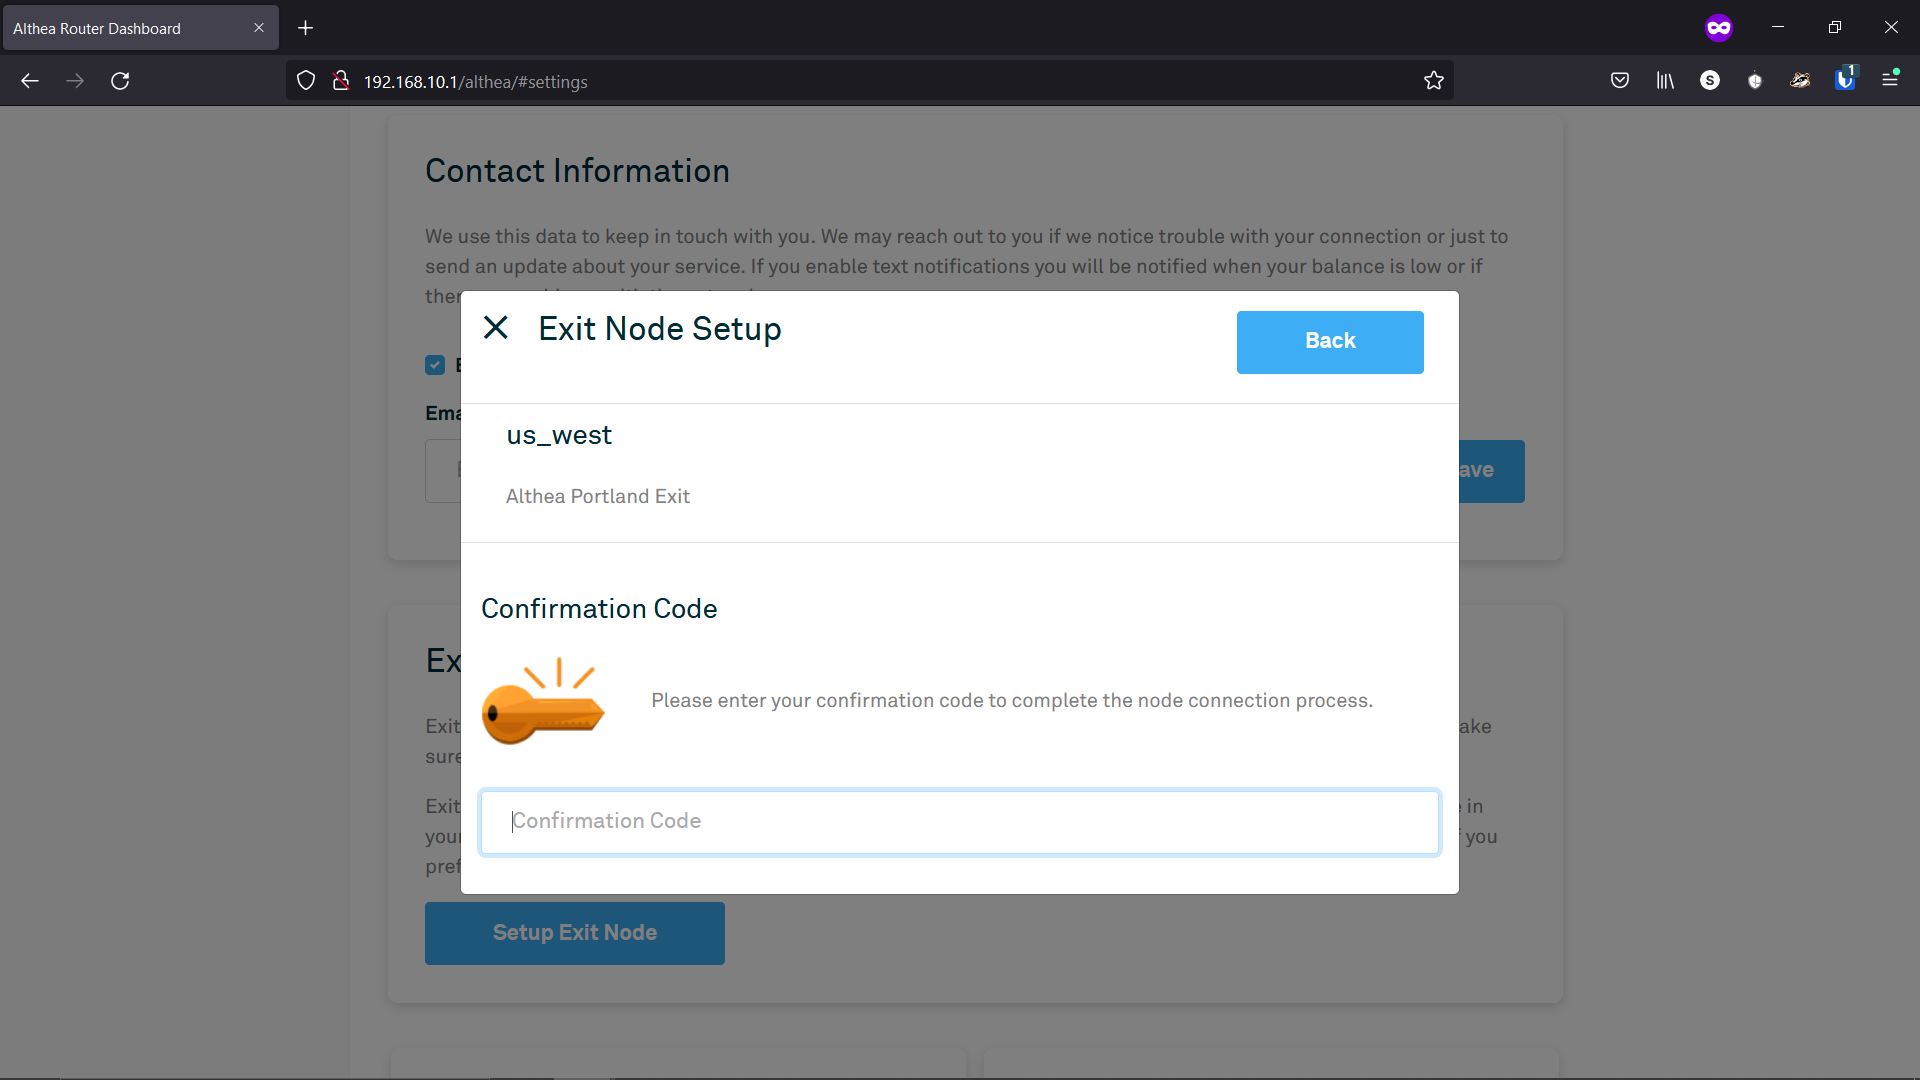
- You will now be asked for a phone number (which can receive SMS text messages). This is used as an anti spam measure and to ensure that we can keep access to specific services like Netflix. It will only be used to notify you of exit information and will not be shared. If you are opposed to this you can use an exit node that does not require a phone number. It may take a minute for the SMS text message to arrive.

- Next you will receive a 6 digit code via SMS text message. Enter it and press submit.
- Congratulations you have selected an Exit server! Althea’s encryption layer will help protect your personal information from local infrastructure providers. It may take a few seconds for the new exit connection to turn green. Once the connection to the exit server is successful, the Gateway router should provide you with internet access. Try loading some webpages and running a speedtest to verify internet connectivity.
- Depending on the rest of your network design, you may need to change the port mode on other ports on your Gateway router. For example, if you intend for the Gateway router to connect to an outgoing AP radio, then you will need to plug that radio into a Mesh port. If you have a small number of outgoing connections, you can simply use one Mesh port per outgoing connection. If there aren’t enough ports, you can use a downstream switch as a port expander (managed or unmanaged switch, either will work). For this arrangement, you can plug a single Mesh port on the Gateway router into a port on the switch, then the rest of the switch ports can go to your outgoing connections. Likewise, if you need more LAN connections than there are ports available, then you can use a switch for downstream LAN devices as well.
Note that some router models have an internal switch, and plugging a LAN connection into a downstream switch can create a switching loop. Specifically this is a known constraint with the WRT-3200ACM and WRT-32X routers. If you plug an Althea router LAN connection into a switch and the Althea router quickly locks up or becomes unresponsive, this is likely what is happening. Unplug the switch, reboot the router, and service should return to normal. If you need to use one of these routers with a switch, you may need to use a managed switch with a particular configuration that prevents this switching loop scenario. Often it is simpler to just upgrade the router to a model that doesn’t have this issue. Higher end routers such as the Protectlis have a separate path for each Ethernet port, so the switching loop issue will never occur.