Router Bench Test Configuration
The purpose of this guide is to set up an example network consisting of a Gateway router, a Relay router and an Endpoint router.
If any of your routers are of a similar make and model, you should label the physical devices prior to starting these instructions to preclude any later confusion.
Setting up the Gateway Router
If your Gateway router has already been connected to the internet and working, you may skip to step 5 of these directions.
- Unpack router and assemble according to its instructions.
- Connect the router to a power source. Indicator lights on the front panel should begin to light up and ultimately settle with a solid light for the power indicator. If no indicator lights appear, double check the device is turned on (power switch in the back flipped towards the line).
- Connect the router to your internet source by plugging one end of the ethernet cable into a LAN port on your existing home/office router and the other end into Port 5 of your new gateway router (manufacturers typically label this port as ‘internet’ or ‘WAN’, see below). The Internet indicator should light on the front panel.
- Confirm your Internet connection by connecting via wifi or with a physical ethernet connection to Port 1 (the port furthest from the Internet/WAN port). Your gateway router’s WIFI will appear as “AltheaHome-5” and “AltheaHome-2.4”. You may choose either and use the default password, “ChangeMe”. Try running a speed test, such as fast.com.
- In a private or incognito browser, navigate to 192.168.10.1 to view the Althea Dashboard.
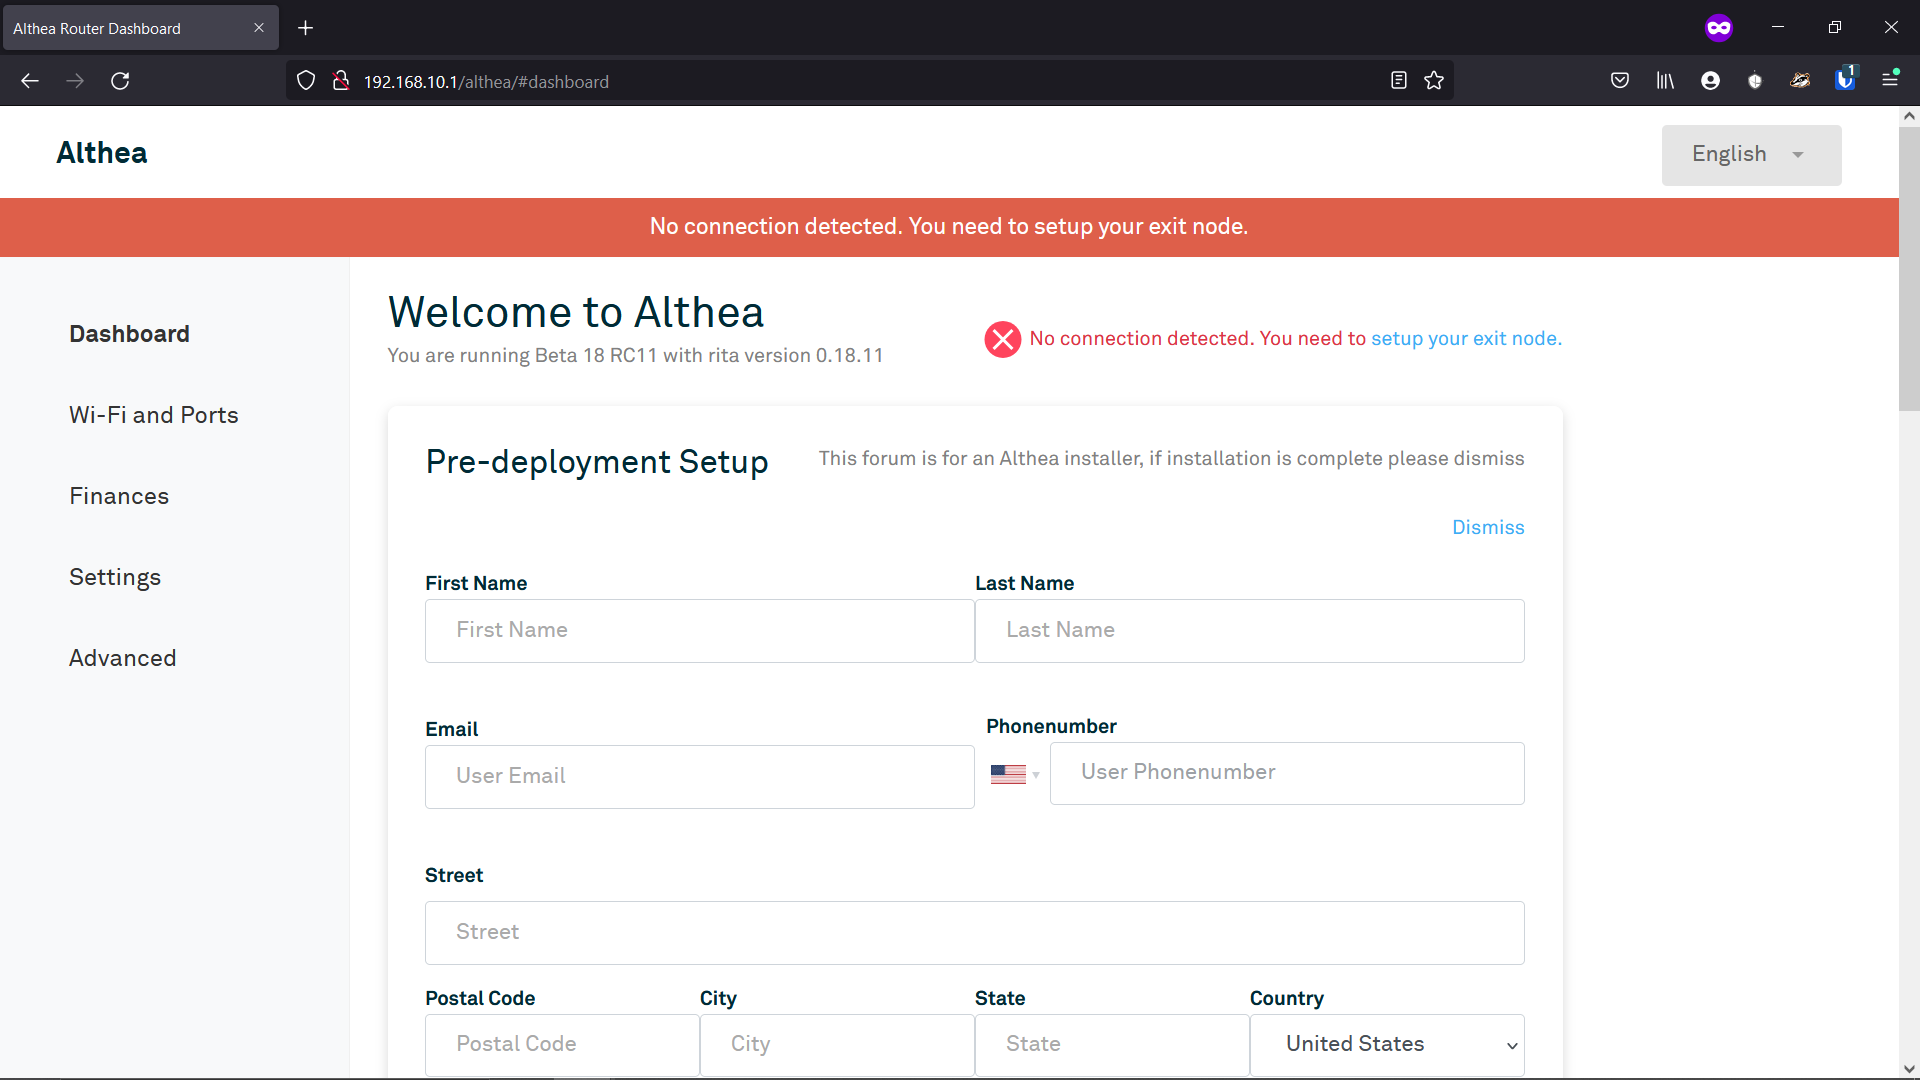
- First you will need to connect your gateway router to an exit node. Navigate to the Network Settings page and scroll down to the “Exit Node” section.
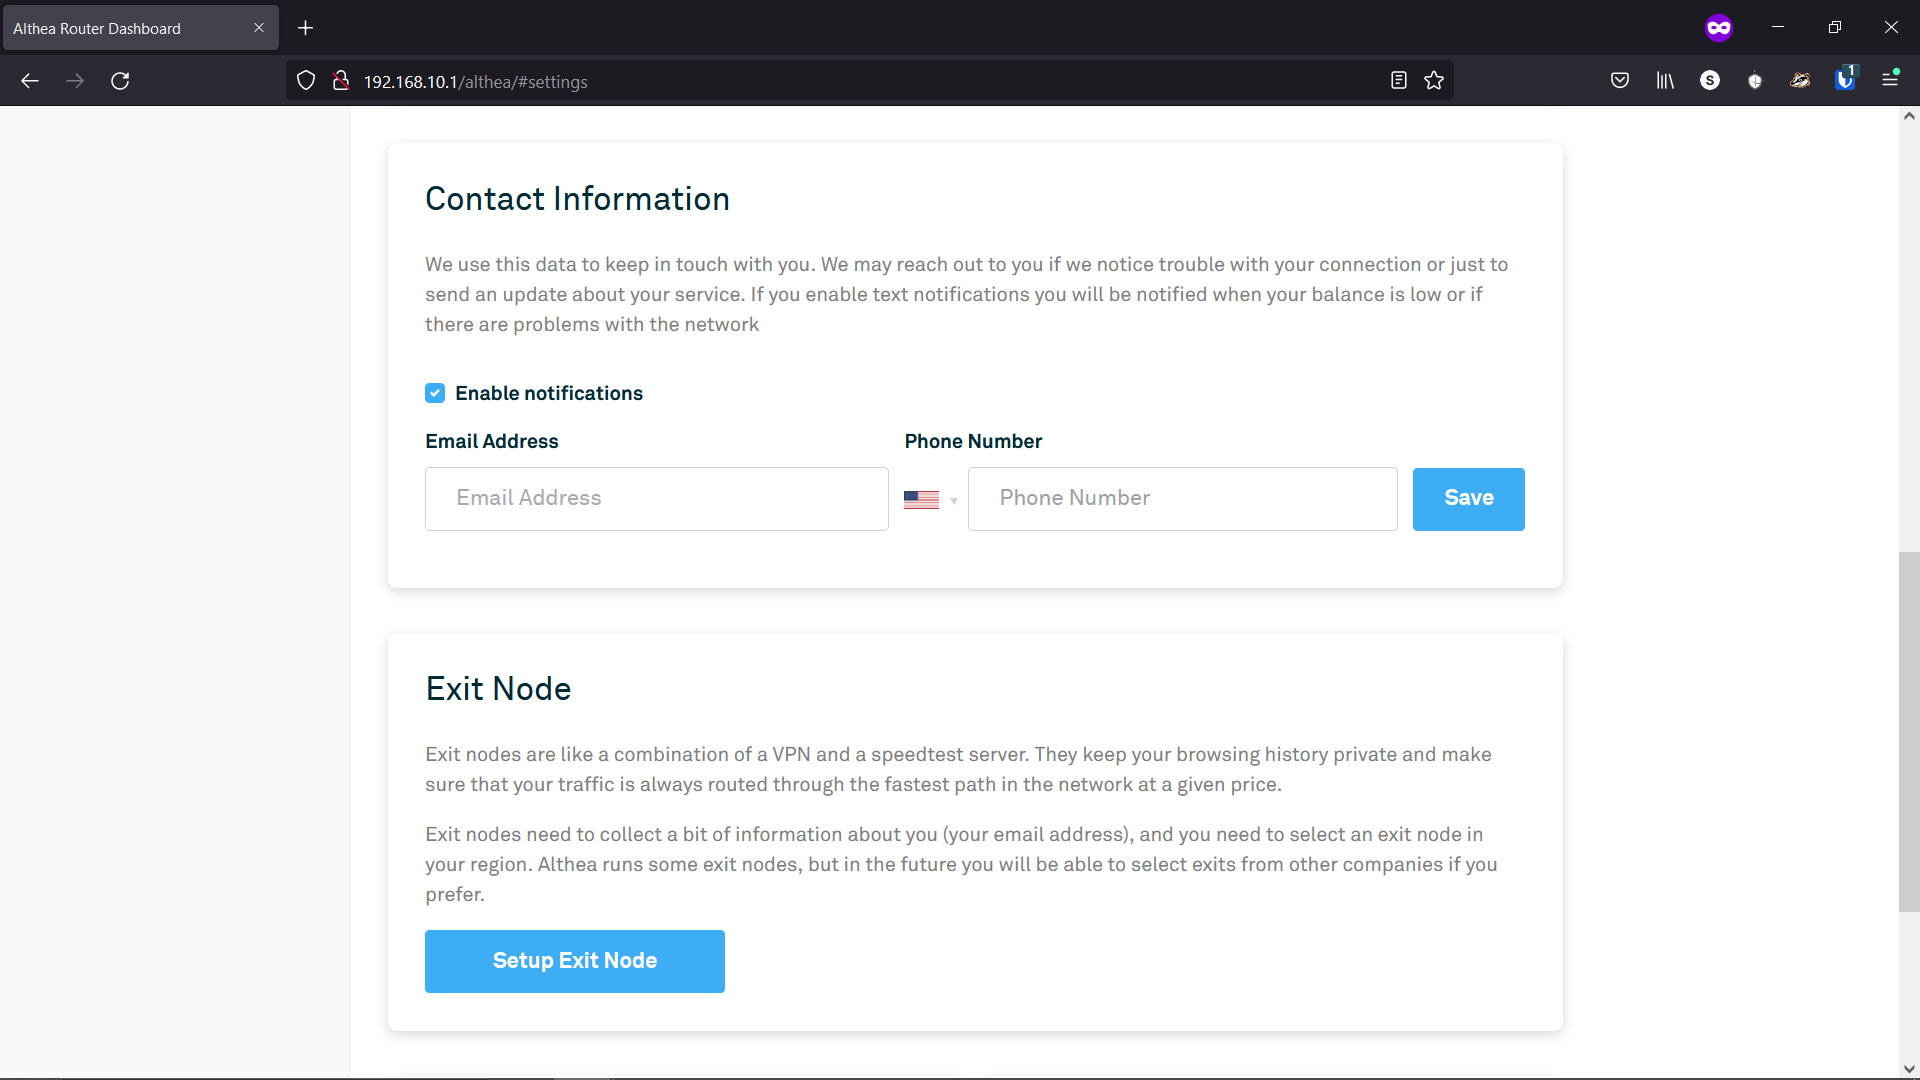
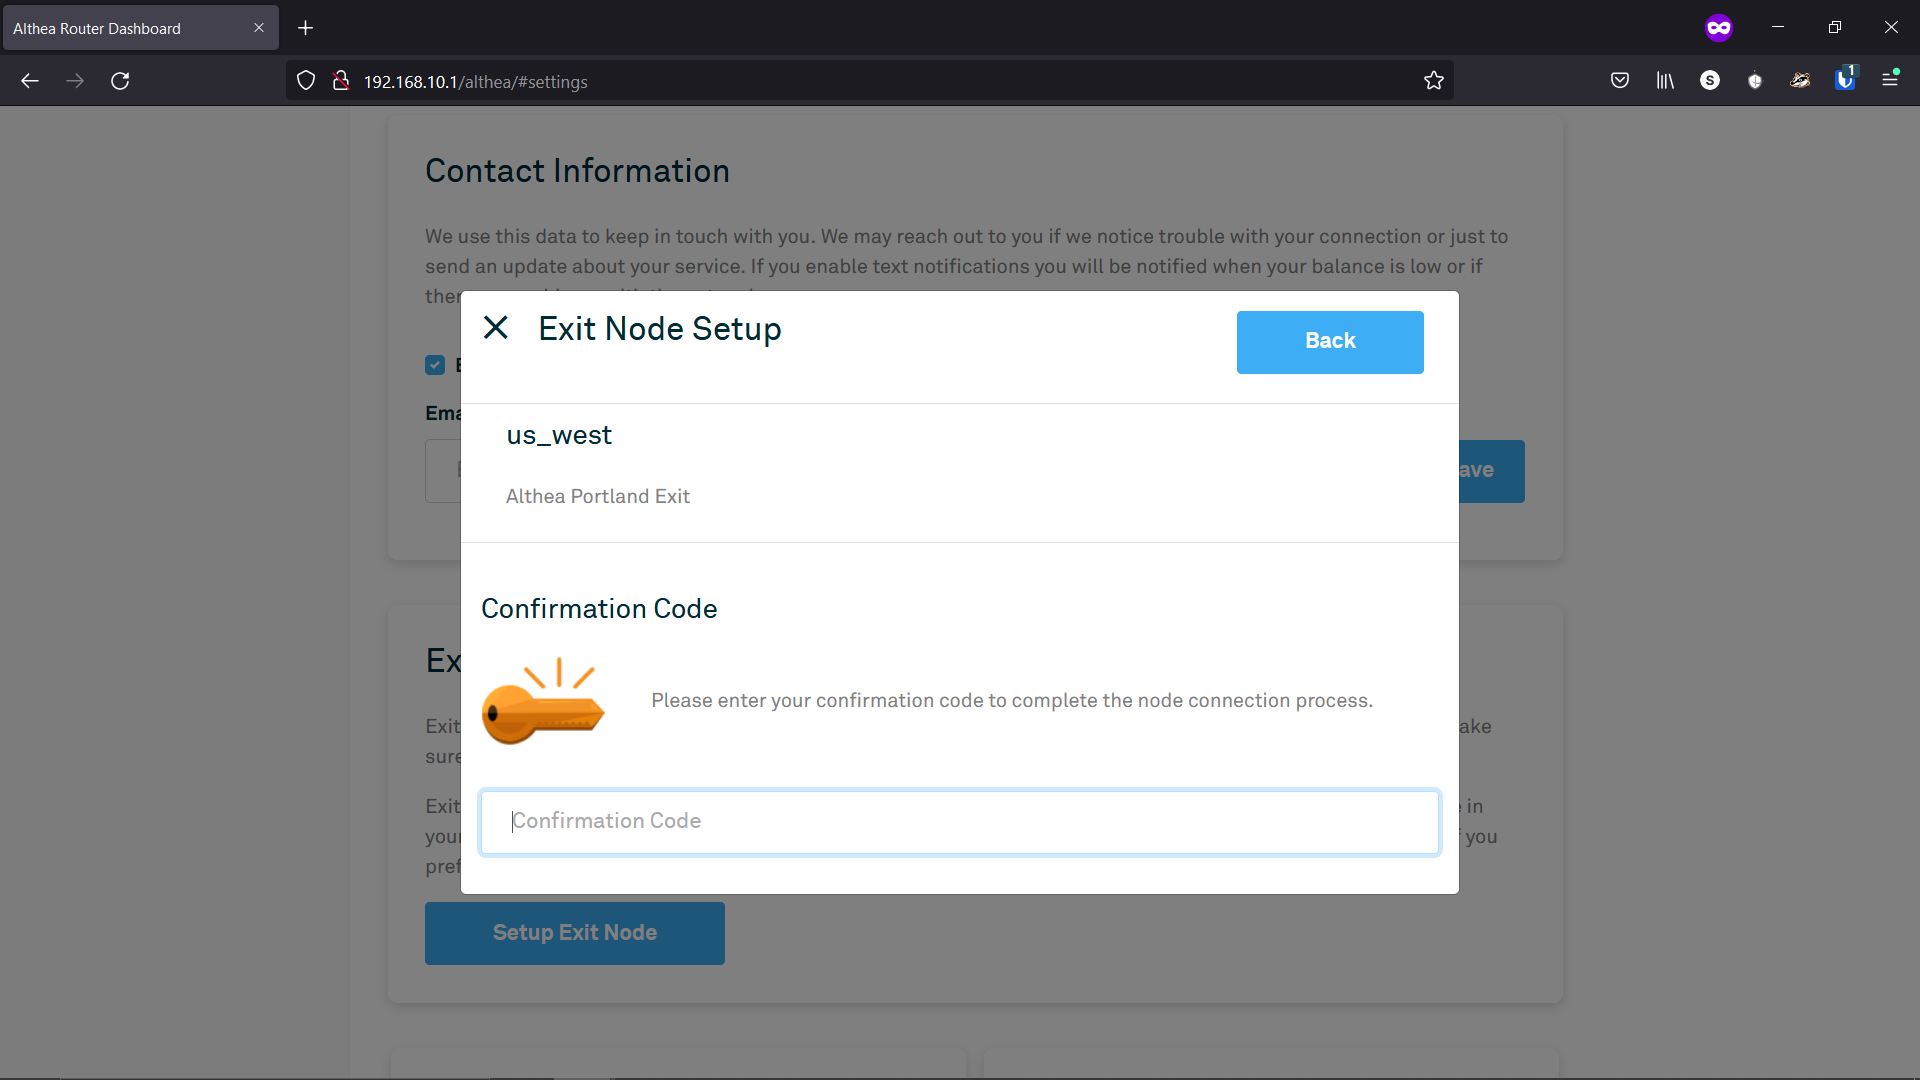
- Click “Setup Exit Node”. The below pop-up will appear.
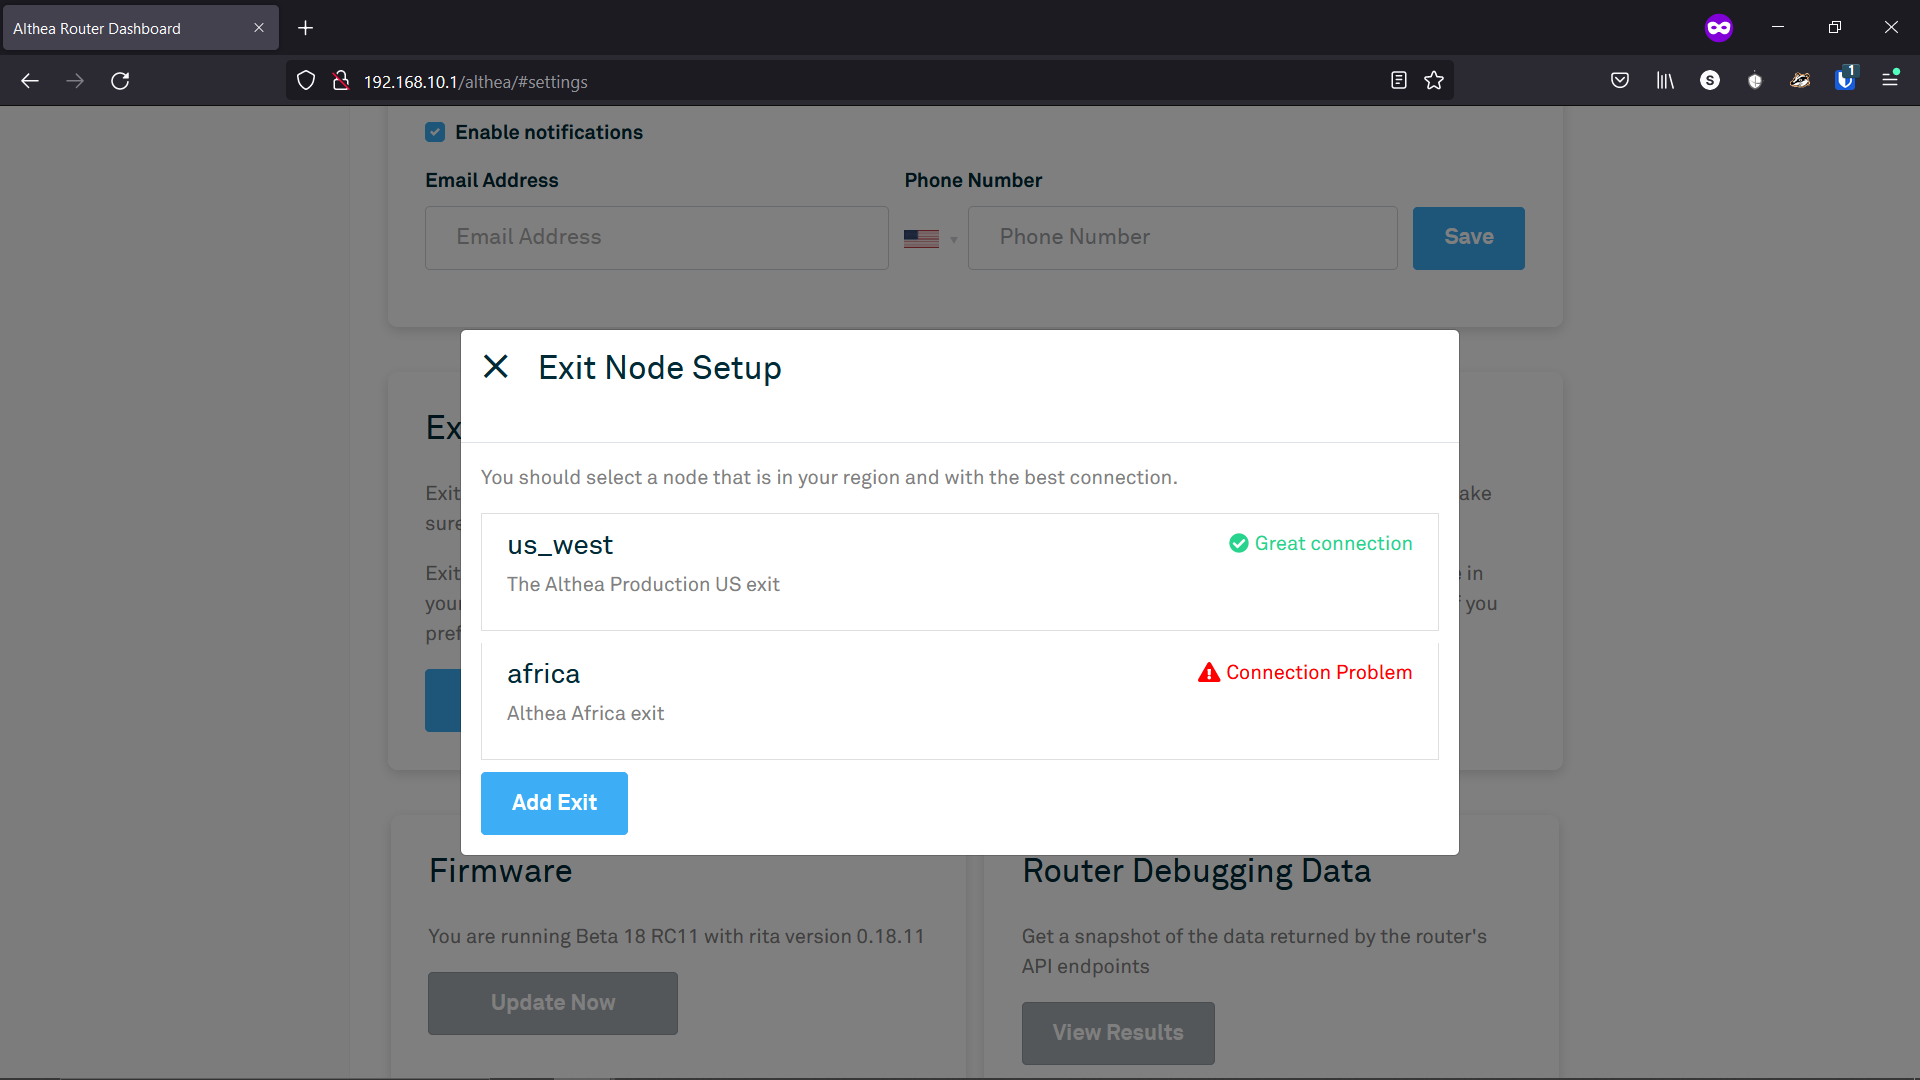
- An exit in Althea is a service that helps protect your privacy and safely deliver traffic to the outside world. It’s important that you choose an exit that you trust. For users in the United States we suggest “US West” an exit operated by the Althea development team. Click on the exit you wish to sign up for.
- You will now be asked for a signup phone number or email address. This is used as an anti-spam measure and to make sure that we can keep access to specific services like Netflix. It will only be used to notify you of exit information and will not be shared. If you are opposed to this you can use an exit server that does not require an email. It may take a second for the email or text to send.

- Next you will receive a 6 digit code via text message or email. Enter it and press submit.
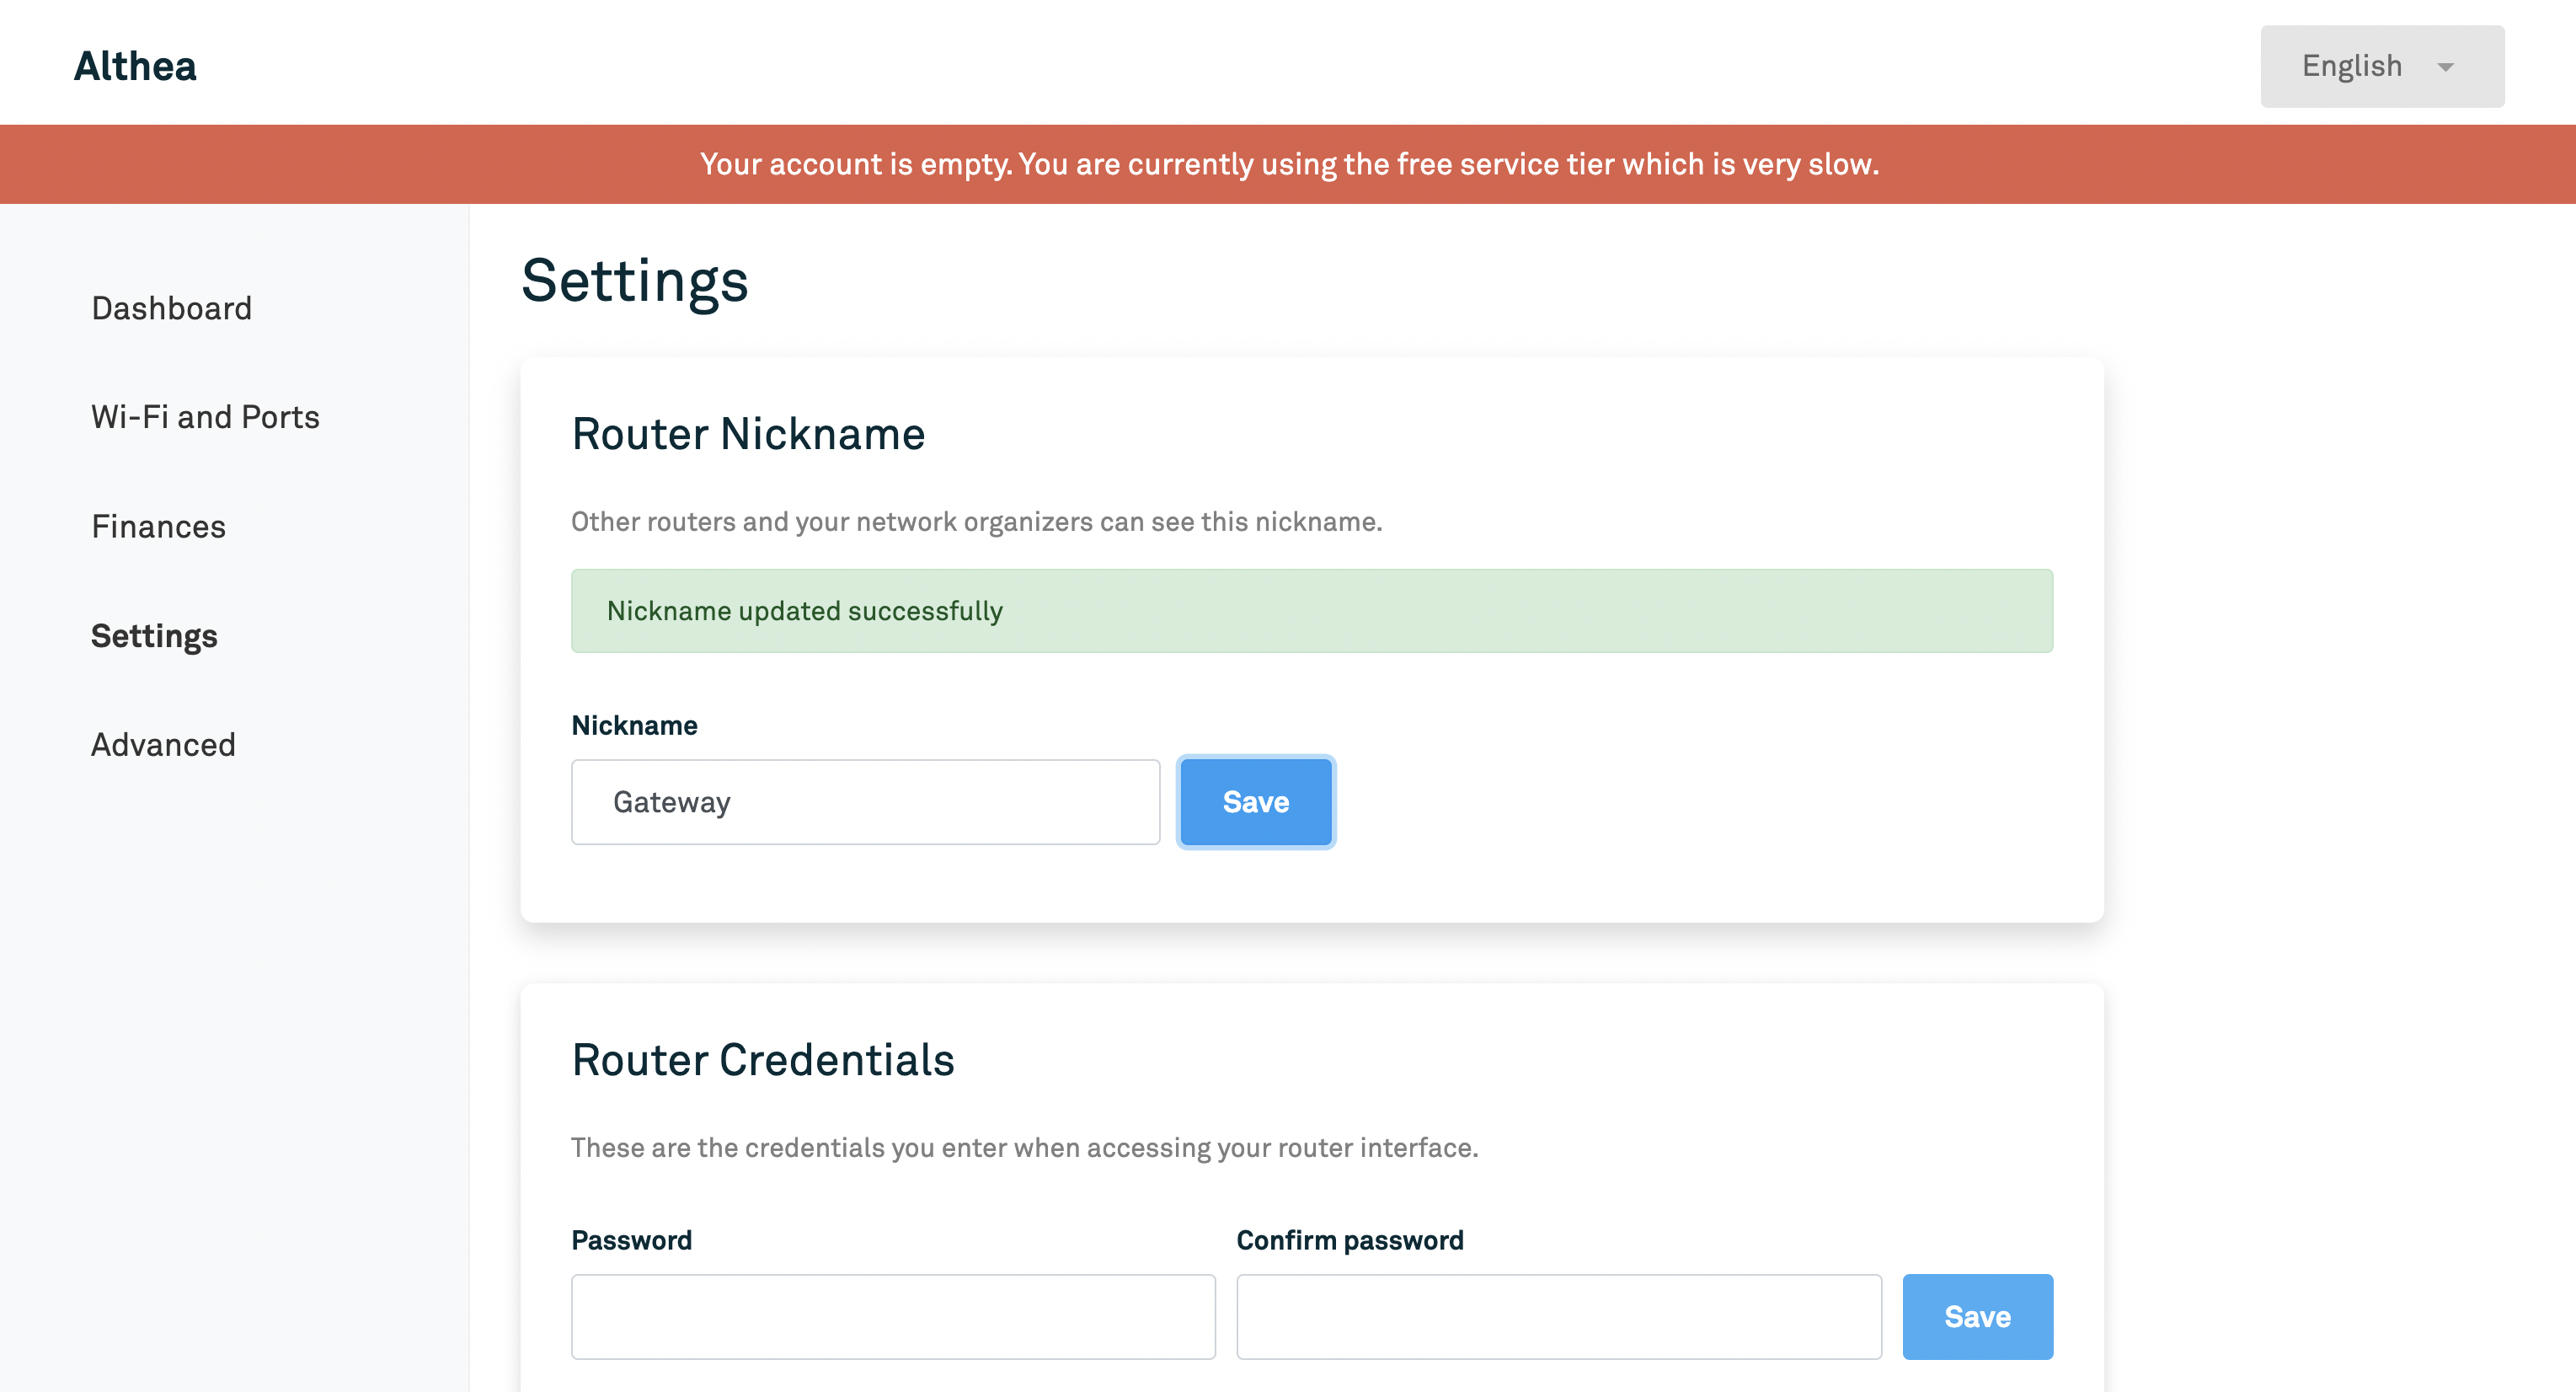
- Because this test network will involve three different routers, it is important that each is properly labeled. First navigate to the settings page and change the router nickname to Gateway.
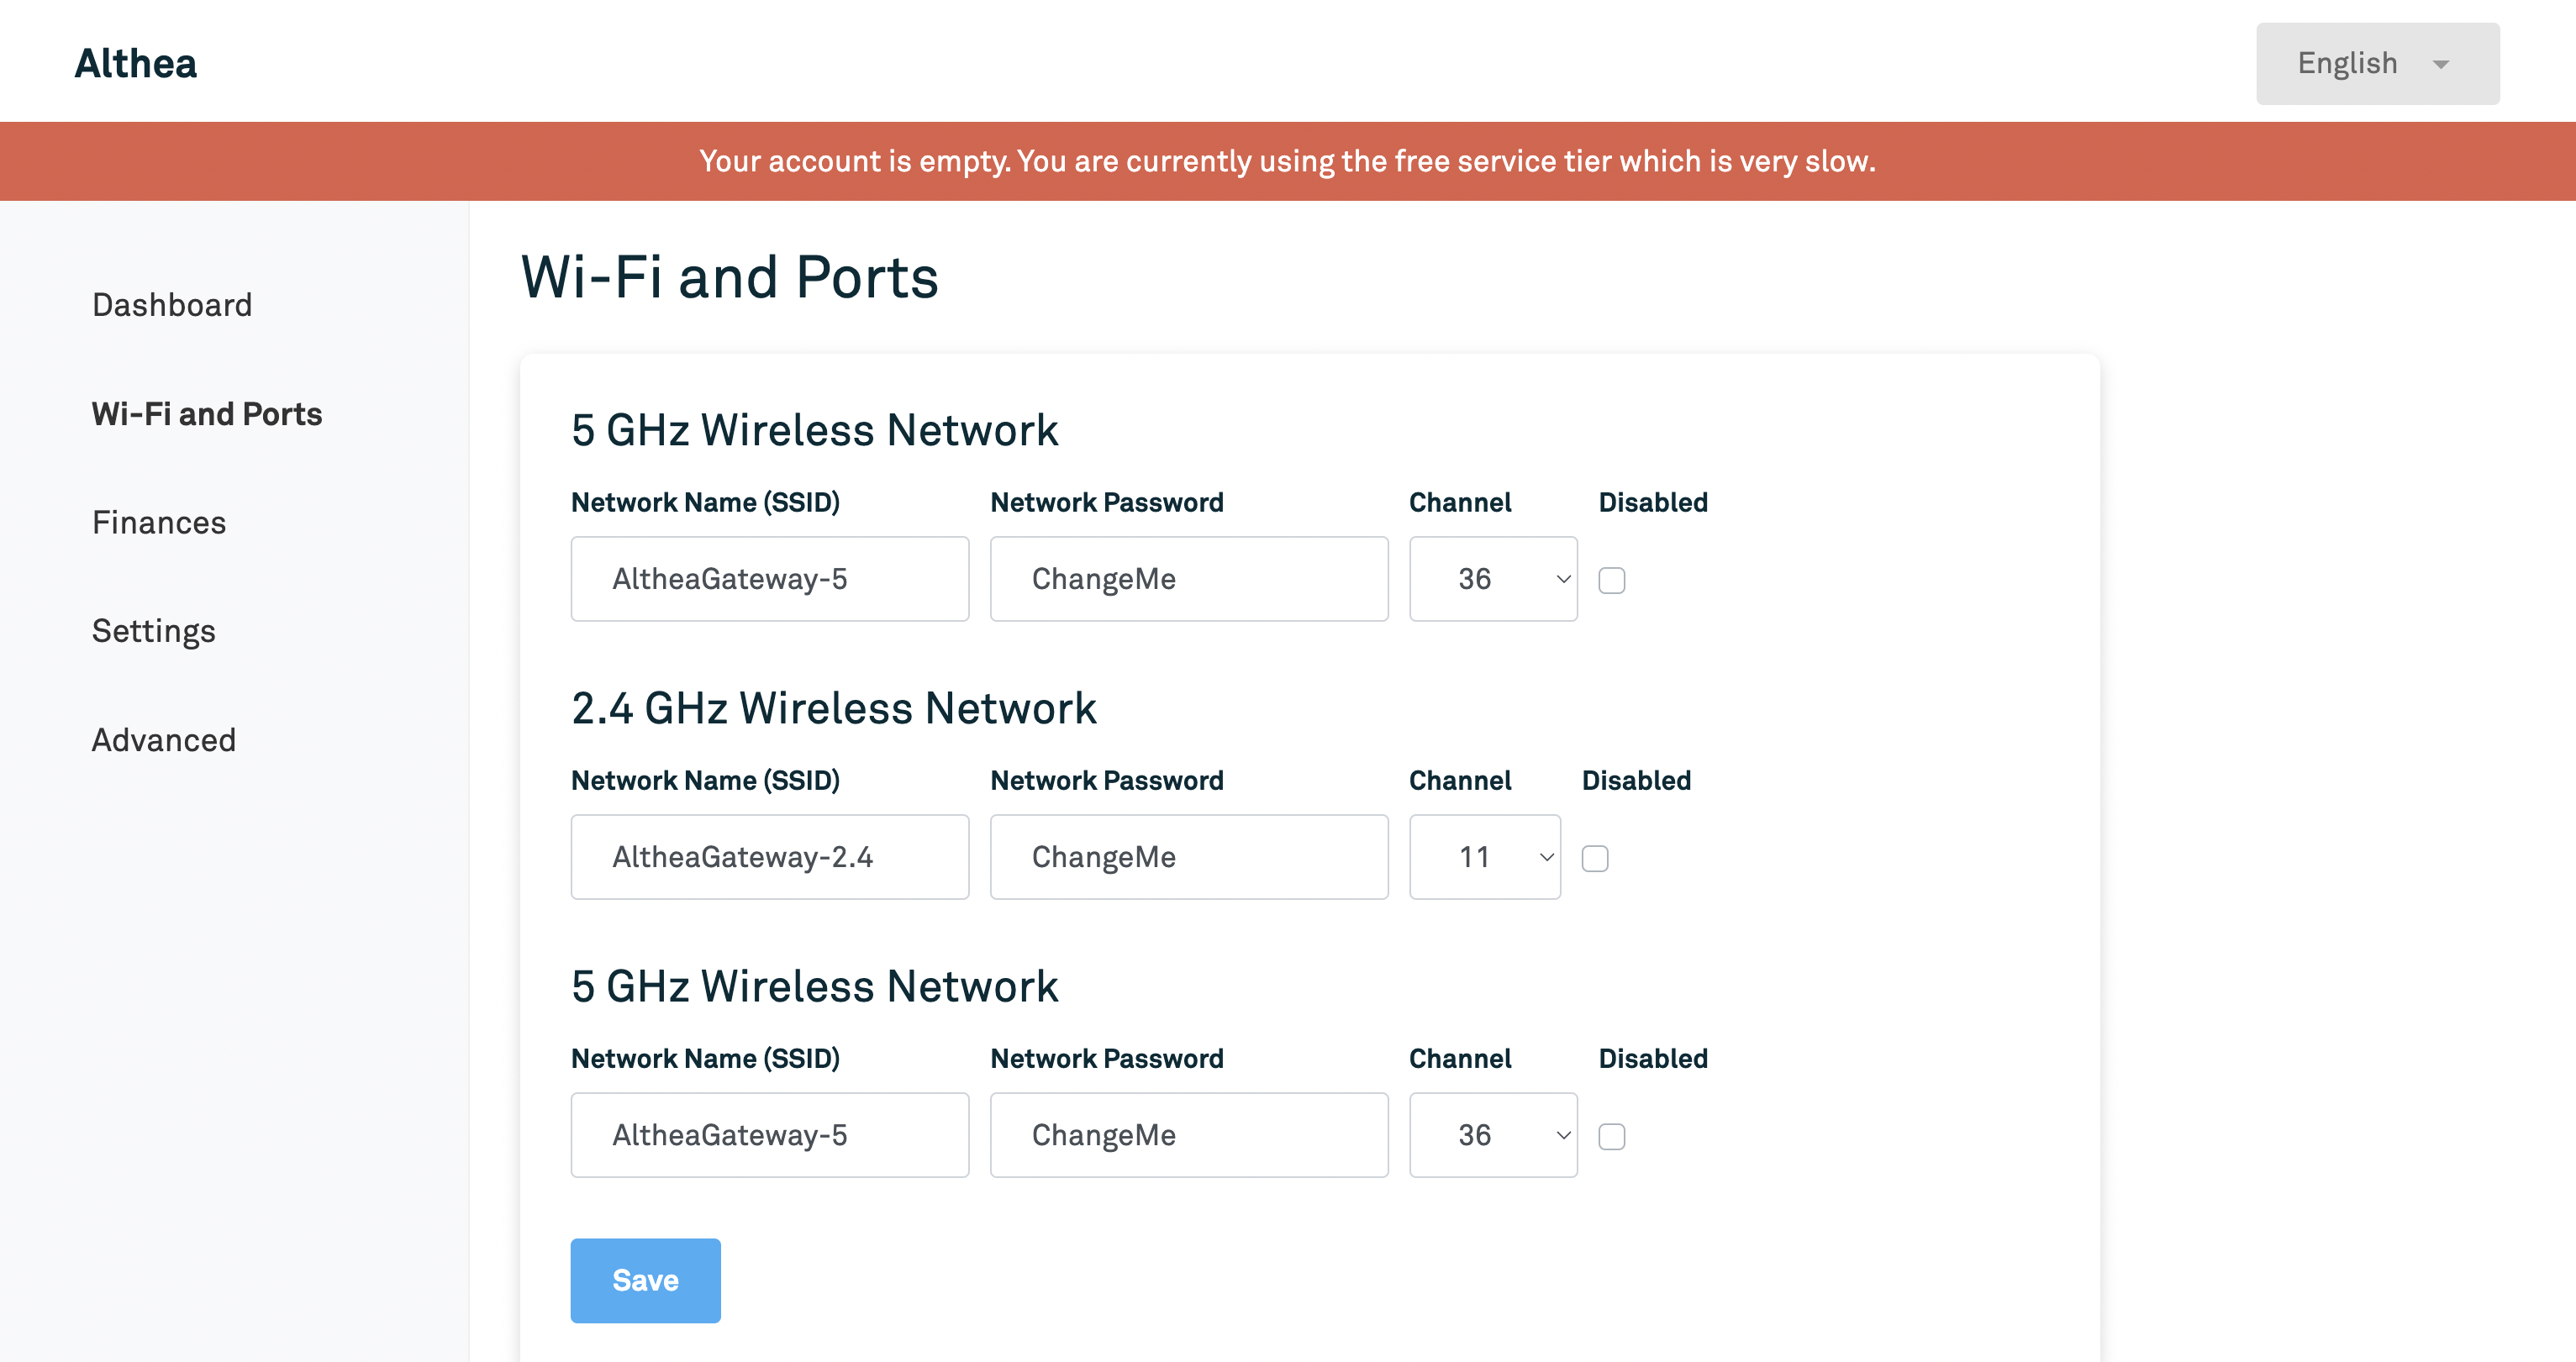
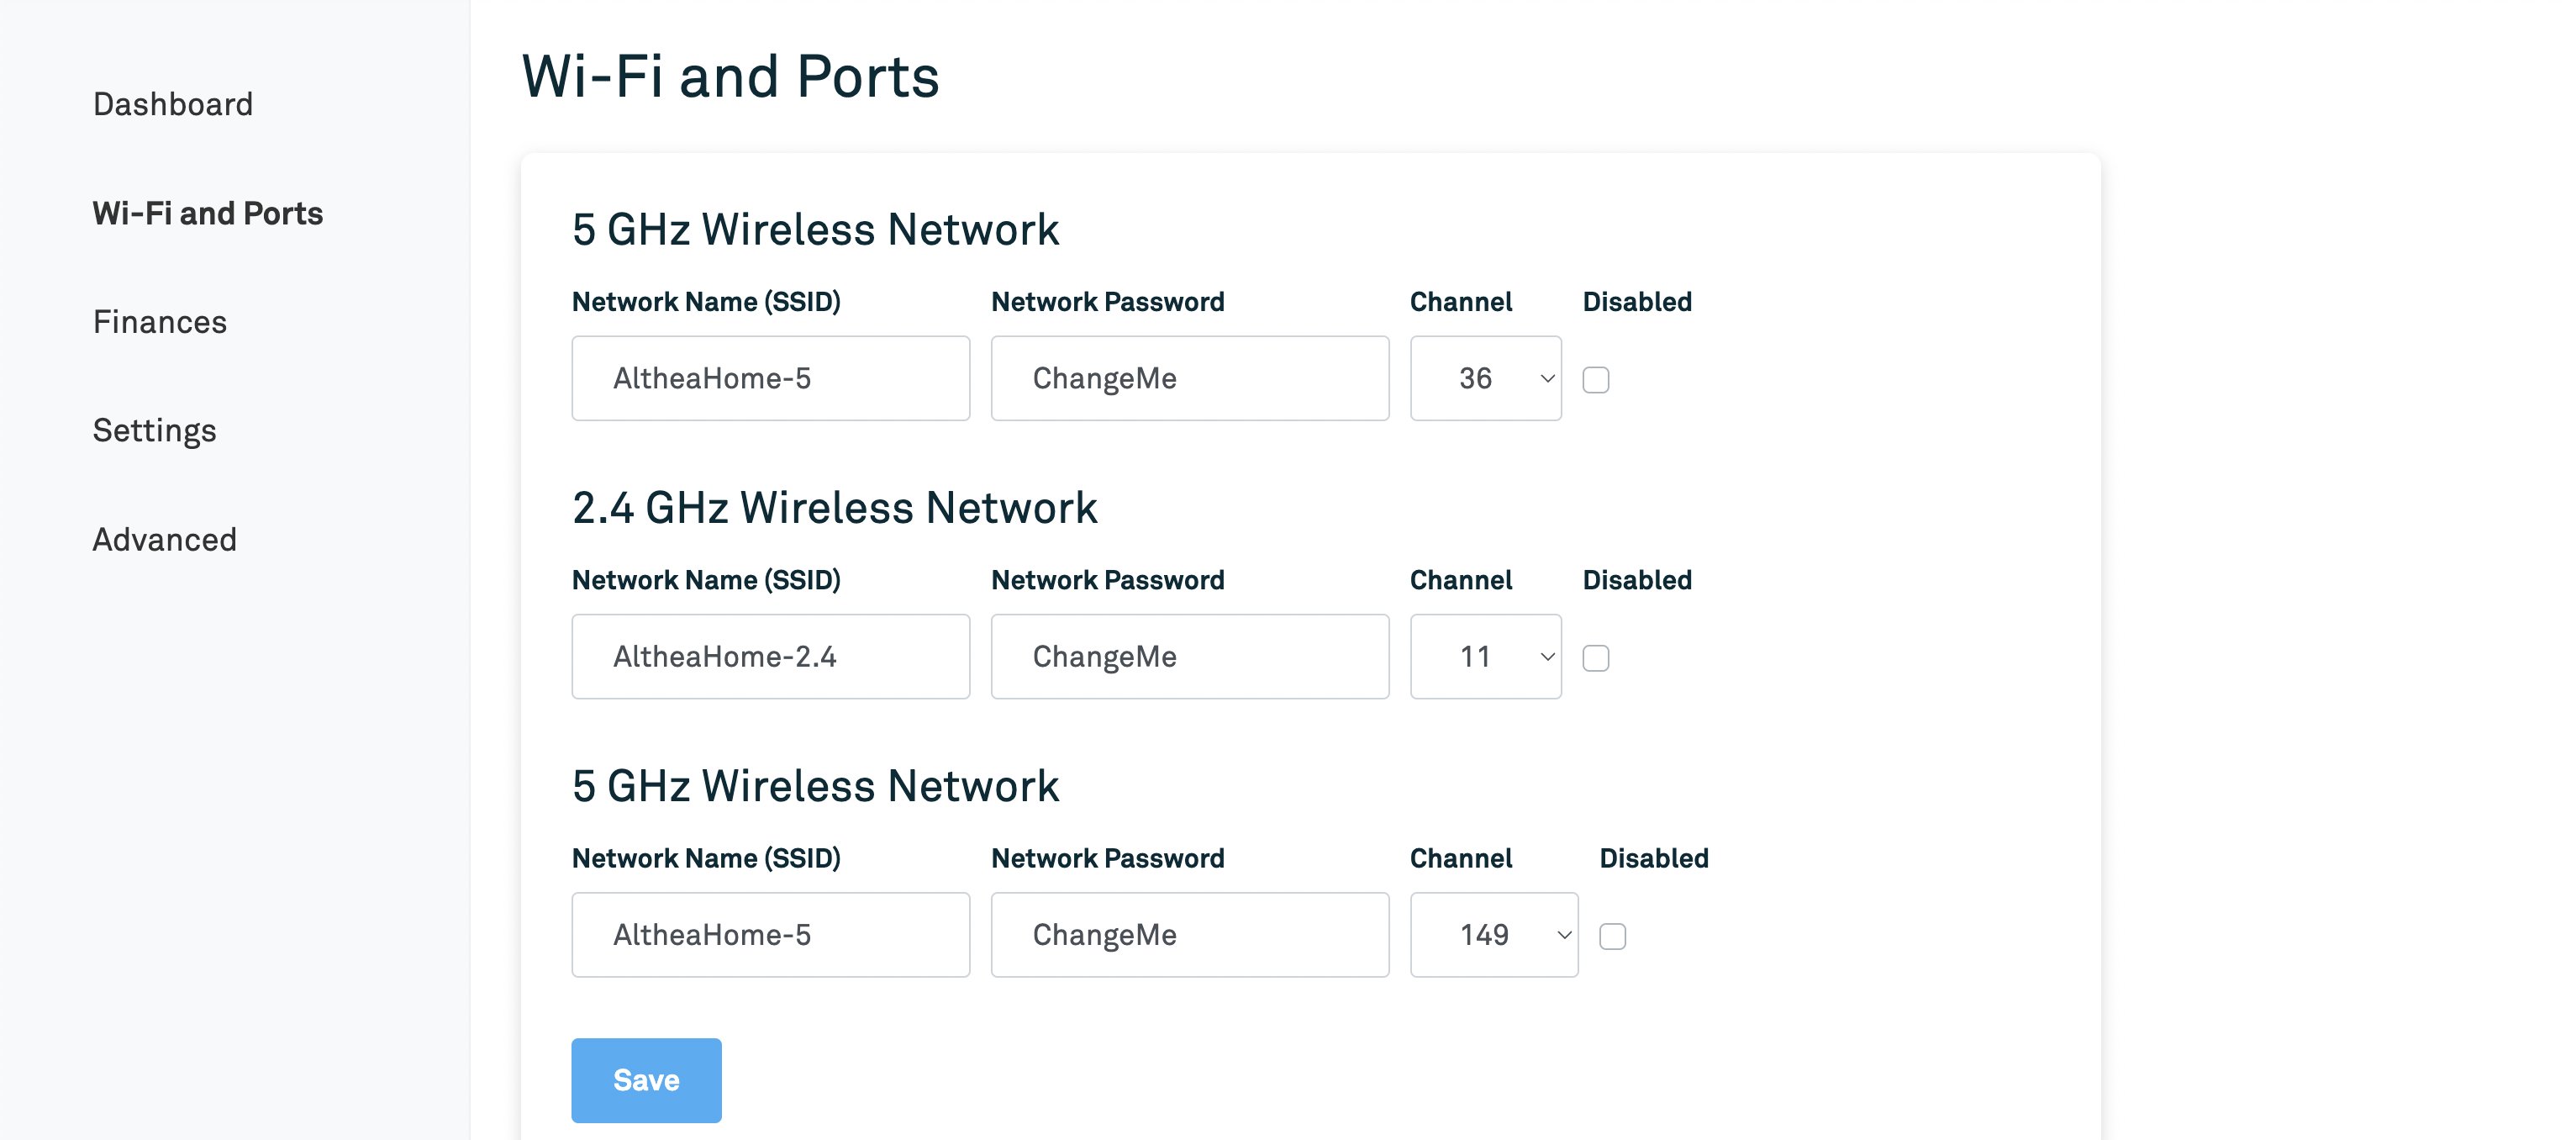
- Next navigate to the Wi-Fi and Ports page. Ensure that the network name includes “Gateway” so that it can be easily distinguished from the other routers that will be part of this network. Any changes made here will cause the router to restart. This may take a few minutes.
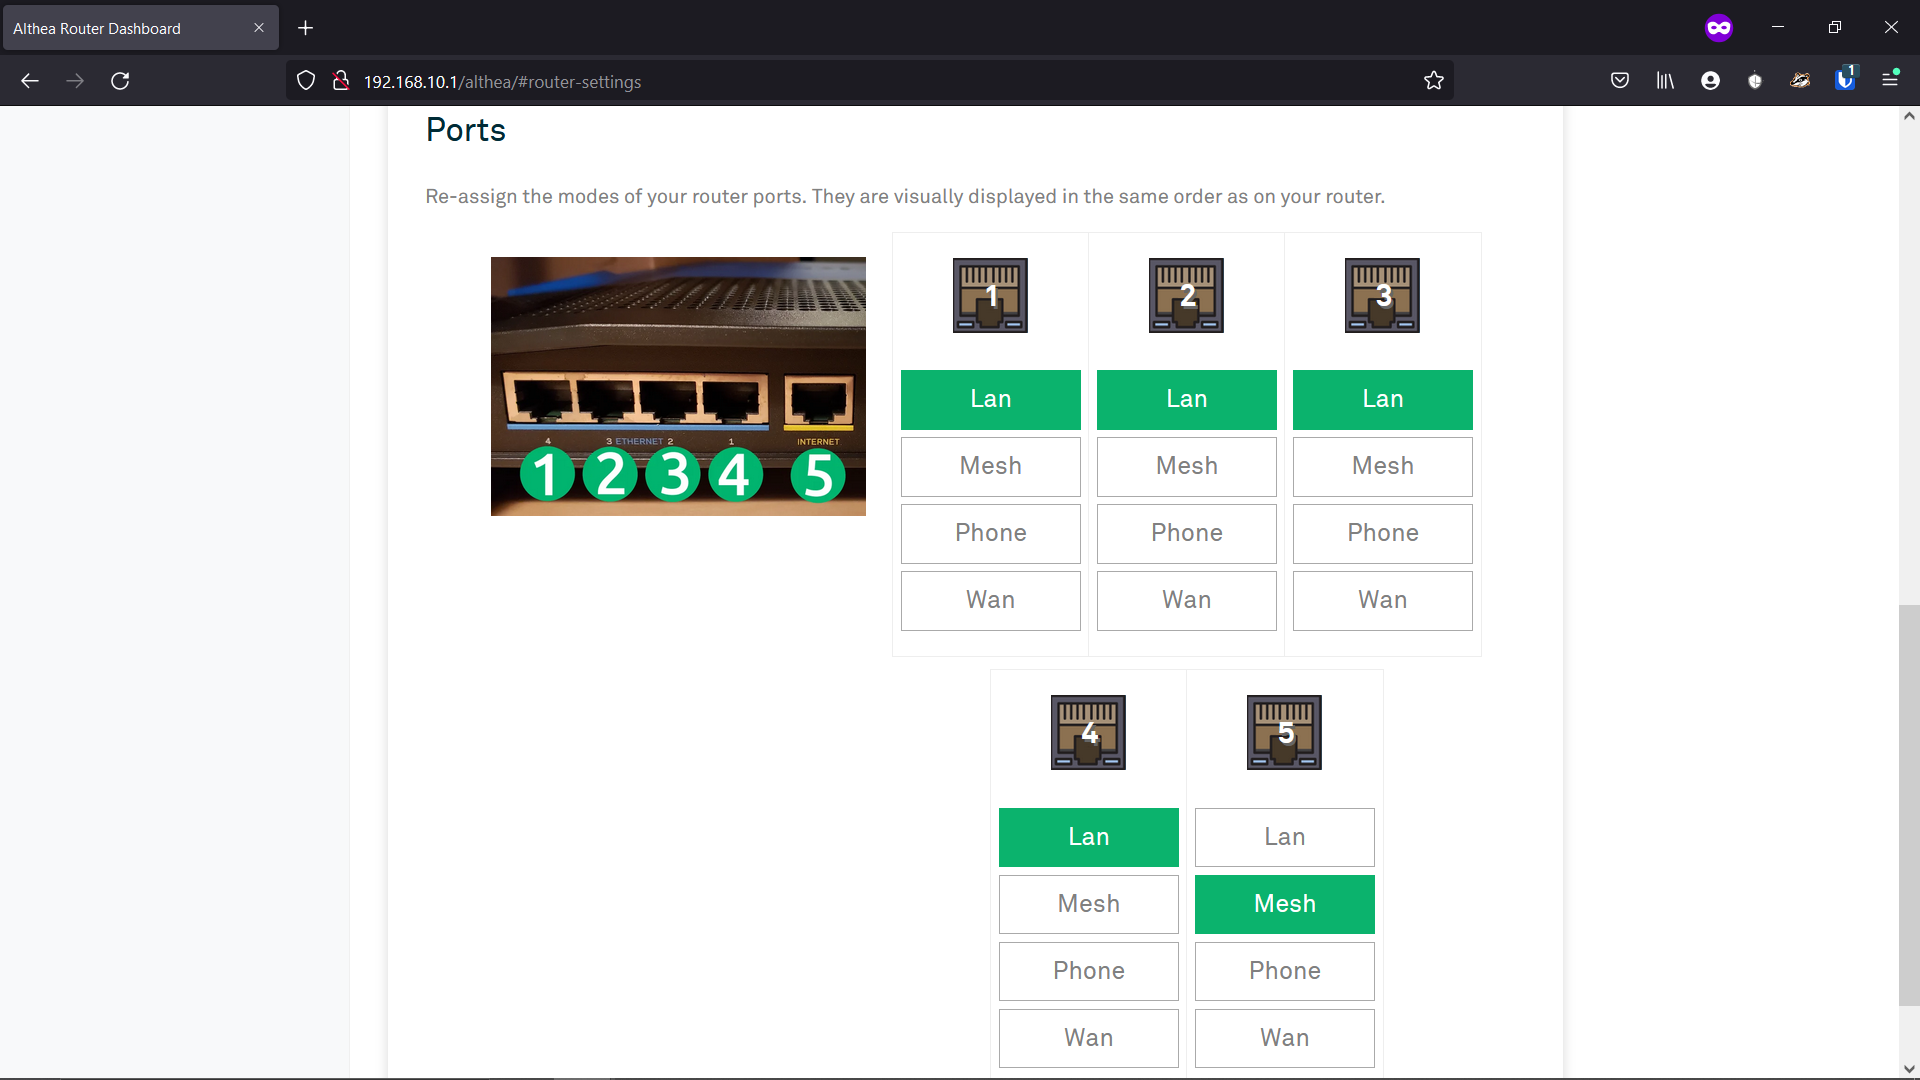
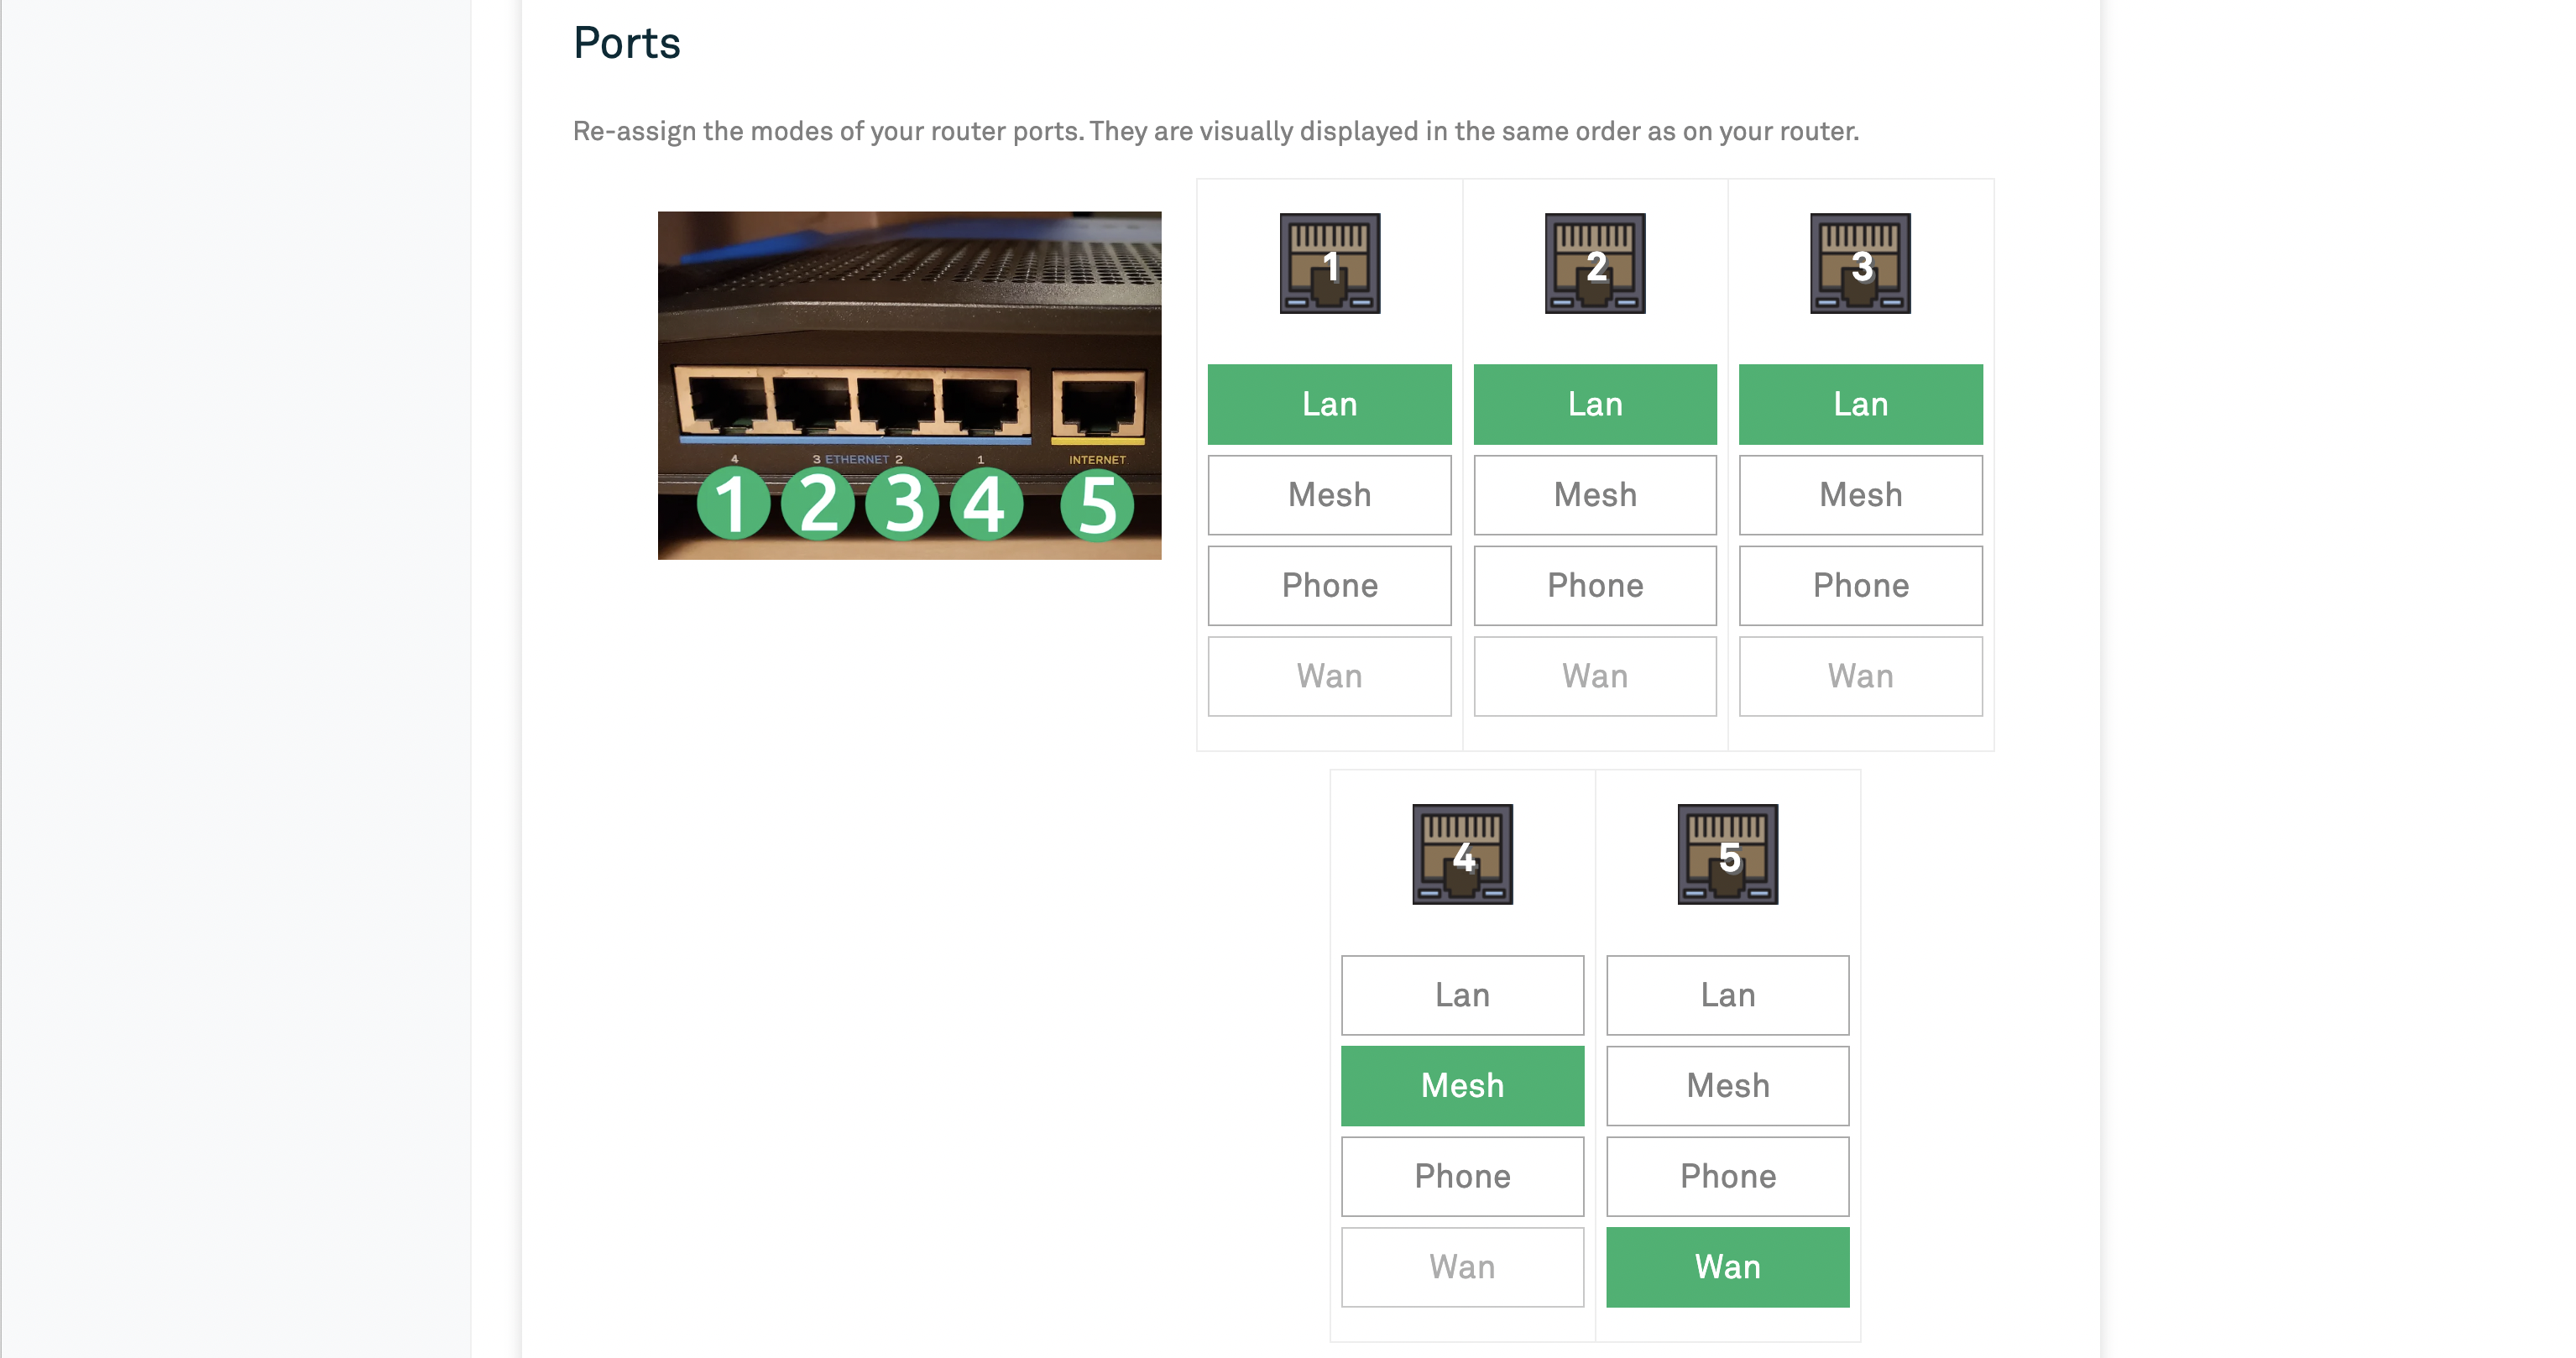
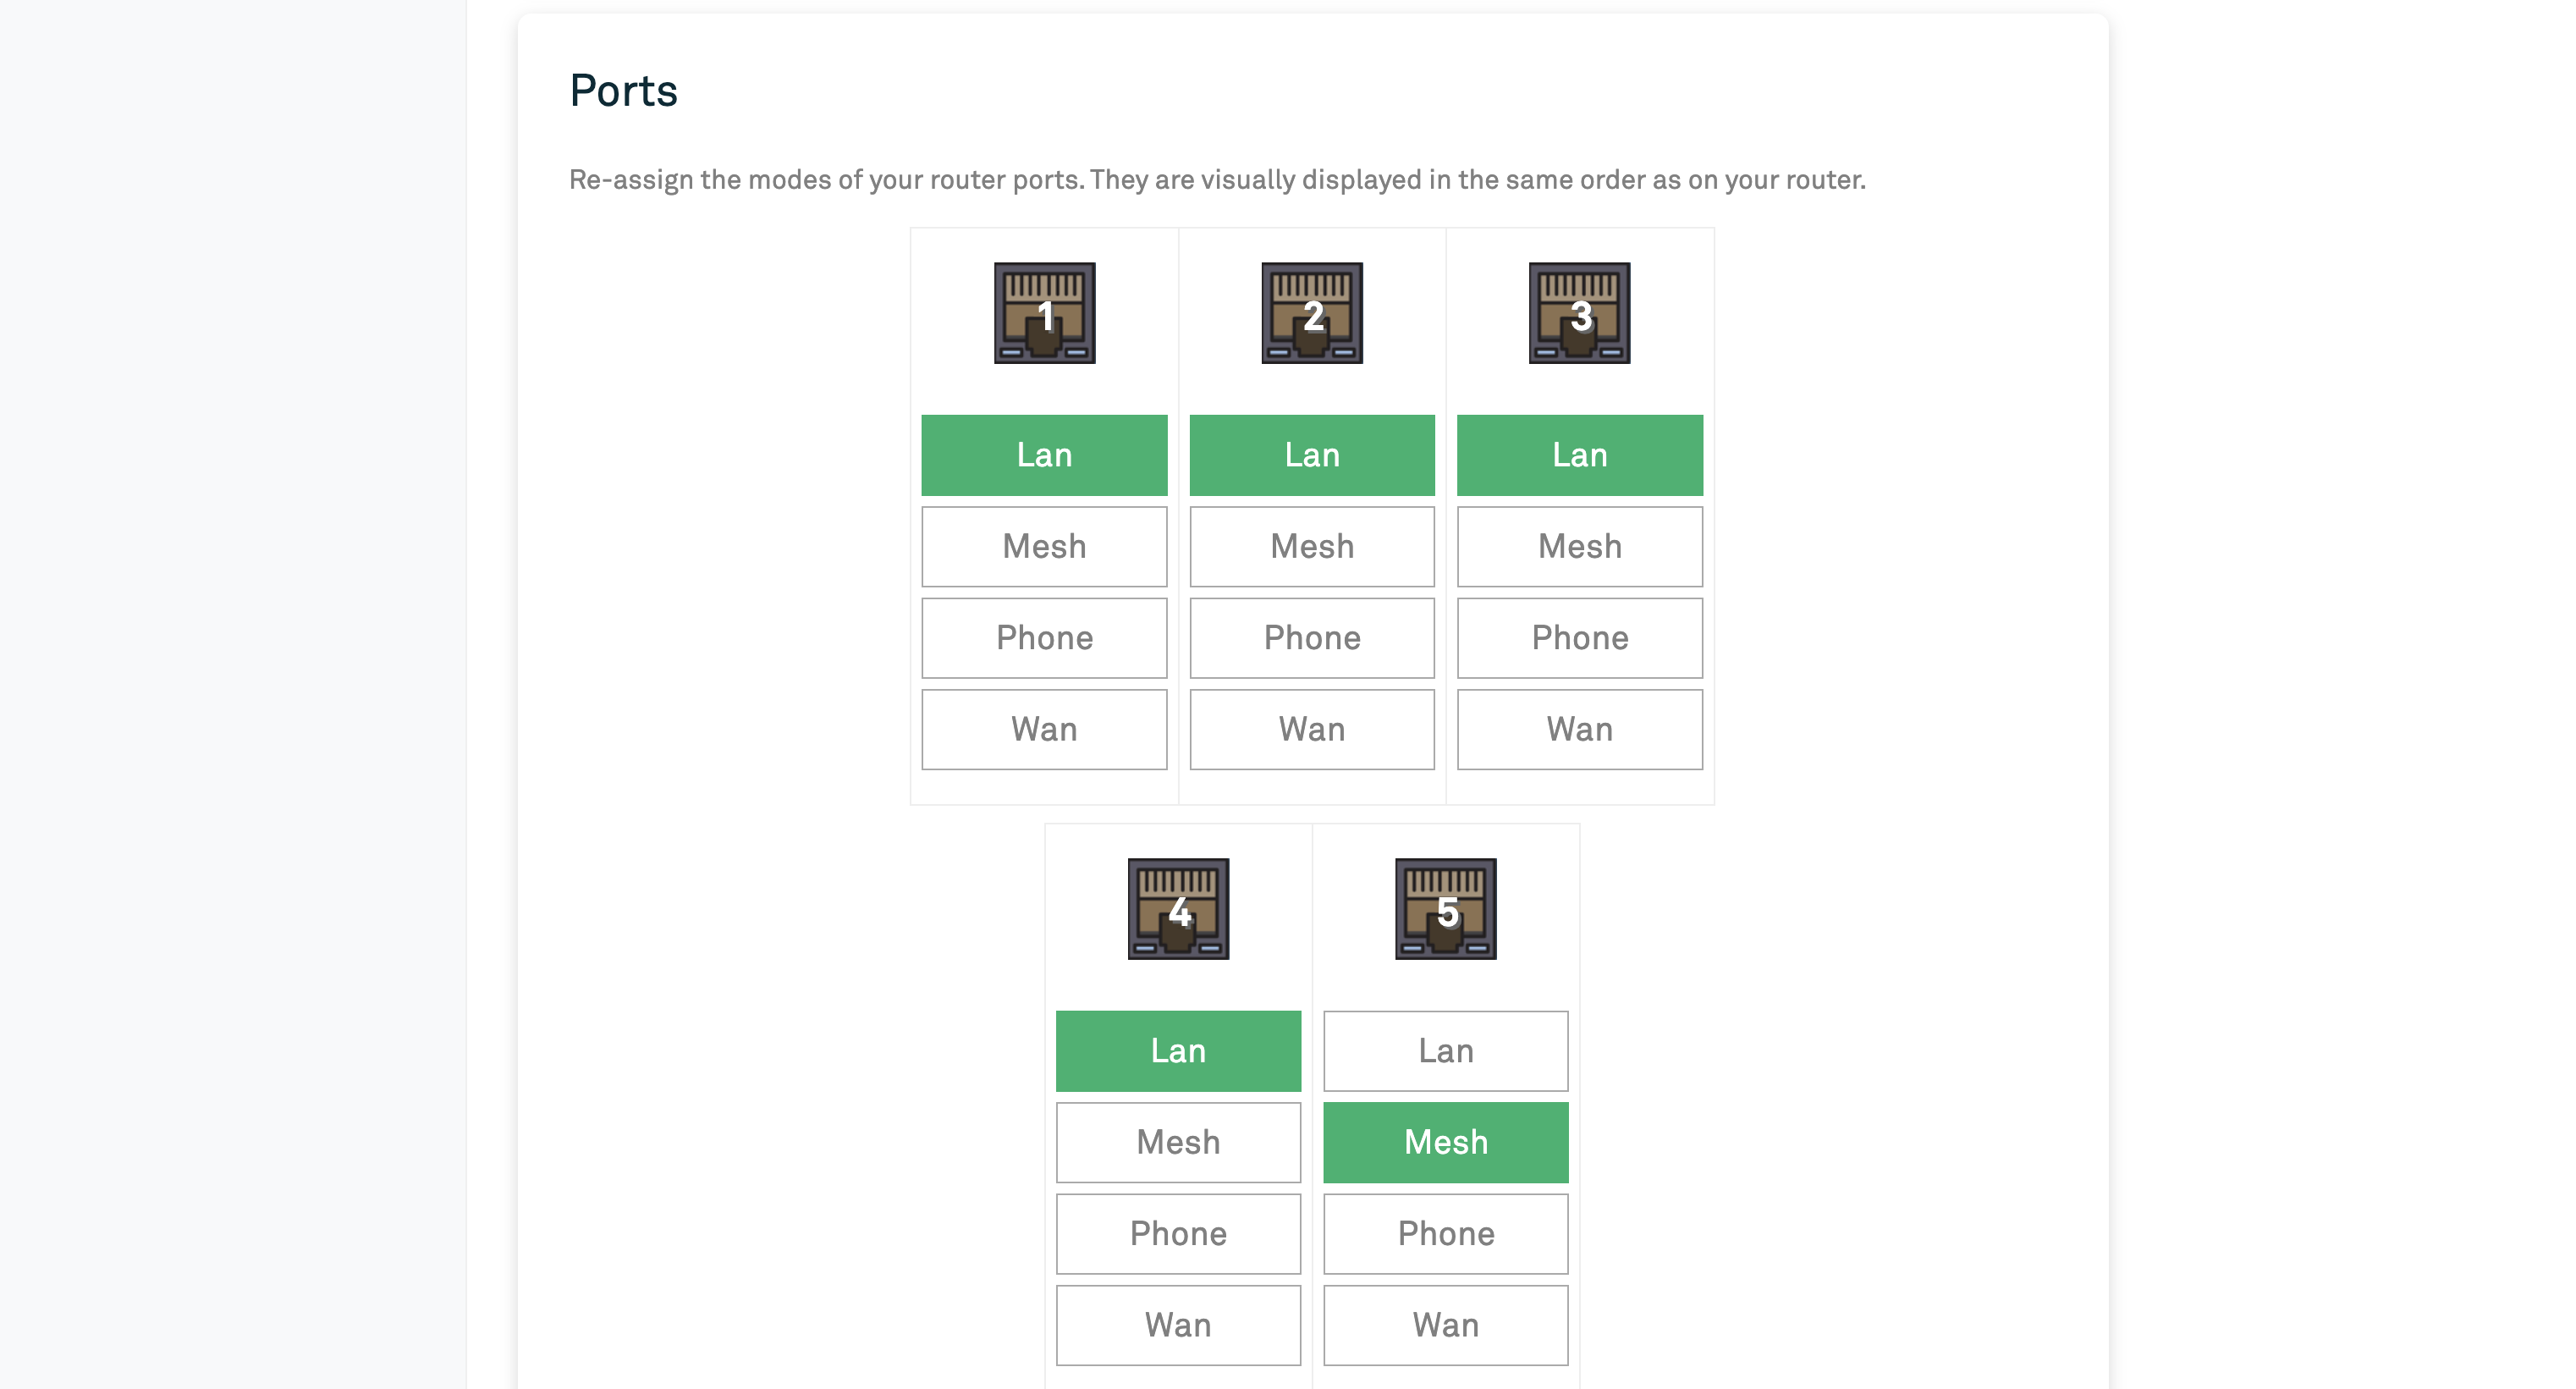
- Scroll down on the Wi-Fi and Ports page to the Ports section. Configure your ports to match the settings below, with the 4th port set to Mesh and the 5th port set to WAN. Any changes made here will cause the router to restart. This may take a few minutes.
Setting up the Relay Router
- Unpack your Relay router and assemble according to its instructions.
- Connect the router to a power source. Indicator lights on the front panel should begin to light up and ultimately settle with a solid light for the power indicator. If no indicator lights appear, double check the device is turned on (power switch in the back flipped towards the line).
- Next, connect to the device’s Wi-Fi, which should appear as “AltheaHome-5” and “AltheaHome-2.4”. You may choose either and use the default password, “ChangeMe”.
- In a private or incognito browser navigate to 192.168.10.1 to view the Althea Dashboard.
- Next, navigate to the settings page and change the router nickname to Relay so that it may be easily distinguishable from the Gateway router.
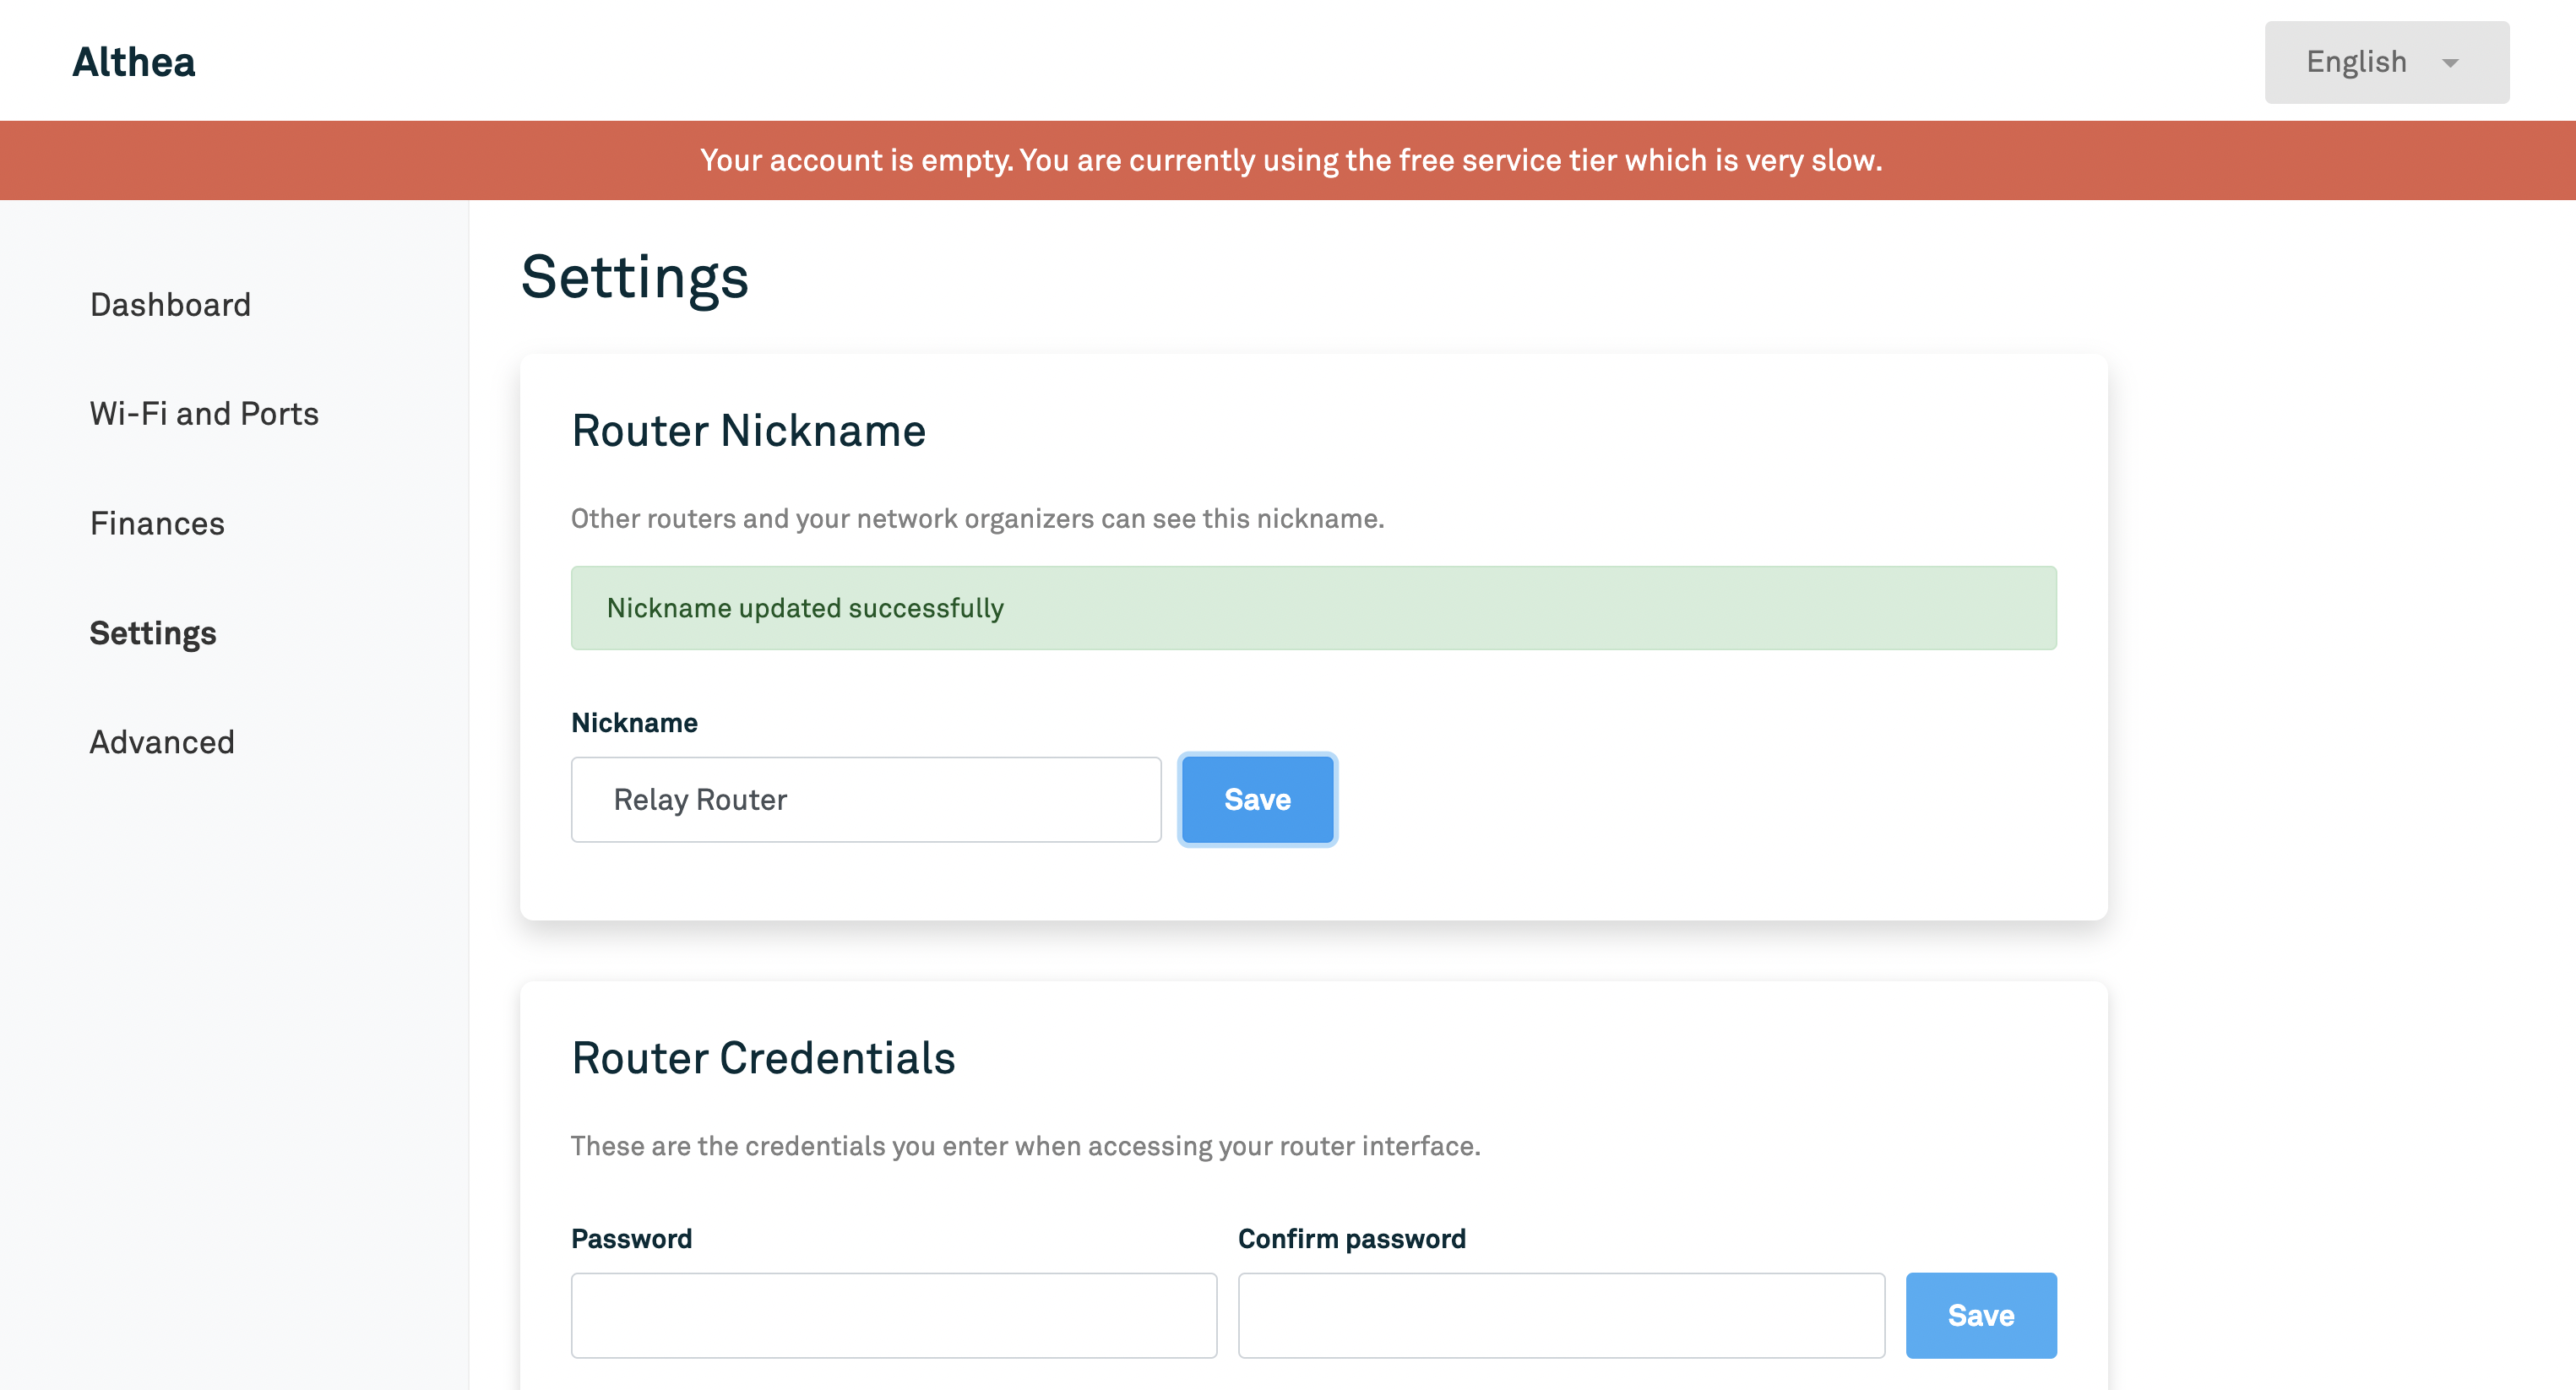
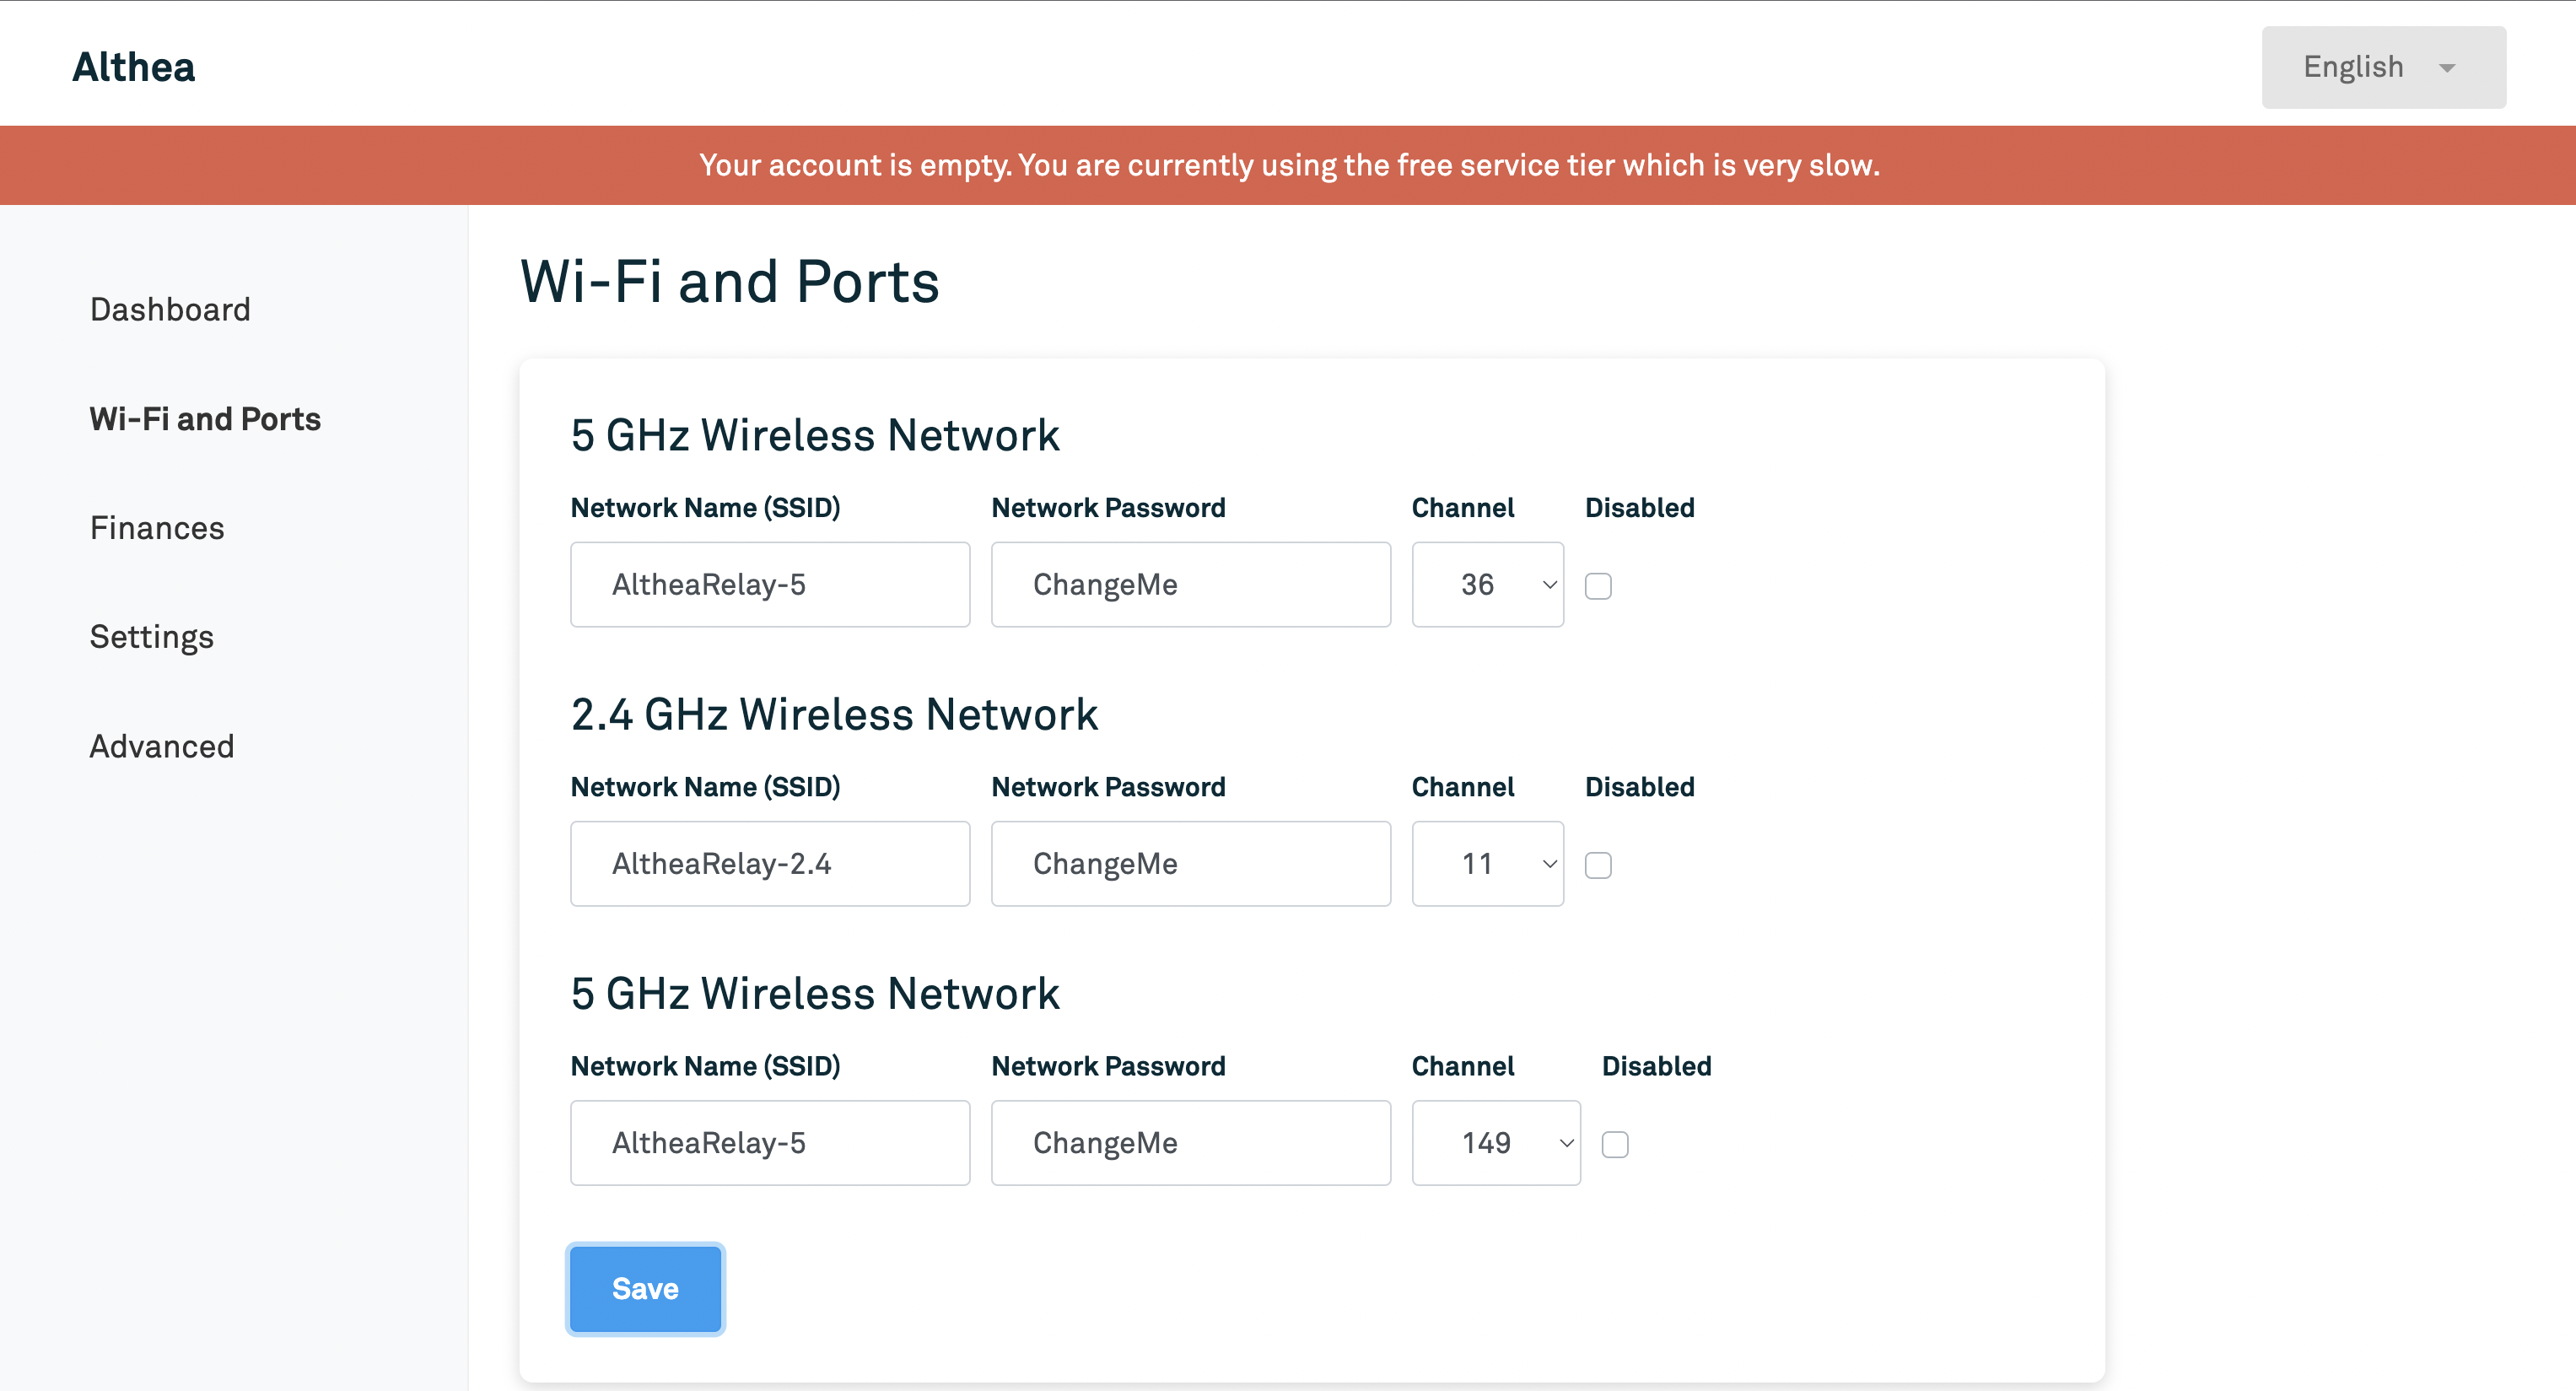
- Now navigate to the Wi-Fi and Ports page and change the network name so it includes “Relay”. This is an important step for distinguishing your Relay router from the others on this network. Any changes made to this section will cause the router to restart which may take a few minutes.
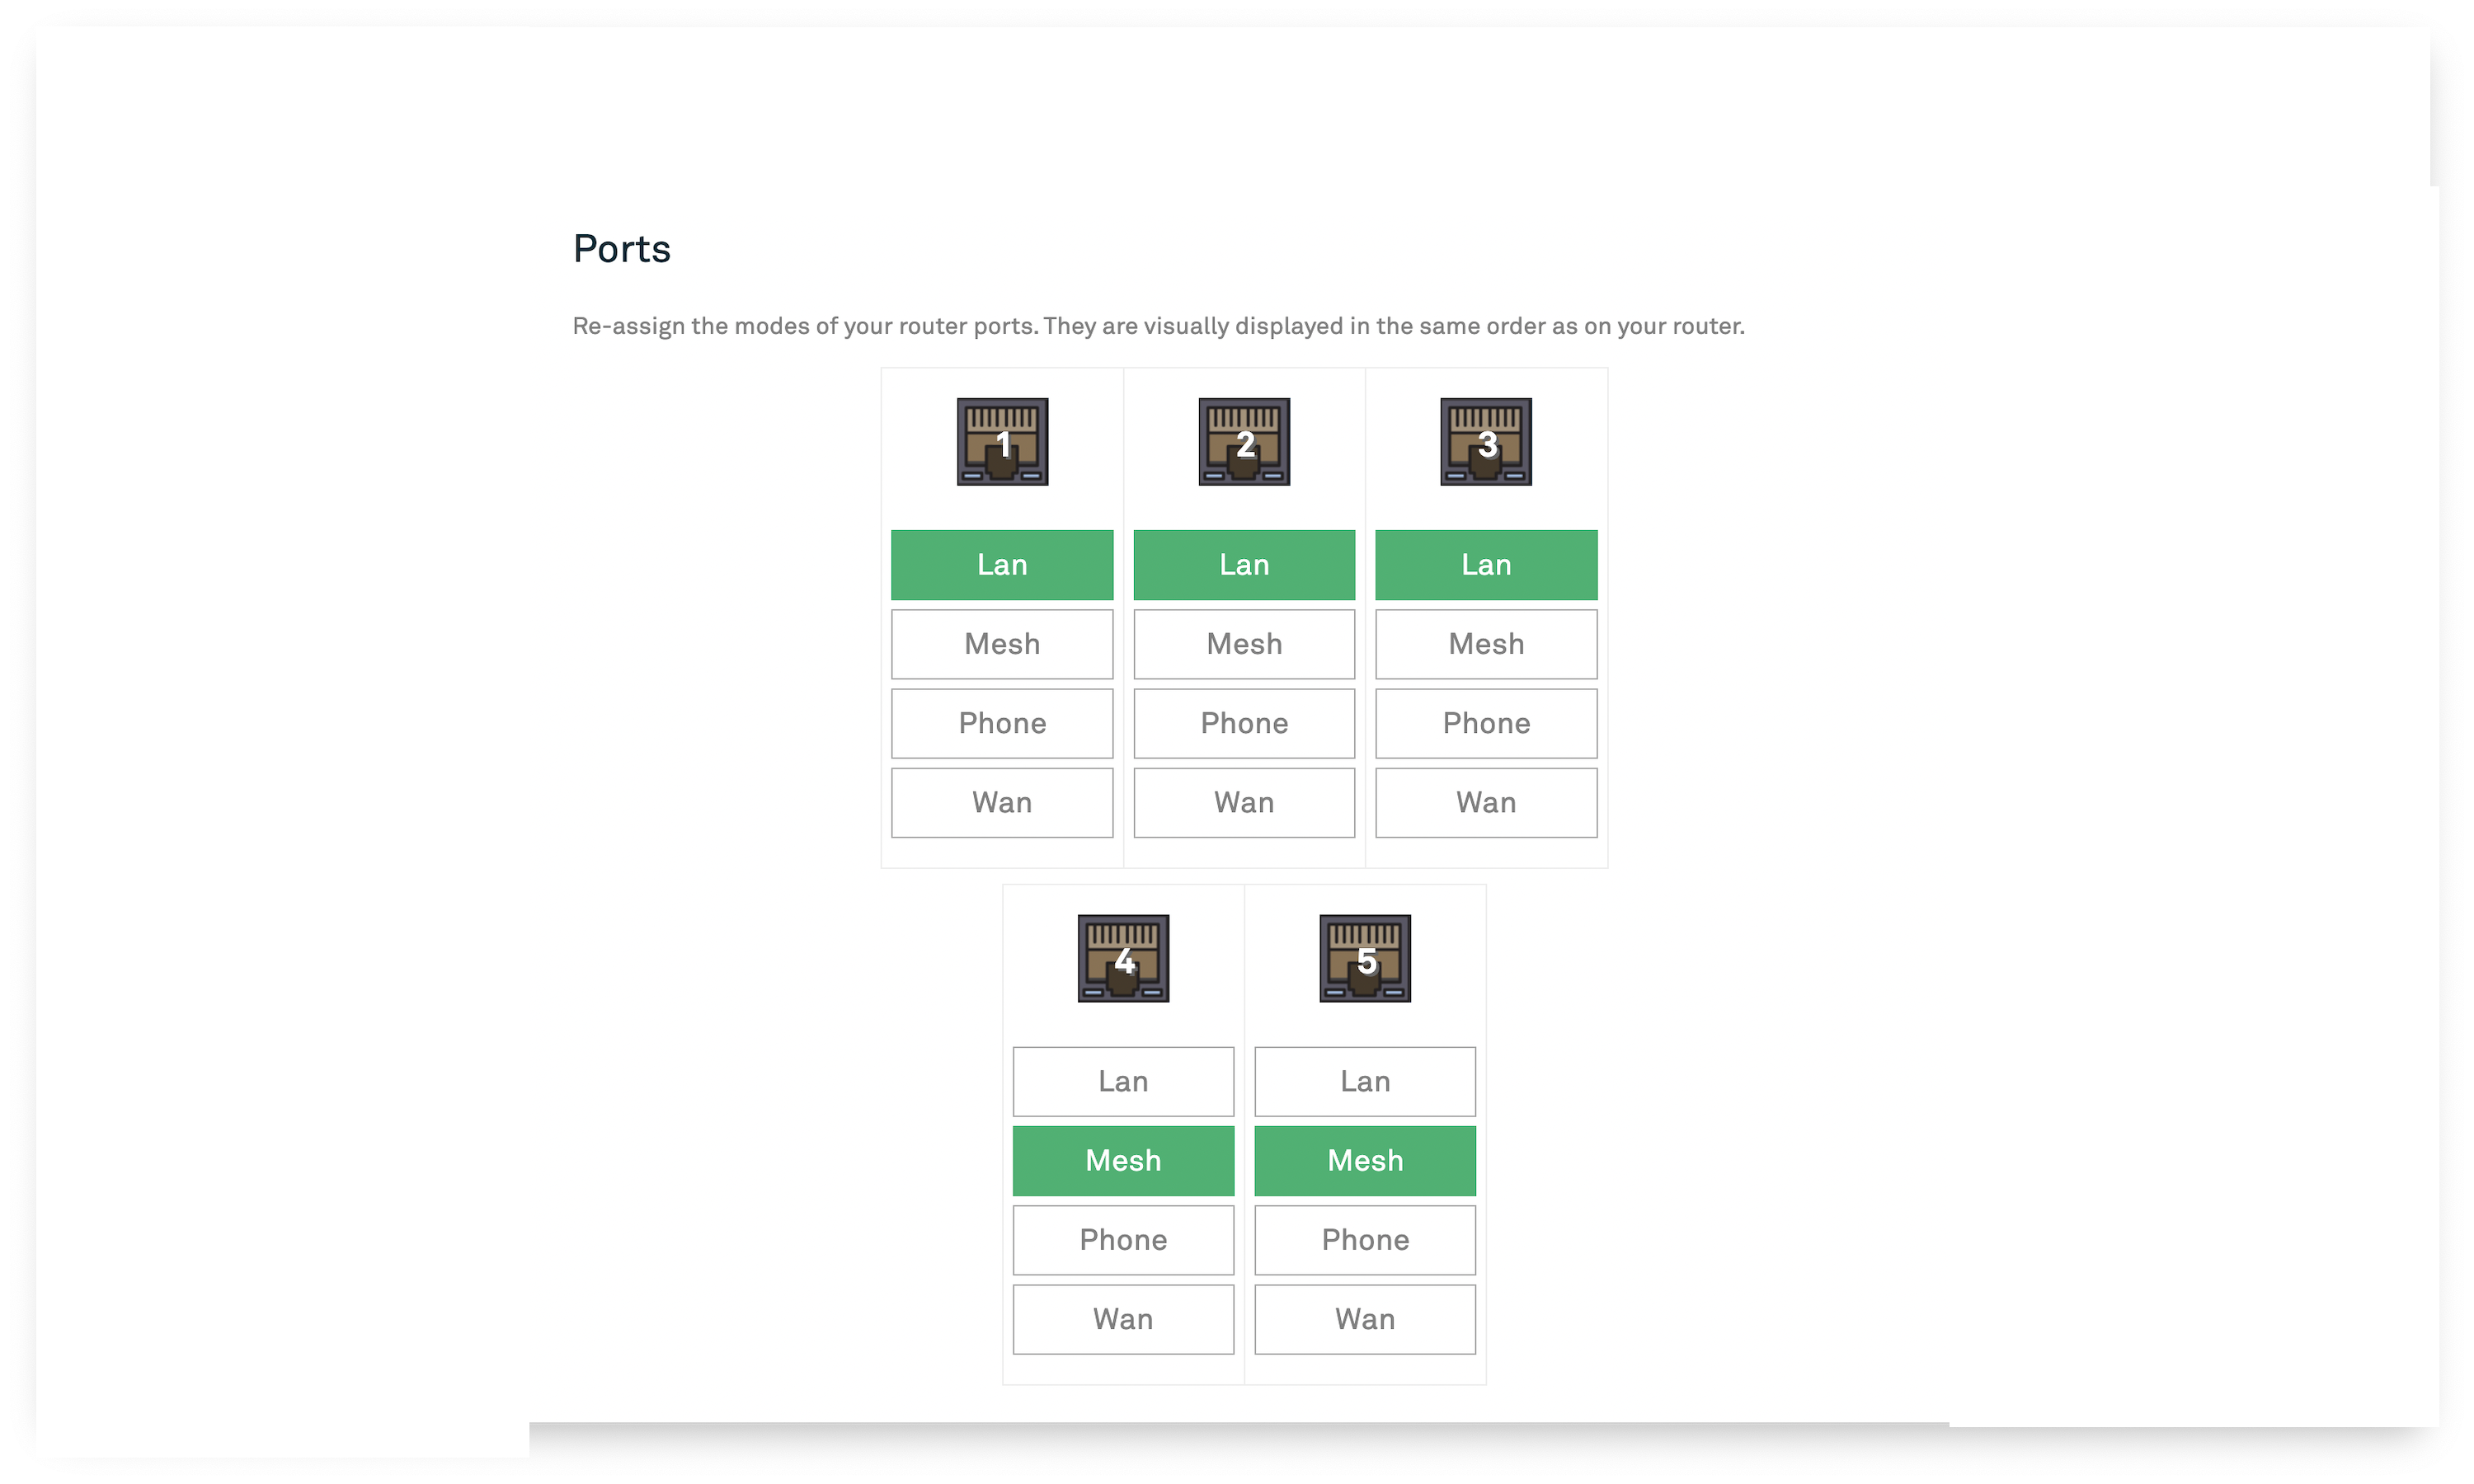
- Scroll down on the Wi-Fi and Ports page to the Ports section. Configure your ports to match the settings below, with the 4th and 5th ports set to Mesh. Any changes made to this section will cause the router to restart which may take a few minutes.
Setting up your Endpoint Router
- Unpack your Endpoint router and assemble according to its instructions.
- Connect the router to a power source. Indicator lights on the front panel should begin to light up and ultimately settle with a solid light for the power indicator. If no indicator lights appear, double check the device is turned on (power switch in the back flipped towards the line).
- Next, connect to the device’s Wi-Fi, which should appear as “AltheaHome-5” and “AltheaHome-2.4”. You may choose either and use the default password, “ChangeMe”.
- In a private or incognito browser navigate to 192.168.10.1 to view the Althea Dashboard.
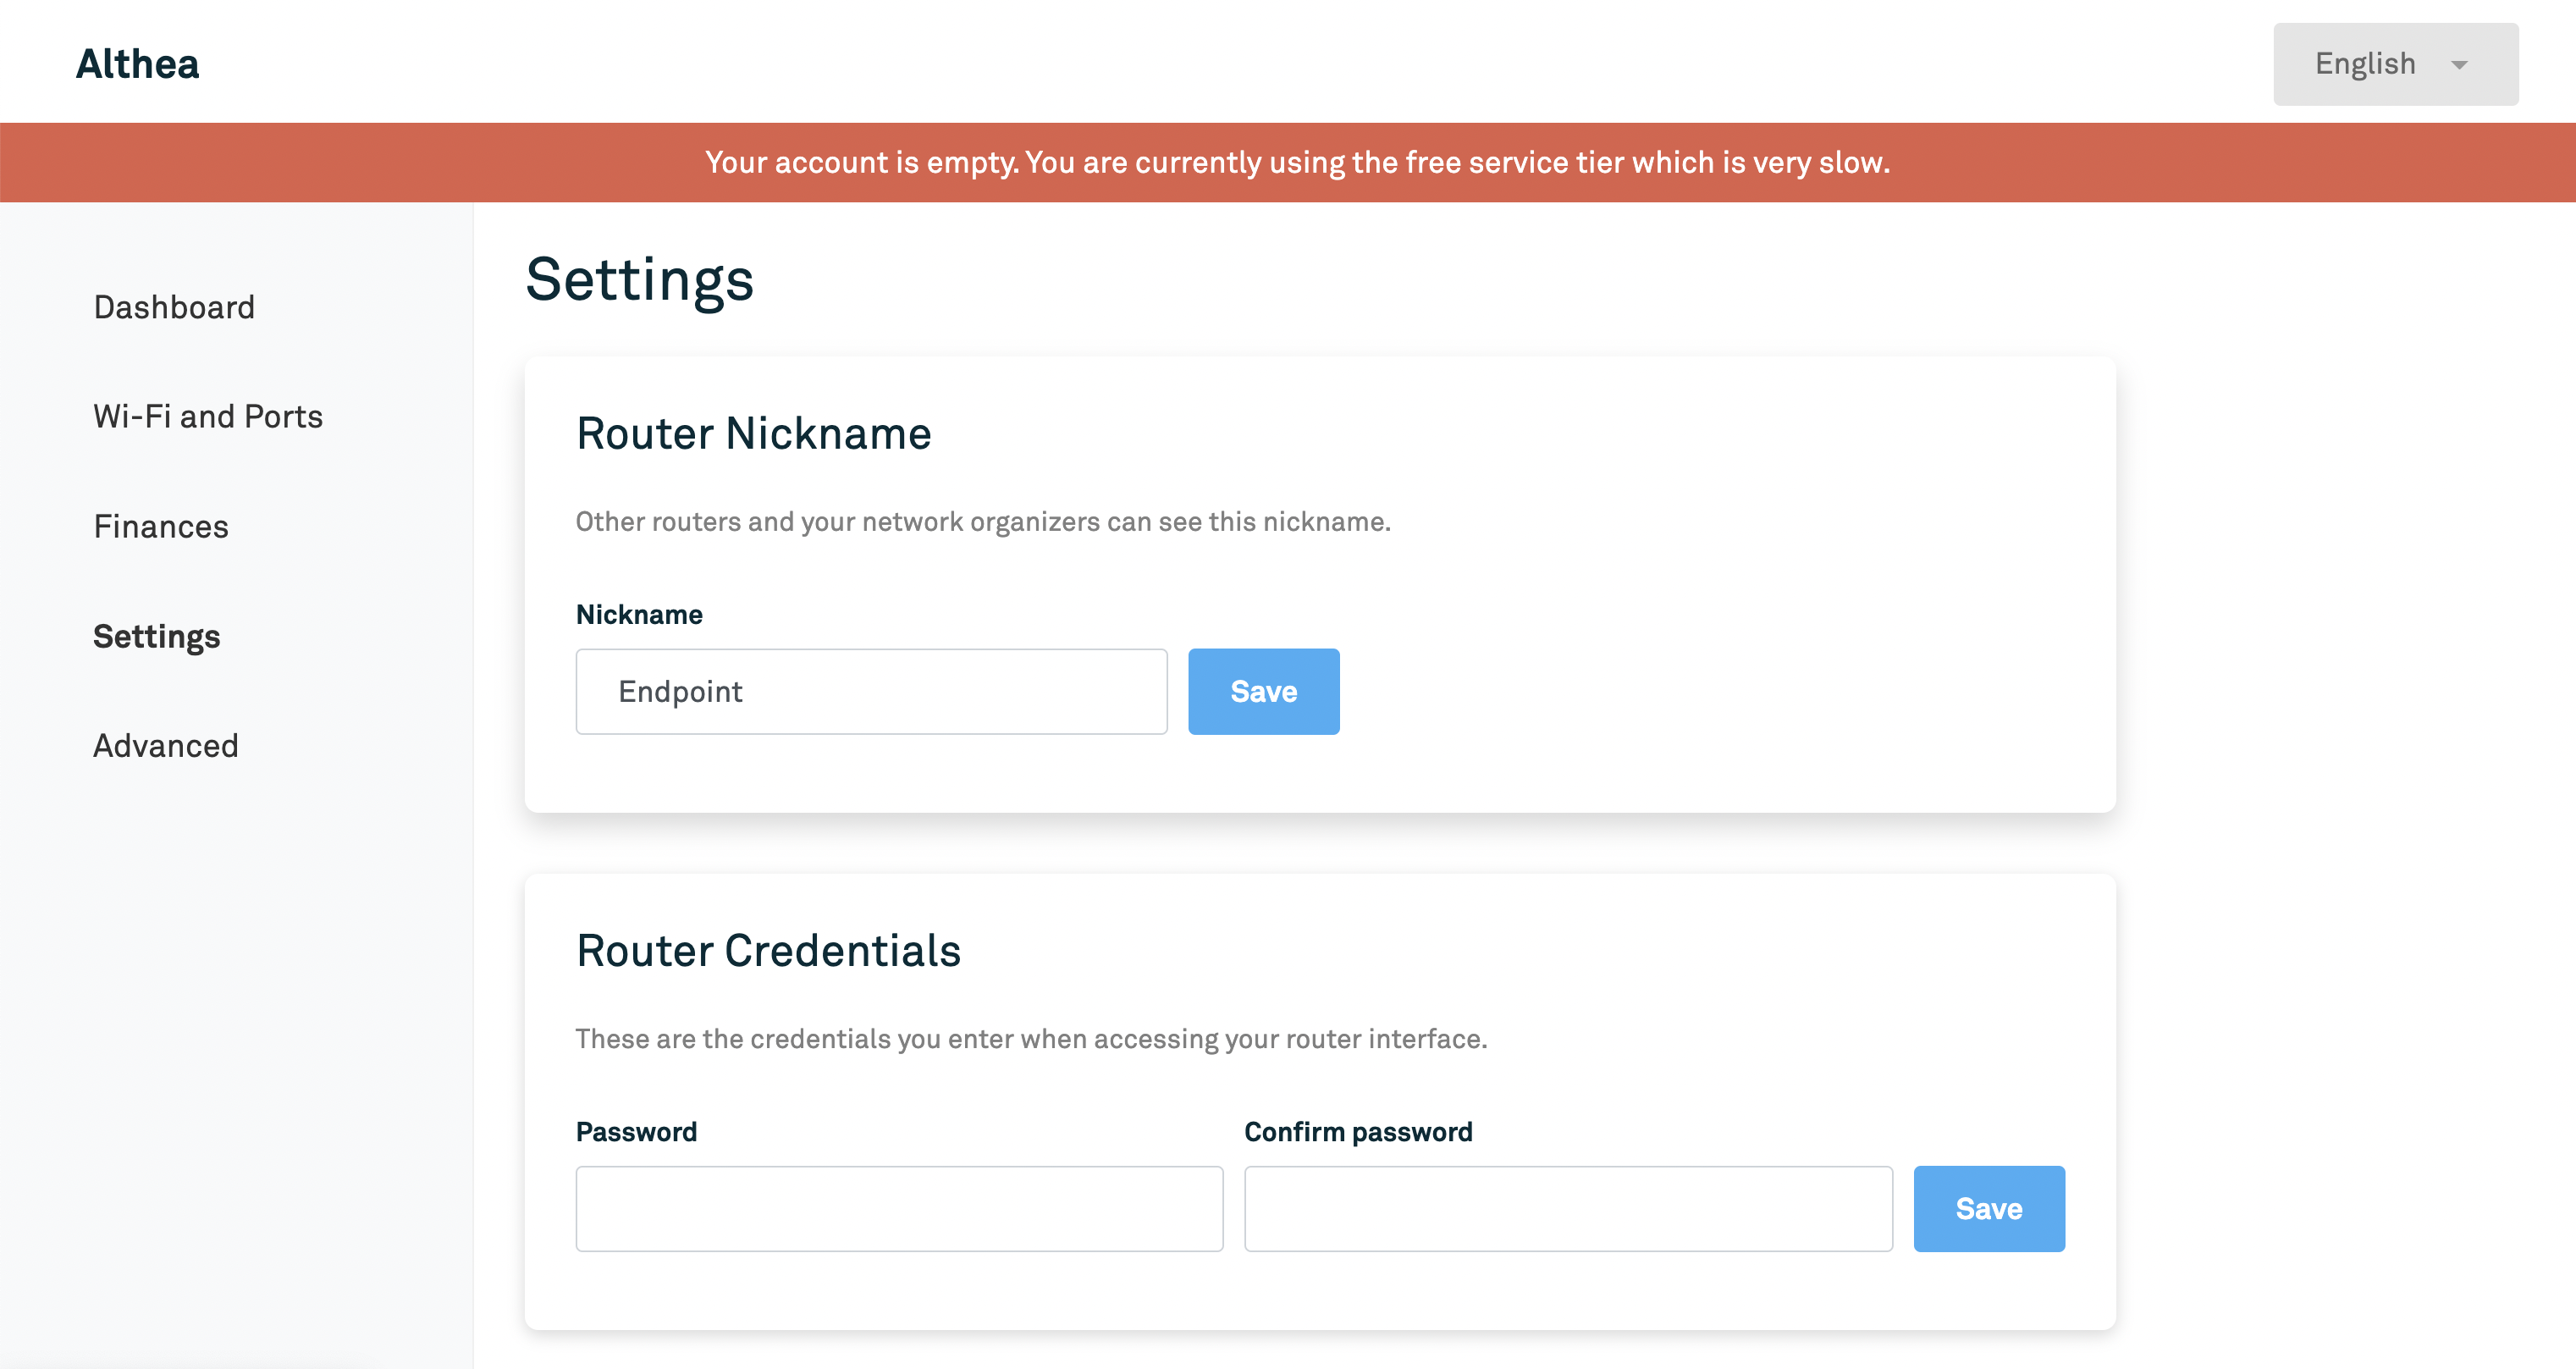
- Next, navigate to the settings page and change the router nickname to Endpoint.
- You may change the name of the Wi-Fi to include “Endpoint”, but this is not strictly necessary as the other two router SSIDs have been changed. Since this router would be used by an end user for personal internet, I maintained “AltheaHome” as the Network Nickname.
- Scroll down on the Wi-Fi and Ports page to the Ports section. Configure your ports to match the settings below, with the 5th port set to Mesh. Any changes made to this section will cause the router to restart which may take a couple of minutes.
Connecting the Network
Now that each router has been properly set up, a wired connection can be made to emulate the Gateway, Relay, Endpoint router connection you can deploy in your own network.
- First connect your Gateway router to the Relay router by plugging one end of an ethernet cable into Port 4 of the Gateway router and the other end into Port 5 of the Relay router.
- The Relay router should now be broadcasting Wi-Fi. Confirm this by connecting to the Relay router’s Wi-Fi and pulling up a new browser page. Consider running a speed test, such as fast.com.
- Next, connect the Relay router to the Endpoint router with another ethernet cable. One end should connect to port 4 on the Relay router. The other end should be plugged into port 5 of the Endpoint router.
- The Endpoint router should now be broadcasting Wi-Fi! Confirm by connecting to the Endpoint router’s Wi-Fi and pulling up a new browser page or running a speed test.