Getting started with your Relay Router
This guide provides an overview for getting your relay router online, starting after the firmware has been installed. If you have purchased a router from Althea directly, the firmware comes preinstalled. If you have purchased your own relay router, please consult the flashing guide to first install the required firmware.
Accessing the Althea Router Dashboard
To set up your new router to function as a relay in your network, you will first need to connect to the device and pull up the Althea Router Dashboard. This may be done with a wired or a wireless connection.
Wireless Connection
To wirelessly connect to the device’s management wifi, find the default WiFi name, AltheaHome-2.4 or AltheaHome-5, in your list of available networks. The password to connect to this Wi-Fi is “ChangeMe”.
Wired Connection
For a wired connection, you will need to plug one end of an ethernet cable into the LAN port of your router and the other into your computer. By default Althea locates the LAN port as the port physically furthest from the marked WAN port on the device. This is usually a different color or uses a globe symbol. If there is no marked WAN port the LAN port is the highest numbered port and the WAN port is the lowest.
Access Althea Router Dashboard
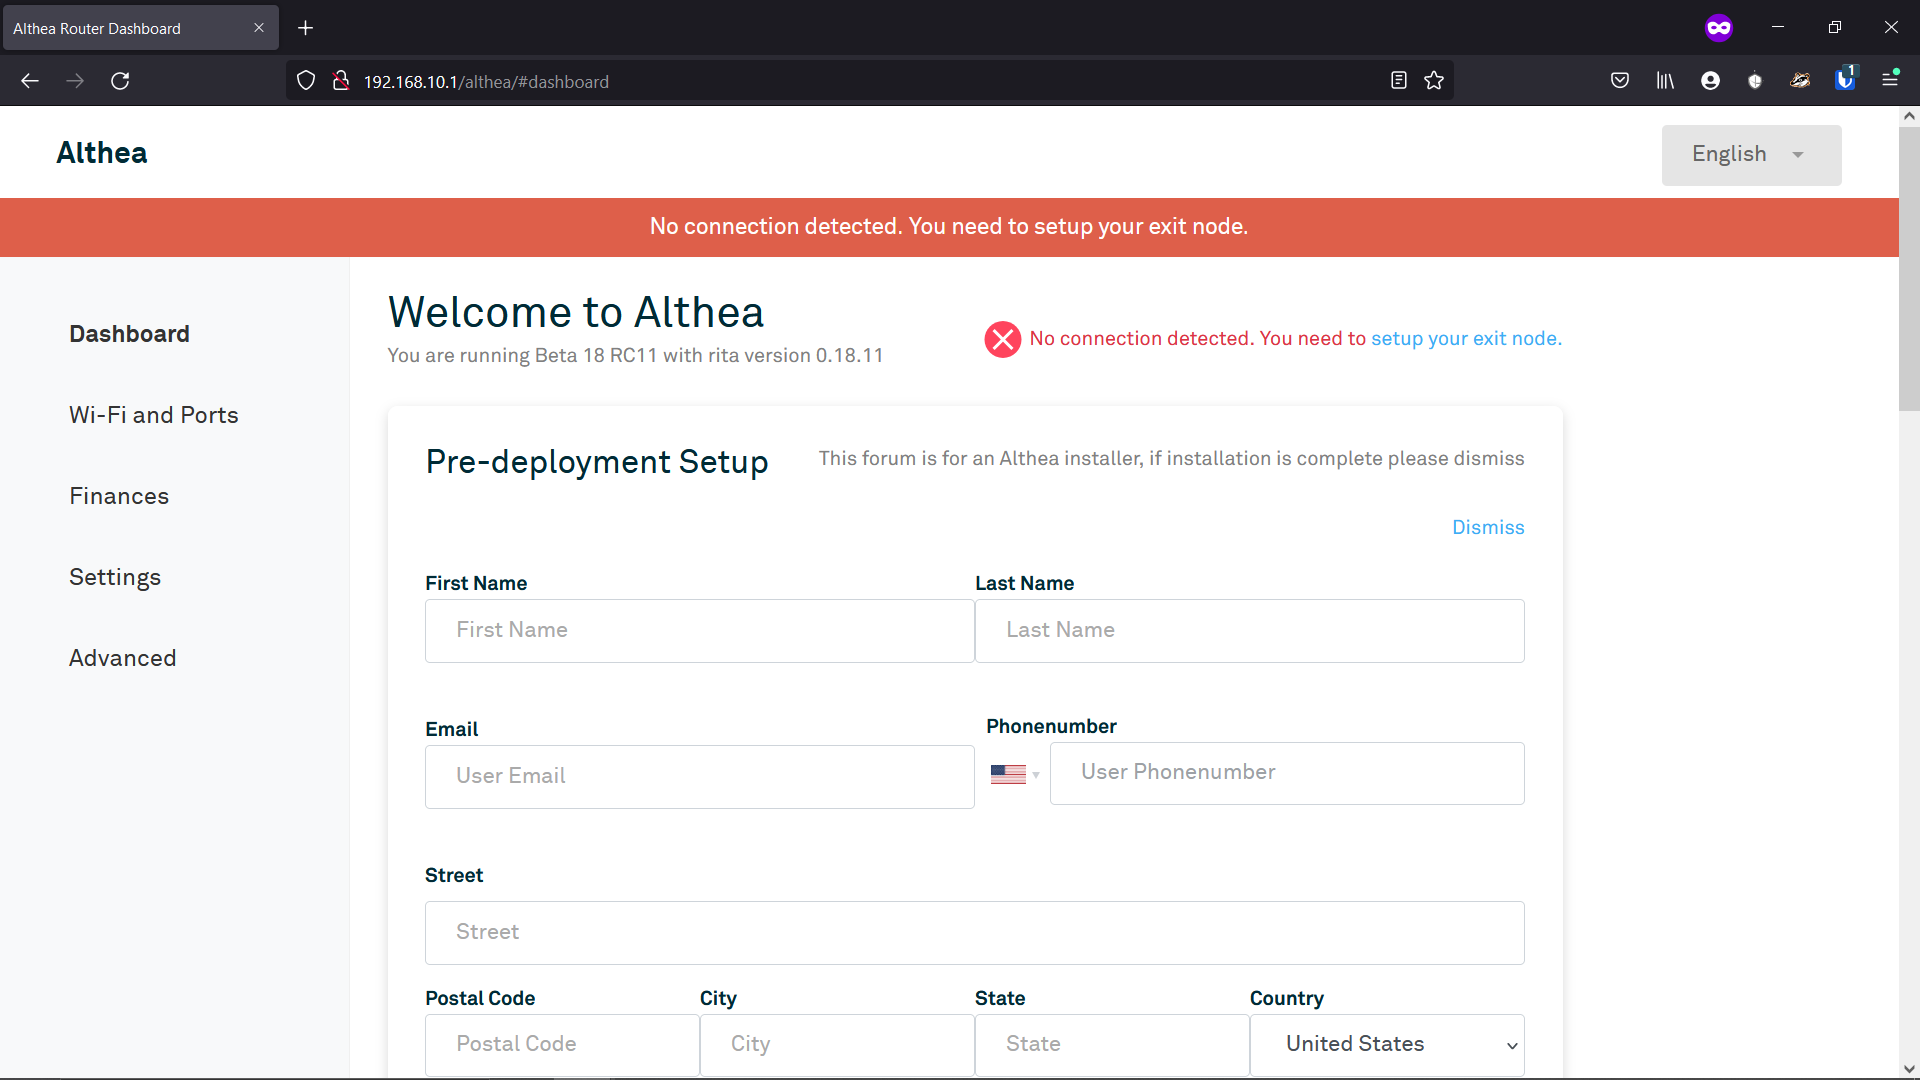
Once your device is connected to the router, navigate to http://192.168.10.1/althea from a web browser. We strongly recommend using a private browser or incognito window to prevent any issues while setting up your router. Below is what you will see when you first pull up this page.
Update Default Settings
Since your relay router is not the only router on your network, it is important to properly name the device so you may easily distinguish it from others.
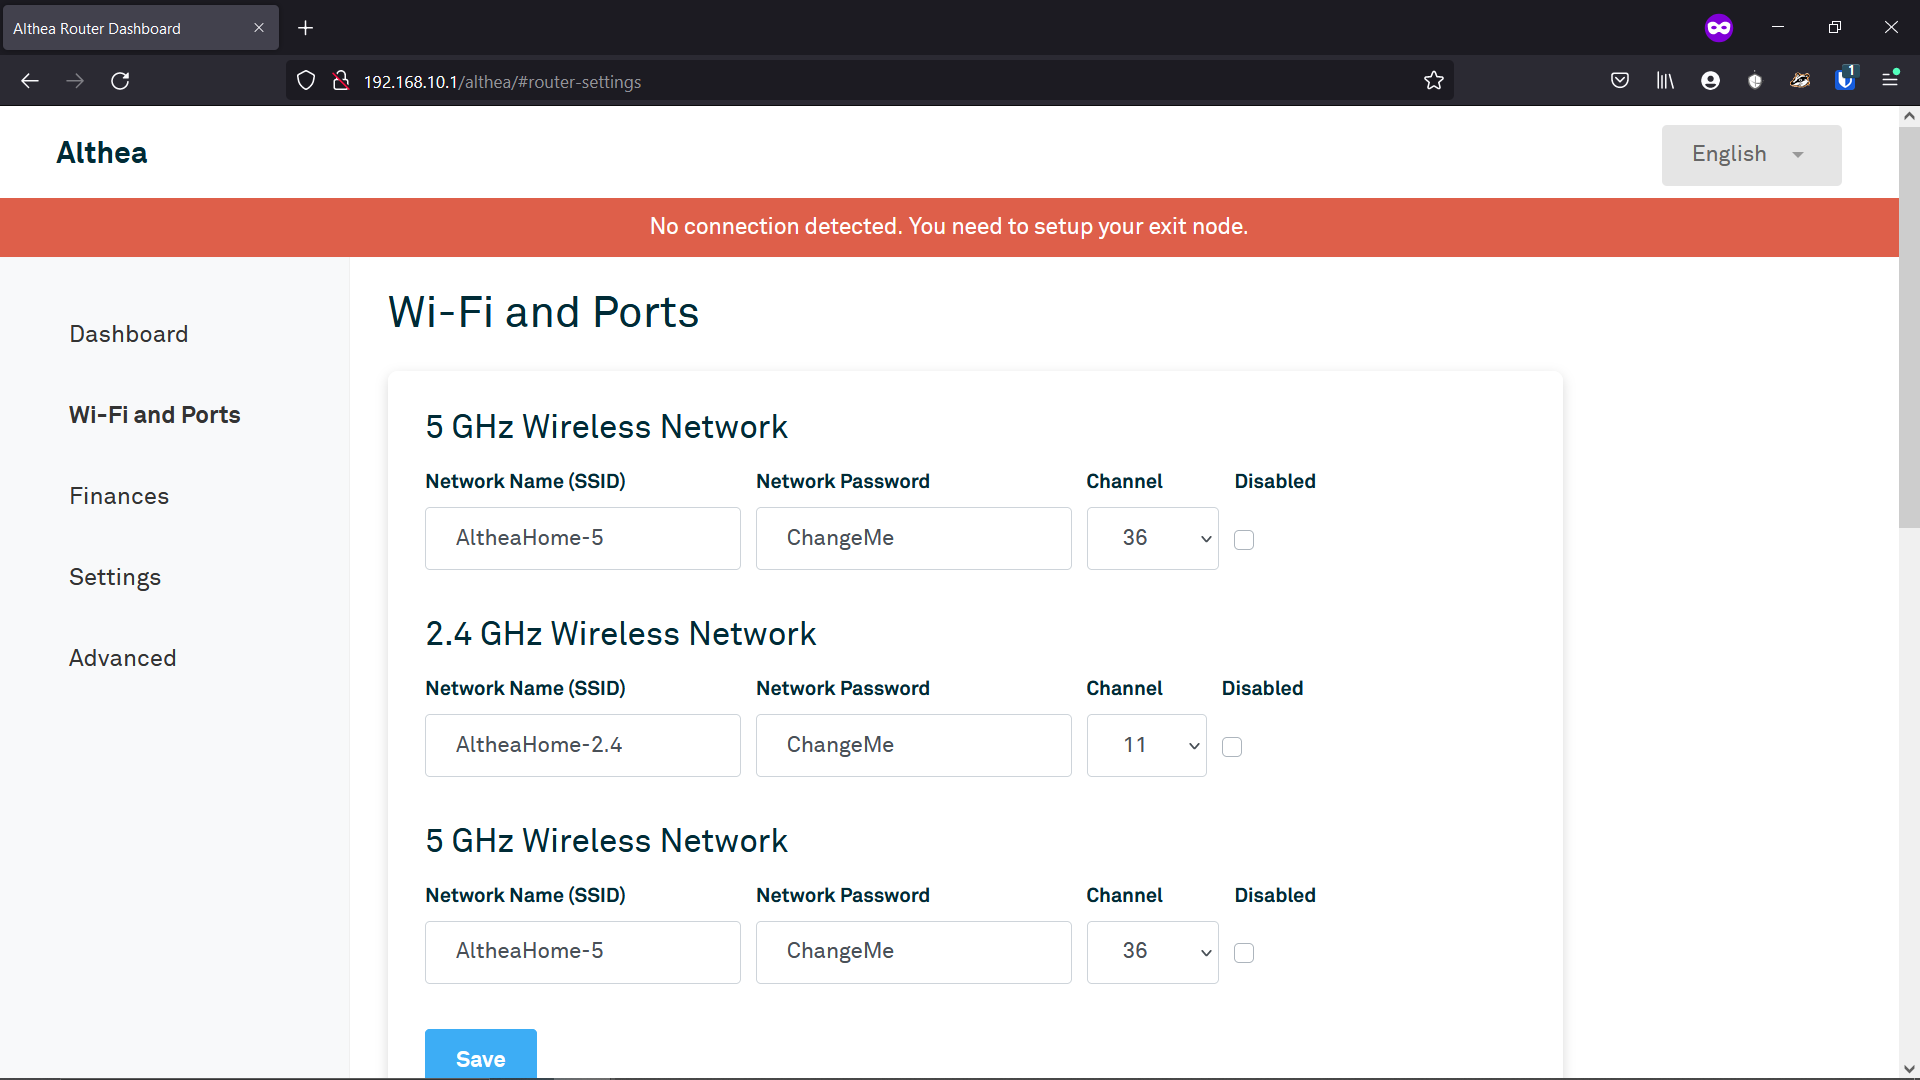
Update Wi-Fi Name and Password
- Navigate to the Wi-Fi and Ports page of the Althea Router Dashboard.
- Under Wi-Fi, change the Wi-Fi name / SSID. We suggest using AltheaRelay or AltheaRelay1 in lieu of AltheaHome for the SSID.
- Next, update your password. Any password may be used, but be sure to make a note of it as the router will need to be reset if this information is lost.
Note: changing these details will cause the router to reboot. You will need the new SSID and password to log back onto the Wi-Fi if you are using a wireless connection.
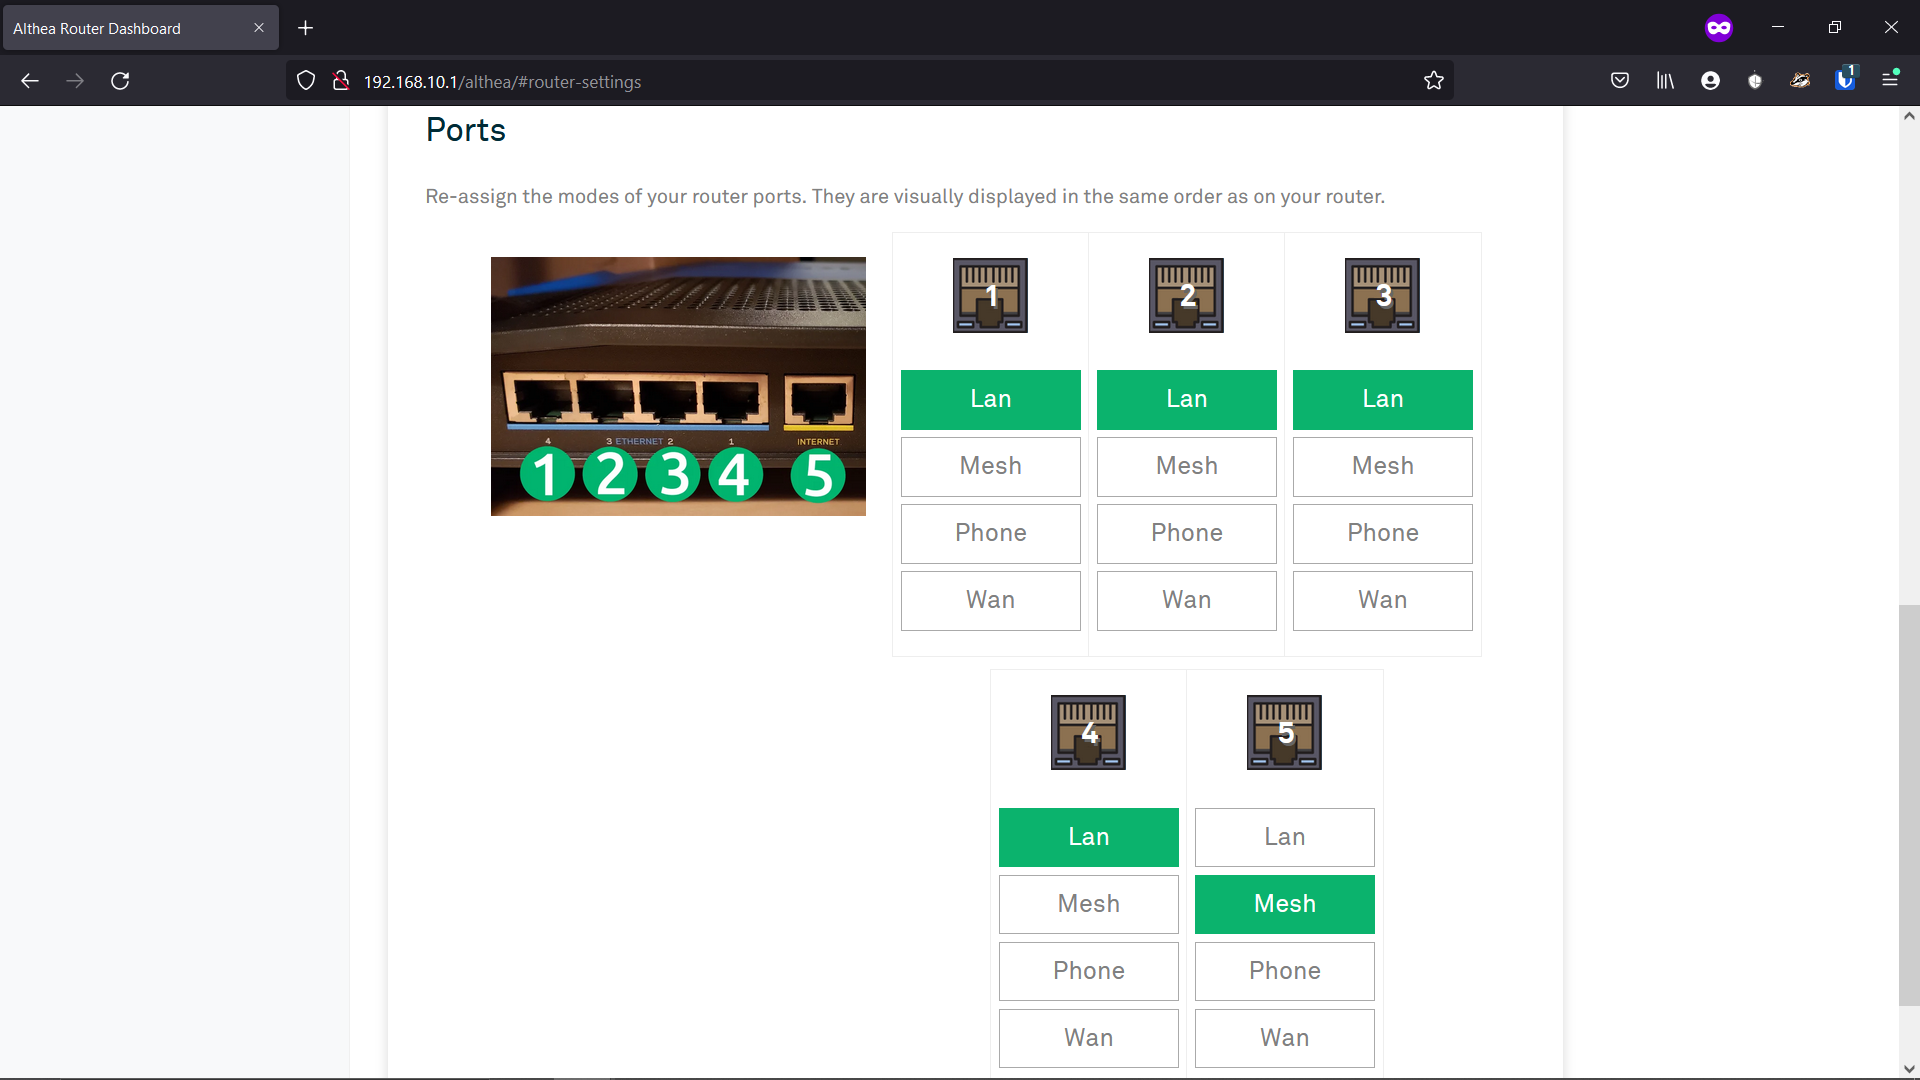
Update Port Modes
Next you will need to update your router ports in order for it to function as a relay router. By default, ports are set for an end user router, with four set to LAN and one set to Mesh mode. You will need one Mesh port for every radio you intend to connect to your relay router.
If you are only connecting your relay router to one radio, these settings may remain unchanged. If you are using multiple radios, start by changing the port closest to the existing Mesh port and working your way towards port 1.
Update Router Nickname
Next navigate to the Settings Page and update the router nickname. Again, we recommend using “Relay” in the nickname so it may be easily identified amongst other routers in your network.
Connect to an Exit Node
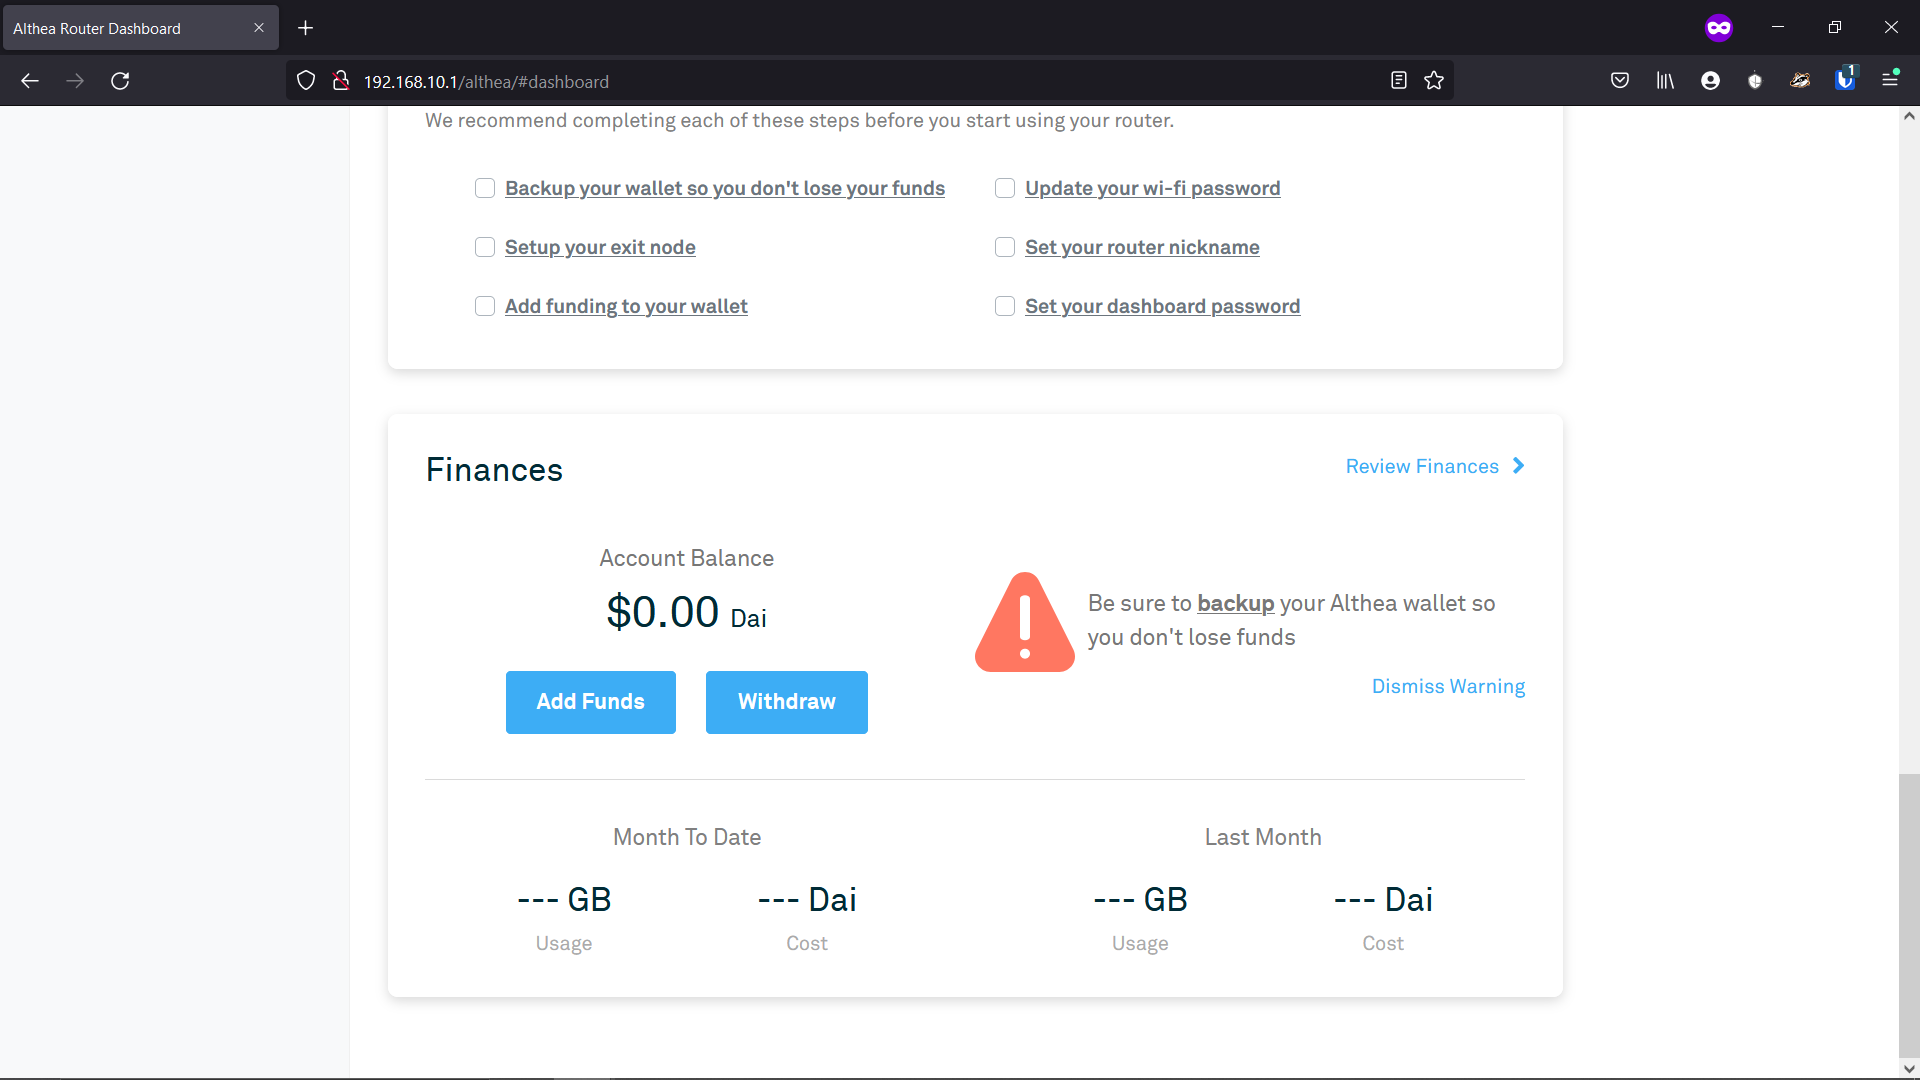
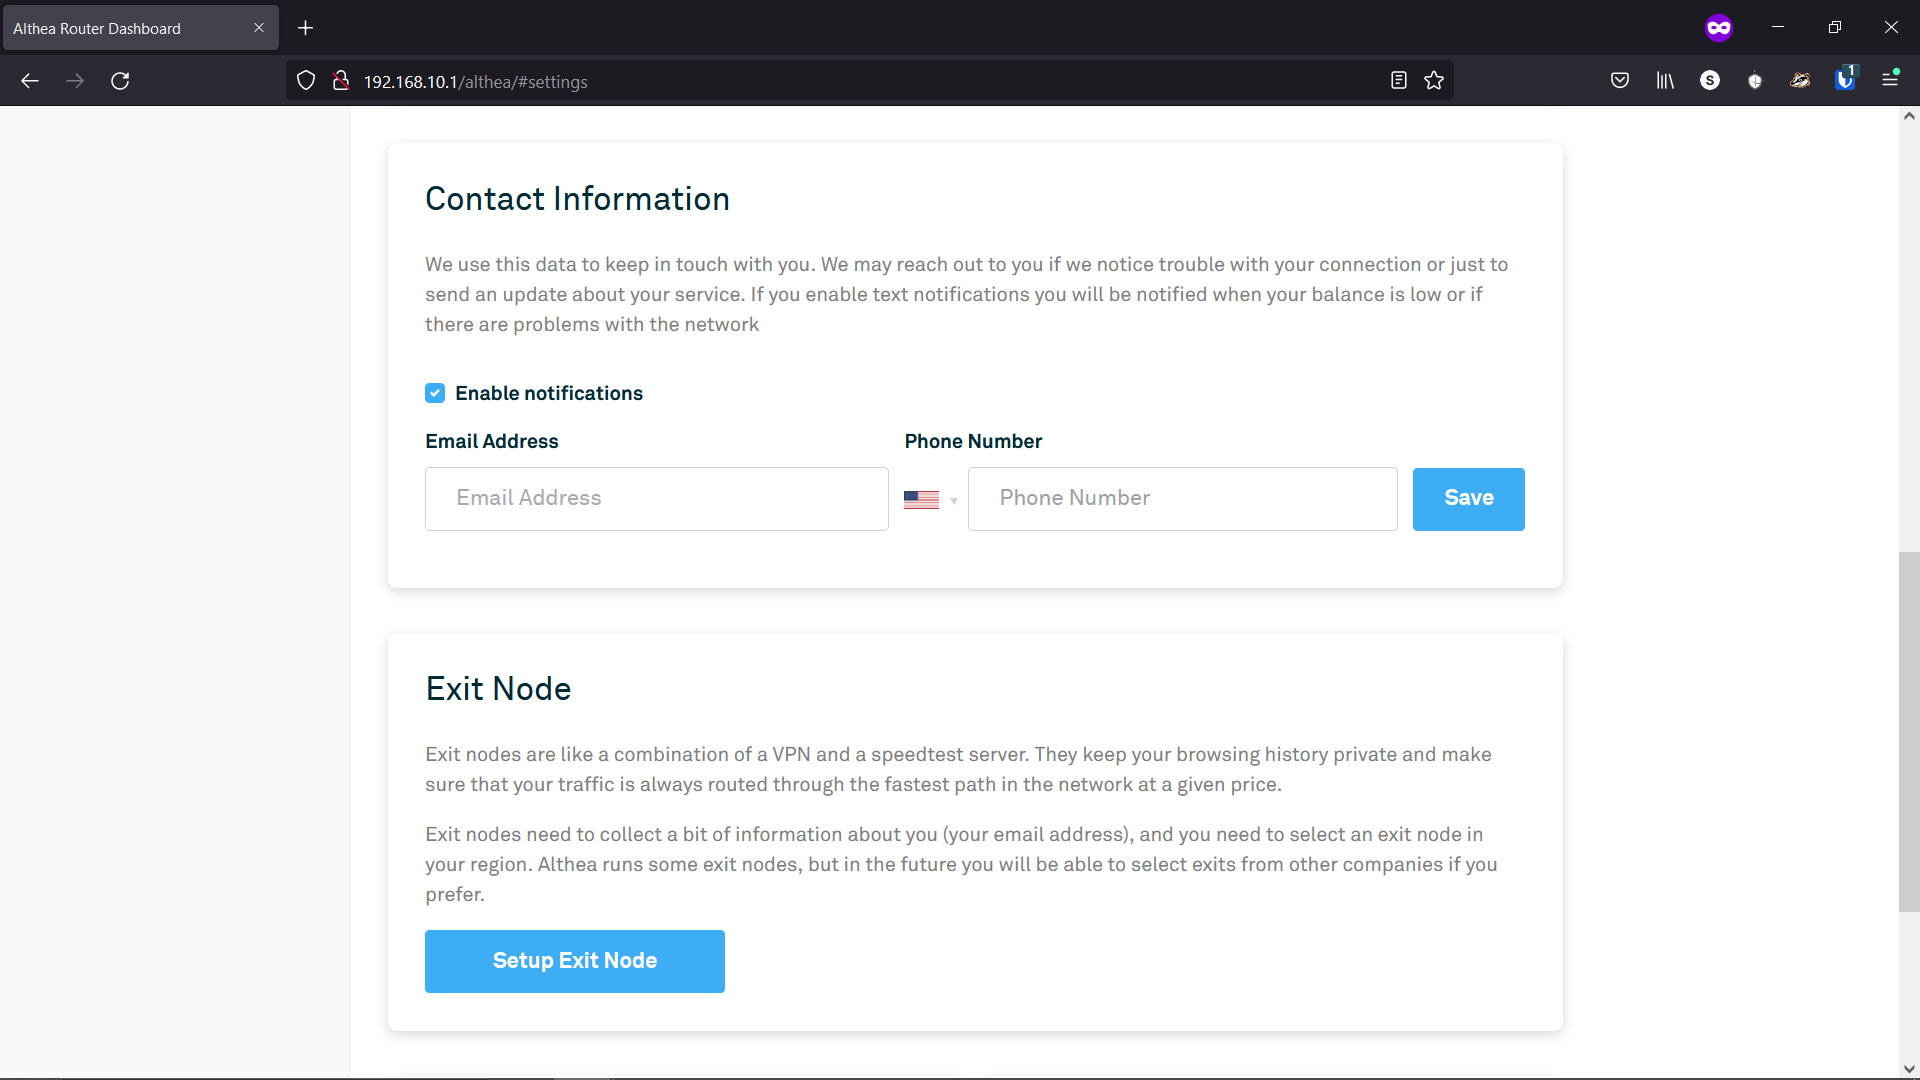
- By now you have probably noticed a warning banner on your Althea Router Dashboard stating, “No connection detected. You need to set up your exit node.” To do this, navigate to the Network Connection page. Scroll down until you find the “Exit Node” section of this page.
- Click “Setup Exit Node”. The pop-up below will appear.
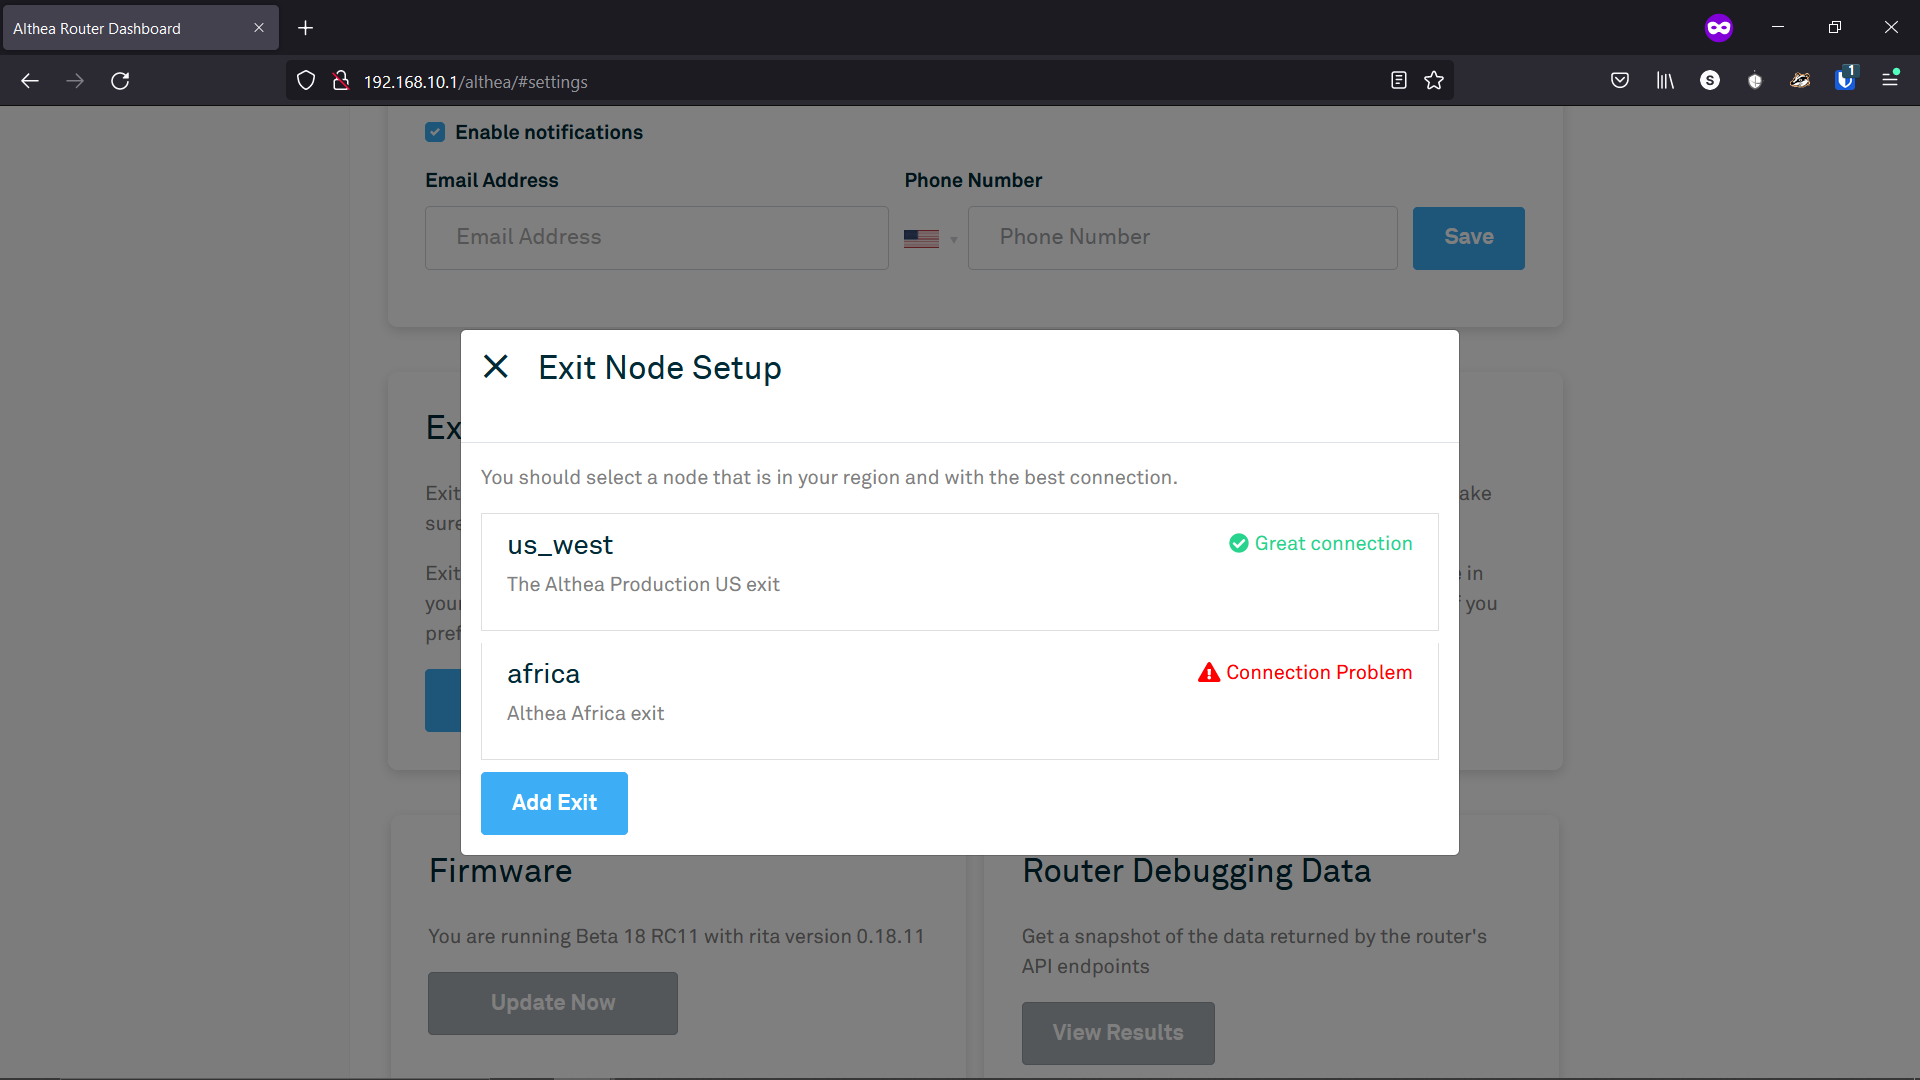
- An exit in Althea is a service that helps protect your privacy and safely deliver traffic to the outside world. It’s important that you choose an exit that you trust. For users in the United States we suggest “US West” an exit operated by the Althea development team. Click on the exit you wish to sign up for.
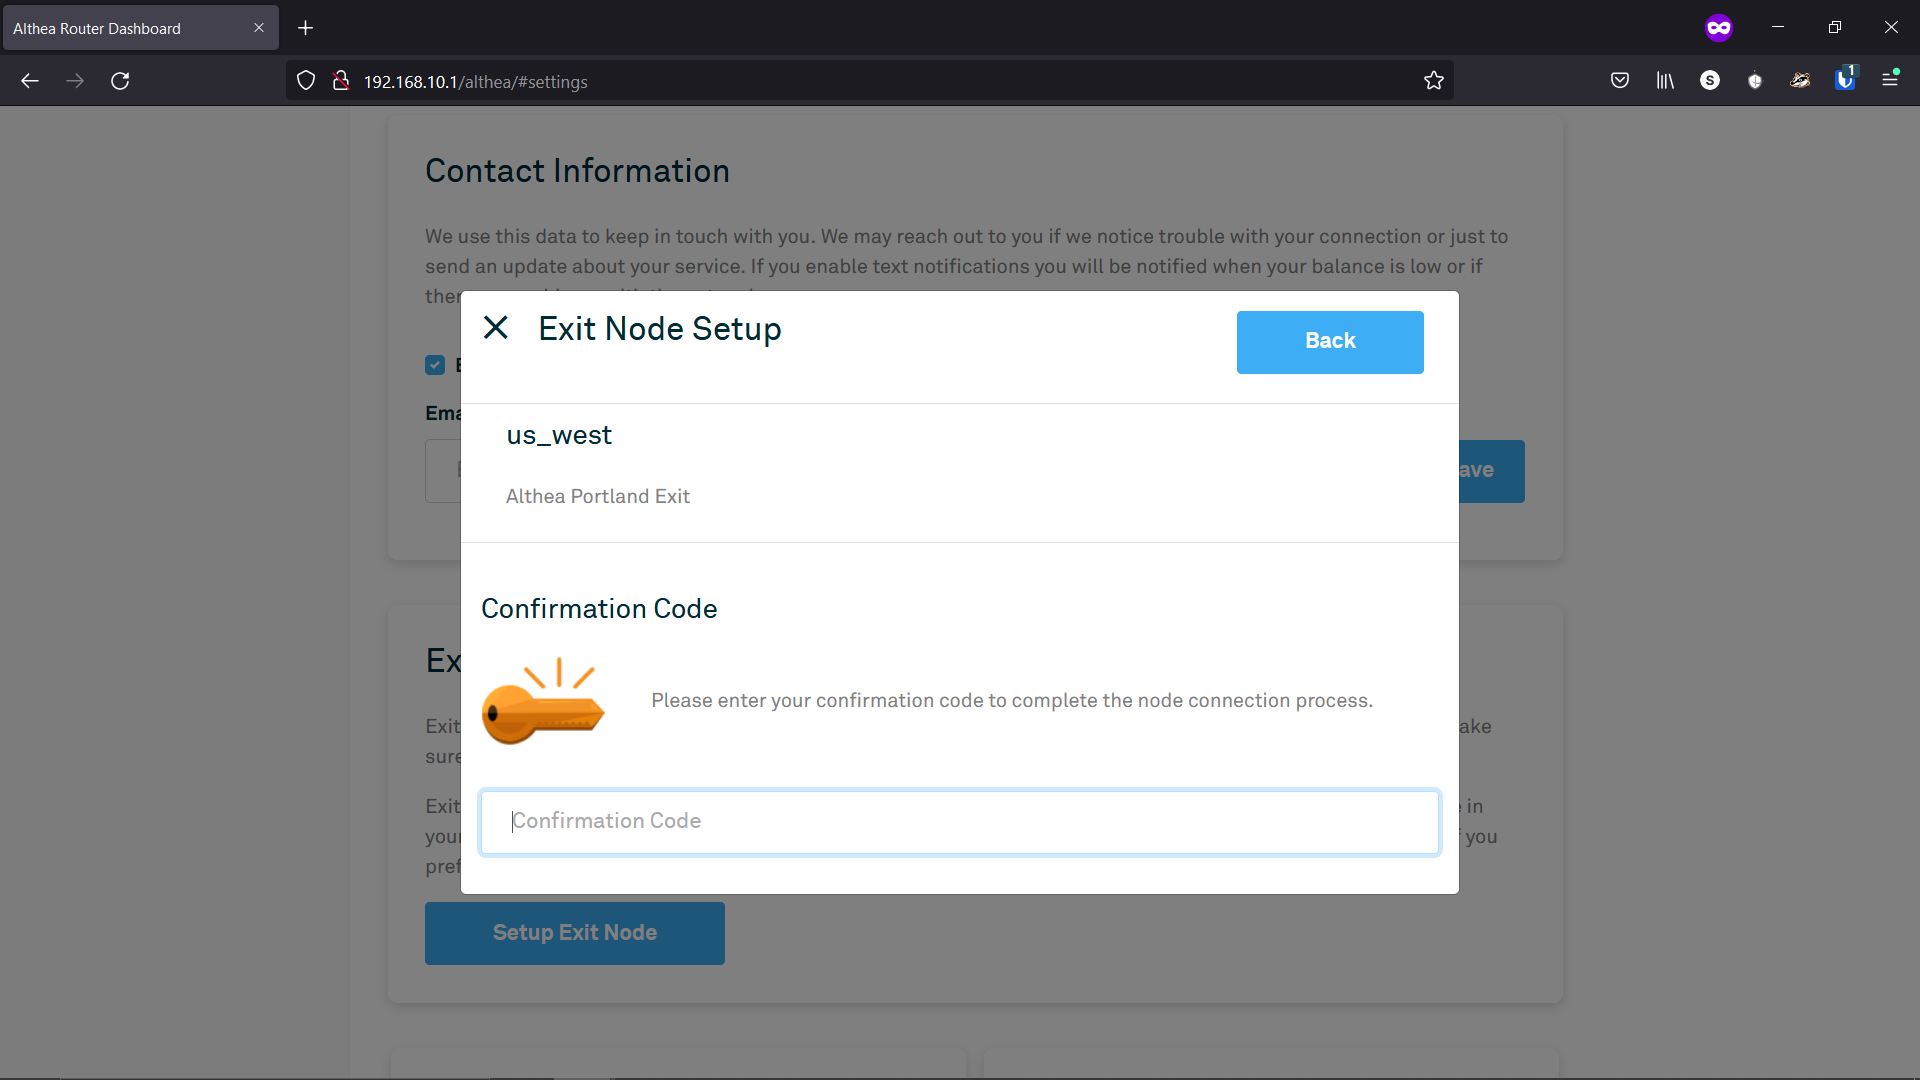
- You will now be asked for a sign-up phone number or email address. This is used as an anti-spam measure and to make sure that we can keep access to specific services like Netflix. It will only be used to notify you of exit information and will not be shared. If you are opposed to this you can use an exit server that does not require an email. It may take a second for the email or text to send.

- Next you will receive a 6 digit code via text message or email. Enter it and press submit.
- Congratulations you have selected an Exit server! This will protect your personal information from local infrastructure providers. It may take a few seconds for the new exit connection to turn green.