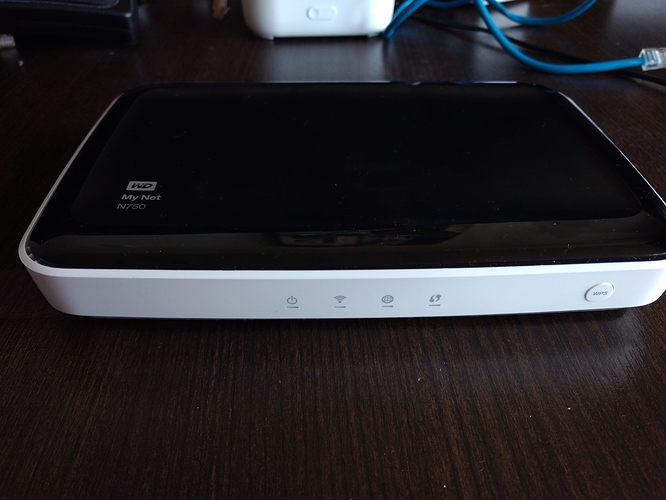
WD MyNet N750
What you need
- One Ethernet Cable
- A computer running Windows, Mac, or Linux with at least one Ethernet port
- A WD MyNet N750 router, for sale here 15
- An Althea firmware image for the n750 click the download button under the correct picture on this page
How to
-
Download the firmware image from step 4 described above. Save it somewhere you will be able to find it later.
-
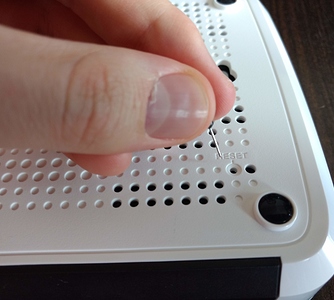
Start with the router free of all plugs and attachments, note the recessed reset button in the corner on the bottom of the router.
- Make sure the power button on the back of the router is depressed. So that it comes on when plugged in.

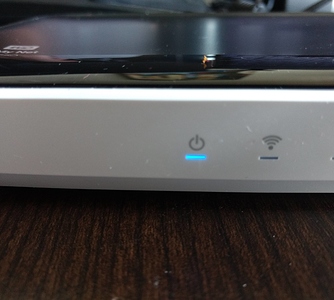
- Plug in the router, holding the reset button using a paperclip or other tool. The button is somewhat difficult to press but makes a very solid “click” when you do it right. Hold the reset button until the power light on the front begins to blink slowly.
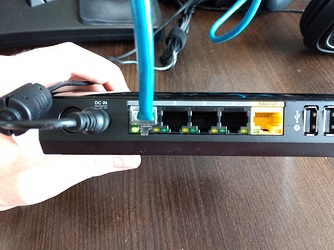
- Plug in the Ethernet cable into the router’s LAN port. Which is the leftmost with the ports facing at you (as pictured).
-
Plug the other end of the same cable into your computer.
-
You must now assign your computer the static ip 192.168.1.2 in a /24 subnet.
-
On Windows follow these instructions 16. For the box in step 5 type 192.168.1.2 in the IP Address box not 192.168.10.1 as shown in the image. A subnet mask of 255.255.255.0 is correct and the value of the other fields does not matter for this exercise.
-
On Mac follow these instructions 4. Fill in 192.168.1.2 in the IPv4 Address box, not 10.1.0.99 like in the picture. A subnet mask of 255.255.255.0 is correct, after step 6 stop and press ok.
-
On Linux open a terminal and type
sudo ip addr add 192.168.1.2/24 dev eth0 -
Enter your password as prompted. If the command runs with no output it was successful! Go onto the next step.
If you get the message
Cannot find device "eth0"
You are probably using Fedora, Centos, or have more than one network port run the command ip a to find the correct name instead of eth0. You are looking for a line like this.
2: enp0s31f6: <BROADCAST,MULTICAST,UP,LOWER_UP> mtu 1500 qdisc fq_codel state UP group default qlen 1000
Notice how the state UP indicates a port where something is plugged in. Here I would run
sudo ip addr add 192.168.1.2/24 dev enp0s31f6
- With that out of the way visit 192.168.1.1 in your web browser. It should look like this.

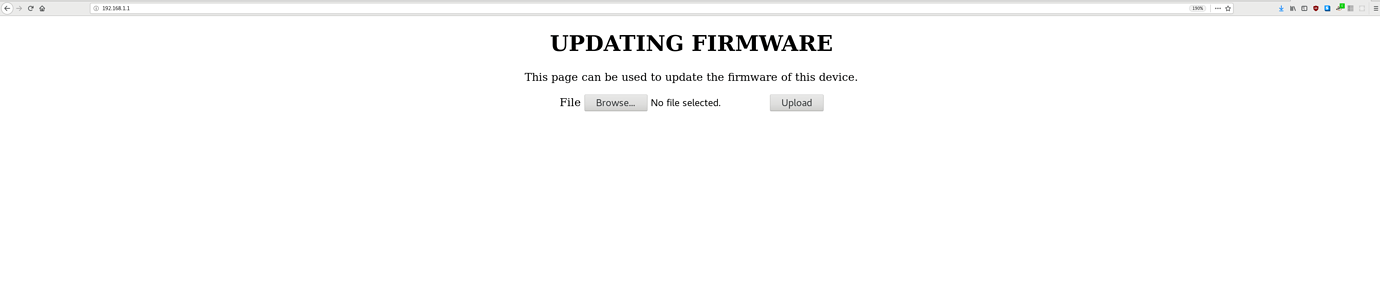
- Press the “browse” button and select the firmware you downloaded in step 1. Then press “upload.” You will be forwarded to a page that looks like this. The power light on the router will go from solid to off, to blinking, then back to solid. This whole process takes a little bit more than the given amount of time on the display.
- If you have another router, to flash return to step 2. If this is all you will be flashing it’s time to undo the static IP assignment. Linux users can skip this step.
-
On Windows follow these instructions 16. For the box in step 5 select “Obtain an ip address automatically” then click ok.
-
On Mac follow these instructions 4. Stop at the box in step two, select “Using DHCP” from the dropdown menu labeled “Configure IPv4” then it “apply.”
-
Your router is now flashed, only the leftmost light should now be on. Unplug the LAN port, wait 10 seconds and plug it back in.
-
After flashing the location of the LAN port changes, double check that you are plugged into the port labeled “1” furthest away from the yellow WAN port.
-
Navigate to 192.168.10.1/althea which is the Althea router dashboard.
-
Congratulations! You’re done! Now you can setup your Althea router and and make links into the network 1